Saturday, December 30, 2017

Jane DT - Funky Flowers Art Journaling

Hello!

I hope you had a fantastic Christmas however you may have celebrated and we have now almost made it to the start of a brand new year.

For my blog post today on Buzzy Goings on at Bee Crafty I thought I would do a bit more art journaling using lots of layers with Bee Crafty products. 
For these pages I had a clear idea of what I wanted to create which was some funky looking flowers, but as I didn't have any stamps to do this I decided to use the style wire circles to help me...


I started by preparing both the pages of my journal with white gesso, then used my brayer to apply layers of acrylic paint (yellow, teal and magenta) making sure each layer dried before adding the next.  I then dry brushed on some more white gesso to tone the colours together...


The next layer to be added was background stamping.  I used archival inks as these are ideal over the acrylic paint and used colours that matched in with the background.  I used the bubble wrap positive, distress diamonds and script XL until I was happy, they were not mounted onto a block as I wanted a patchy and distressed type of look.

After these had been given a quick dry with my heat tool I added the next layer which was stencilling.  I used the same paint colours from my background and stencilled on some blue using the metalwork alpha inkable and yellow with the regular dots d'inkable.  Then I used the circles d'inkable with white gesso in a diagonal pattern across the pages...


Once I was sure the gesso was dry I coloured some of the circles in using gelatos and then added white and black pen doodling...


At this point I felt that I needed a bit more black in the background as a contrast so used black archival ink with the retro dash and dots backdrops stamp.

To create my focal points I stamped all three sizes of the style wire circles onto white card using black archival ink and then cut them out.  To make them look like flower centres I used yellow and orange gelatos to colour them and then added some stencilling using the circles d'inkable again (one of my favourites!) and permanent marker pen...


Once I had placed and stuck them down I used a permanent black marker to draw in the stems and petals around each flower.  More doodling was then added with black and white pens before adding a few splatters with my white paint pen...


Finally I chose a sentiment that I thought would be good as a saying for 2018, I stamped it out then chose the parts I wanted to use and coloured them before sticking them down and adding some shadowing around the edges.

If you would like to see any of the products that I used here are the links...

* Style Wire Circle - Large
* Style Wire Circles - Small and Medium
* Distress Diamonds
* Script XL
* Retro Dash and Dots
* Bubble Wrap - Positive
* D'Inkables - Regular Dots
* D'Inkables - Circles
* Inkables - Metalwork Alpha

Thank you for taking the time to look at my post today, and I wish you all a very happy new year!

Jane xx


Friday, December 29, 2017

Emily DT - Christmas Gifts

Hi everyone, I have always said that I struggle with colouring in stamps. I am eager to learn to do it properly and was lucky enough to get some Spectrum Noir alcohol markers for Christmas.

I have had a go with them this week and although I have a very long way to go, I am happy with my first try!

I have turned one of my first attempts into a card so I hope you like it!

Here is the card I have made...


I stamped out the Peony beautanical stamp onto some white card in black Memento ink. I then coloured it in using my Spectrum Noir alcohol markers.


I cut it out and stuck it onto white card, then stamped a sentiment in black. I then mounted it onto black card then onto a card blank.


I hope you like it! I like the simplicity of just having the flower and the sentiment.


I hope Father Christmas brought you all the crafty goodies which were on your lists, and I also hope you all have a Happy New Year!

See you next week for my first blog of 2018.

Emily x


Thursday, December 28, 2017

Karen DT-ROCK

Hello everyone xx

How was your Christmas?  Hope you had a wonderful time with family and friends. I did, lots of eating was involved. ..lol

As it's Thursday I'm back showcasing the fabulous Bee Crafty  products. Today's make is using the fabulous music collection ... i LOVE them all lol and we had a lot of music and dancing over the festive period...lol

For this card I used the following :
Guitar stamp
WORDage stamp: ROCK
Backdrop: Stars stamp set
Mondrian Inkable
Distress Oxides : Twisted Citron, Wilted Violet
Versafine : Smokey Grey.  Black onyx


Ink through the Mondrian Inkable with Twisted Citron Distress Oxide,  then blend the Wilted Violet DO just around the outer edges of the template. Remove template
Stamp the Guitar in Black Onyx Versafine,  and the backdrop stars in Smokey Grey versafine
Stamp the Rock stamp in Smokey Grey versafine on a seperate piece of white card, cut out each word and adhere with foam pads, down the side of the card

I hope you enjoyed today's post and I'll be back next Thursday with another Bee Crafty make

Crafty hugs xx

Wednesday, December 27, 2017

Marleen DT - Fleur and Freddie

Hello dear bloggers
and Happy Christmas to those who celebrate it.

Its my turn to share a bit of inspiration today for
BeeCrafty.
I havent actually been crafting for a few weeks now as my mojo left with the christmas stress, so today Im gonna share a few cards I made with the Fleur and Freddie stamps back when the girls had them on Hochanda. Find these adorable stamps in the STORE with all the other amazing goodies.


For both cards I stamped strait onto white smooth cardstock and coloured with my water colour pencils. Matting and layering and voila.. Very simple cards and you could use any colouring mediums you feel comfortable with.

And that is it for today. Stay tunes to BeeCrafty though, the girls have some amazing stamps up their sleeves for the new year.
Thank you for popping by and for any comments left behind.
Dont forget to come visit me on FaceBook, Twitter, Instagram, Pinterest, Youtube or my FB page.
 Happy Crafting


Saturday, December 23, 2017

Jane DT - Something Seasonal!

Hello!

For my last post before Christmas on the Buzzy Goings at Bee Crafty Blog, I thought that I should definitely create something for the season. 
A few weeks back I created some ATC's using some of the Beautanicals and butterflies, so I decided to continue my set with two more on a similar theme but with a wintry look.  This time I also took photos of the different stages. 

This is how they looked once completed...


I used two greyboard ATC's for this project and after coating them with white gesso used my mini gelli plate and brayer to apply 3 layers of different tones of blue paint.  I put the paint on my mat first then used the brayer to add it lightly to the gelli plate, I was aiming for a patchy look and printed each colour one at a time starting with the lightest...


Next I used the circle d'inkable by placing it onto the gelli plate, brayering one of the darker shades of blue over the top then removing the stencil and placing the ATC onto the plate to pull off a print...


After that was dry (a quick blast with a heat tool was enough) I used the regular dots d'inkable in the same way, but this time with white gesso...


To create the next layer I wanted to add some stamping.  As I had already used acrylic paint I needed a permanent ink so I used a blue staz on ink pad with one of the snowflake stamps...


To create a really contrasting silhouette I then stamped one of the wildflowers using a Versamark ink pad and then used sparkly white embossing powder (I made sure to use an anti static bag first to stop any specks of powder sticking elsewhere)...


I wanted to create another layer with some more dimension and texture, so used the snowflake d'inkable with some blue sparkle paste in a couple of areas on each ATC...


For a finishing feature I coloured a piece of card with one of the paints used in the background and then stamped one of the butterflies in Versamark then covered with white sparkly embossing powder.  This was then cut out and cut in half so that it could be on both of the ATCs...


The very final touch was to use the same technique with the sentiments, I also added some dark blue ink to the edges to create a frame for the words...


These are the links to the products that I used...

* D'inkable - Circles
* D'inkable - Regular Dots
* D'inkable - Snowflakes
* Beautanicals - Wildflower 2
* Art Stamps - Birds and Butterflies Set 1
* Yuletide - Snowflakes (Spikey)
* Yuletide - Everyday Christmas 1

I hope you all have a peaceful Christmas and are able to enjoy it whatever you are doing.

Jane xx

Friday, December 22, 2017

Emily DT - Have a Bee Crafty Christmas!

Hi everyone, I hope you are all ready for Christmas! I have decided to look back through some of my favourite Christmas cards I have made using Bee Crafty stamps. The four cards I have chosen are all made using non-traditional colours like green and turquoise.

I hope you like them!


Merry Christmas to everyone!

Emily x

Thursday, December 21, 2017

Karen DT- Golden Butterfly

Hello

How are we all? All ready for Christmas...I'm not....Last minute presents to buy and wrap lol

 Anyways, today I'm back with another blog showcasing the beautiful products available from Bee Crafty 

For this week's post I got out those gorgeous
Birds and Butterflies 

I also used:
Script background stamp
Ticker Tape Stamp set
Golden Gate Lustre Luxe 
Pixie Powders
Distress Ink: Black Soot
Black onyx versafine


  • Create a random background using Pixie powders (I used gold). Then splatter Black Soot Distress ink over the area
  • Use black onyx versafine to add some random Script on opposite sides 
  • On a seperate piece of card stamp a butterfly in Black onyx versafine. Colour in with the Golden Gate Lustre Luxe,  mixed with a little water. Cut out.  Stamp a second butterfly and heat emboss in black. Use the Lustre Luxe again to colour in. Cut out and adhere on top of the first butterfly,  with 3d glue gel, ensuring the wings can lift up. Adhere to card 
  • Stamp and cut out the Ticker Tape sentiment and adhered with foam pads
  • Mat onto black card and adhere to card blank 
Well that's this week's sample for you. I really hope you enjoyed today's post. .many thanks for popping by 

Crafty hugs xx 

Tuesday, December 19, 2017

Charlee DT - Last min xmas cards

Hey crafters. Hope you're all well. For this weeks blog I thought I'd share an idea for quick last minute Christmas cards.


What you'll need:


Step 1:
On some scrap card stamp the splatter swirl rectangle. With a craft knife carefully cut out the inside of the rectangle. On one of the card blanks place the rectangle you cut out to the side of the card. With some distress oxide in your colour of choice blend all over the card. On the other card place the mask with the rectangle missing and blend inside the rectangle with some oxides.

Step 2:
With the same colour oxide you blended the card with ink up the splatter swirl rectangle and stamp over the two rectangle spaces you have. Next ink up your snowflakes in a colour that you wish and stamp them inside the rectangles. Then ink up your sentiment and stamp in black.

That's it for these quick cards. If you're anything like me and like to leave things until last minute, I hope this helps for any cards you've forgot to make.

Hope you all have a very Merry Christmas
Until next week
Charlee
x

Monday, December 18, 2017

Lorre-Anne DT - To hear the Angels

Hi bloggers, it's Monday which means I'm up again on the Bee Crafty blog to share another project with you all, and this week I've decided to make a nice quick and simple card.  I really love this sentiment, and think it's just perfect as the focal point of this card.


Materials
What to do
  • Cut some black card slightly smaller than the card blank, and some white card slightly smaller again.
  • I used the circle template and blended through some Tumbled Glass.  I used Versafine ink to stamp the sentiment in the centre.
  • On spare white card I used Versafine ink to stamps 3 butterflies, added some colour using my Zig pens, and cut out.  I glued these to the card before matting to the black card and gluing to the card blank.
I hope you all have a great week, and I'll be back next Monday with a new project for you all.

Hugs, Lorre-Anne x

Saturday, December 16, 2017

Jane DT - Swift Wings Art Journal Page

Hello!

I am back again today on the Buzzy Goings on at Bee Crafty Blog with something a little bit different to usual!

For the last couple of years I have been meaning to get into art journaling, and this has meant that I have had in my crafty cupboard a number of journals ready to use.  Although I have done a few pages I haven't really gotten into the flow of using them, so this week I decided to meet two needs in one, getting my large A4 journal started and creating a post for you!!
Here is what I created...


Unless I am creating specific samples with a certain stamp etc. I tend to start all my other projects by deciding which mediums I want to play with rather than an actual idea of the outcome.  So for this I decided that the distress crayons that have been sat in my stash for some time really deserved to have their day!
 
I started by preparing my page with some white gesso to help with the blending of the crayons, but I applied it with a palette knife to create texture and also leave some areas uncovered.  Then for extra texture I added crackle paste to areas, again using a palette knife and I kept it quite thin for finer crackles...


Next I chose colours from the brightest set of distress crayons (set 1) to add colour across the double page spread.  I applied them one at a time, using the pink, blue and yellow, then creating blends of colour.  Once this had been applied I used the circle stencil by rubbing colour away with a baby wipe...
 
 
After that I used the purple from set 2 to add some colour to some of the circles and then a white posca pen to add some details.
Next I used the sunset stencil with black paint and the cracked glass with white paint for some more pattern...


Then I used the new number background stamp and the XL script stamp with black archival ink, and  the bubble wrap backdrop with white paint (I made sure I cleaned my stamp thoroughly straight after!).  I wanted to create lots of layers and interest in my background, and just really added until I was happy...
 
 
I still required more so used an old plastic card with white gesso to add some lines to the background and also added some black distress crayon (set 3) around the edges to create a frame.
 
Then I needed to create my focal images.  I used the Da Vinci Wings, the Feather Wings and one of the keys, stamping them in black Versafine then using clear embossing powder over the top before cutting them all out.  I used a selection of the distress crayons to colour them, adding a little bit of water to blend the colours out.  To add a bit of extra detail I used gold gilding wax on all the pieces, and also added some to the crackled areas of the background...
 
 
Once I had stuck the pieces where I wanted on the pages they seemed to blend into the background too much, so I used a black Pitt Pen around the edges, blending it with my finger as I went.
Finally I chose a sentiment that matched my pages and what I wanted it to express.  This was stamped and each word cut out by hand before adding colour with the crayons.  Once stuck down I again added the black pen to highlight the words.
 
Once this was all done I finished off the page by adding some white dot highlights.
 
To create my journal pages I used the following products:
 
* Backdrop Stamp - XL Script
* Backdrop Stamp - Numbers
 
I hope you have enjoyed seeing my something a bit different, and I am planning to try to keep on with my art journaling now I have got started!!
 
Happy crafting,
 
Jane xx


Thursday, December 14, 2017

Karen DT- Together we so ROCK

Good morning everyone

Hope you're all well.  As it's Thursday I'm back with my weekly blog for Bee Crafty and today I'm sharing a card I made using the fabulous music stamps..which I have to say I LOVE lol

For this card I used:
Microphone stamp
WORDage stamp: Together we so rock
Soundwaves: Wibble
Dinkable : Sunset
Inkable: Circle easy frame
Distress Oxides: Twisted Citron, Peeled Paint
Black onyx versafine


The distress oxide was blended through the circle easy frame template then Peeled Paint was blended through the Sunset Dinkable.
The template was removed then the Microphone,  Soundwaves and sentiment stamps were all stamped in Black onyx versafine

Such an easy card to make but the look is so effective and can be varied using different shape templates and coloured inks

Thankyou very much for stopping by and I'll be back next Thursday with another Bee Crafty make

Crafty hugs xx

Tuesday, December 05, 2017

Charlee DT - Fleur and Freddie

Morning crafters. Hope you all managed to catch Sam on Thursday with these amazing stamps. These stamps are just so versatile.


This one was made by stamping Fleur and Freddie and then masking them off with some drawing gum. I then stamped the wildflower 3, the moon and the clouds with versafine onyx black. Matt and layered with some red glitter card and black card.


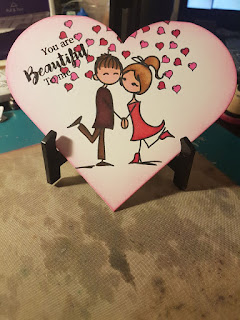
For this one I took the love inkable and blended picked raspberry and wilted violet oxides through. I then took some of the small heart stamps and stamped them through. Fleur and Freddie were masked of on the stamp so I could stamp them separately. I coloured them in with distress ink pens. The hearts where covered in red stickles and then some glossy accents on top.


I covered the MDF heart with lavender quartz lustre luxe. I then used the hearts inkable and stars dinkable and blended through wilted violet oxide. I then stamped Fleur and Freddie and the For You sentiment with memento. I then use some liquid pearls and nuvo drops to "colour" Fleur and Freddie and the hearts. 


With the multi hearts inkable I used some pebeo sand paste. Once it was dry I brushed over all of it with fired brick and black soot oxides. I then painted the hearts with pebeo paint to make them stand out more. I die cut some rectangles with faux stitching. I stamped Fleur and Freddie and the sentiment using versafine. I coloured the hearts in with spectrum nior illustrators and used a white gel pen to pop a highlight in.


I stamped Fleur and Freddie with versafine and masked them off. Using faded jeans oxide I blended through the hearts inkable, honeycomb dinkable and splatter dinkable.


Using flame red lustre luxe I cover the MDF heart. I then used fired brick oxide through the multi hearts inkable. I then sprayed the heart with some spray and sparkle and left it to dry. I used heart die and cut out one in white and a larger size in black. I stamped and coloured Fleur and Freddie with the illustrators. I blended fired brick oxide round the edges of the heart. I stamped out the sentiments in versafine. I then adhered the hearts onto the MDF heart.


I stamped Fleu and Freddie and masked them off with pebeo drawing gum. I then used broken china and faded jeans oxides to blend all over the card. Then with the honeycomb dinkable I blended through broken china oxide, then using the hearts and splatter dinkable I blended through Faded jeans oxides. After I rubbed the drawing gum off I coloured the hearts with the illustrators.


For this one I stamped Fleur and Freddie with memento and coloured them in with the illustrators. I then stamped them onto some scrap paper and cut them out to use as a mask. I then stamped the clouds all over the card, and coloured them in. I then coloured the whole background with the illustrators. On the card blank I stamped the little hearts all round the edges.


I folded some card in half and die cut a heart shaped card out. I stamped and coloured them with the illustrators and blended picked raspberry distress ink round the edges.


For this last one I stamped and coloured Fleur and Freddie with distress ink pens straight onto a card blank. I then masked them off. I blended hickory smoke distress ink through the hearts inkable and the splatter dinkables. Then using the good times sentiment I stamped all over with smokey grey versafine. And then stamped the you are wonderful sentiment in onyx black versafine.

That's all for this week. I hope your inspired and managed to get hold of some Fleur and Freddie stamps.

Until next week
Crafty hugs
Charlee
X