Tuesday, March 28, 2023

Alison CT - Journaling Girls Bev and Sam

Hi, as today is Journaling Girls day, I have created this step by step guide to creating this journal page.
To begin I chose one of the catalyst papers and used a wet paint brush to help me tear a piece that would leave a 1cm border around it when glued into my Dina Wakley Media journal. I used distress collage medium to glue it to the page. 

Whilst the collage medium was drying I stamped Bev and Sam and three of the heart stamps onto a piece of Talens mixed media paper using Versafine Clair morning mist. I coloured them with ecoline pens and cut them out.
Next I stamped the bunting border, using Versafine Clair charming pink, around most of the edge of the catalyst paper. I also stamped the chain border three times horizontally using Versafine Clair verdant ink.

Then I stamped a selection of arrows and other worker stamps from the Journaling Girls Arrows samp set using the charming pink and verdant ink.
Next I chose four sentiments from the small words 1 stamp set and stamped them with morning mist ink. I deliberately bent the stamps so they were not straight. I then cut them out.

Finally I glued everything to the page using collage medium.

Products used:
Talens art creation pads - mixed media paper 
Art stamps - journaling girls Bev, journaling girls Sam, journaling girls borders, journaling girls arrows
Wordage - small words 1
Versafine Clair - morning mist,  verdant, charming pink
Slims acrylic blocks - journaling border, circle, rectangle 185mm x 84mm

Thank you for taking time to come and have a look.
Alison

Sunday, March 26, 2023

Alison CT - Floral Journal page

Hi everyone, today I'm sharing an art journal page created using some of the latest release.

To begin I spritzed the page with water. Then I used a wet 1inch flat paintbrush to add Dylusions paint to the page. I used lemon zest, blue hawaiian, calypso teal and island parrot. Before the paint could dry I spritzed it with water and encouraged drips to run in all directions.

Using a number 6 round brush I added marks to the page using the left over paint from the background and white gesso. I left this to dry naturally whilst I prepared the flowers.

I stamped three of the flowers, using Versafine Clair nocturne on a piece of cream card. I coloured the flowers in shades of pink water colour paints and the leaves in green. When the paint was dry I cut them out.

Next I used the leafy freehand border stamp along the spine edge of the page, joining two together to cover the complete length. Stamp three more - one horizontally and 2 diagonally.

Then I stamped my facourite rainbow from the journaling essentials and coloured it with same paint as the flowers. I cut it out and glued it to the page to hide where the borders join.

Next I stamed the cross and dot stamp from the journaling essentials set using versafine clair warm breeze and the circle with hearts using versafine clair charming pink.

Then I glued the three fliwers to the page. One on each of the leafy borders.

Finally I added a sentiment using stickersfrom the Wordy Stickers from sheet 2B.
Products used:
Dylusions paint - lemon zest, blue hawaiian, calypso teal, island parrot
Dina Wakley paint brushes - 1 inch flat, no 6 round
Cream card
Watercolour paints 
Versafine Clair - nocturne, charming pink, warm breeze
Super Skinny Slim - journalling border
Art stamps - sketchyflowers, freehand borders, journaling essentials 

Thanks for taking a look 
Alison

Saturday, March 25, 2023

Sally CT - Bee Free card

Hi There! Thought I would show you another card using the latest stamps from Bee Crafty today.


I began by smooshing some distress oxide inks onto a square of mixed media card, drying with a heat gun between layers.

Using a texture disc and Uncharted Mariner Distress Oxide ink, I added a little stencilling.
I used the journaling essentials stamp set to add more to the background with Wild Honey and uncharted Mariner distress oxide inks.
I also added a border from the new freehand borders stamp set.
Using the innie from the 4" circle easy frame inkable, I added a shadow frame to the centre of the background, using uncharted mariner distress oxide ink.

I stamped the bird from Sketchy birds #1 onto some white card with black versafine ink and cut it out.
I stamped the sentiment in uncharted Mariner onto white card and cut it out, adding both to the card using sticky pads. 

Here is the finished card.
I used:
Distress oxide inks in Mermaid lagoon, Mustard seed, Wild Honey, Uncharted Mariner
14cm square of Mixed media card
15 cm square White card

Thanks for looking! 

Sunday, March 19, 2023

Alison CT - Spring Zing Tag

Good morning, today I'm sharing some inspiration for this month's challenge in the BeeCrafty facebook group.

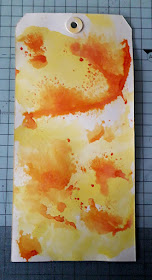
To begin I spritzed Squeezed Lemonade distress oxide spray onto a blending mat and spritzed it with a little water. I then dipped the tag into this ink. I left it to dry naturally.

I repeated the process using Spiced Marmalade distress oxide spray. I left this to dry thoroughly.
Next I used stamps from the Journaling Essentials with Spiced Marmalade and Mustard Seed distress ink to add detail to the background.
Then I applied texture paste through the inkable tag that looks like a thistle fliwer bud from set 5. I left thus to dry naturally.

On a separate piece of cream card, I stamoed the daisy and tulip from the Sketchy Flowers stamp set, the three joined circles from the Journaling Essentials stamp set and the two sentiments from the Mixed Messages stamp set using Versafine Clair morning mist. I coloured the flowers with inktense watercolour pencils.

I glued the flowers and sentiments to the tag using matte multi medium. I then stamped a border from the Freehand Borders stamp set four times with Versafine Clair morning mist.

Finally I used matte multi medium to add the three circles to the tag.

Products used:
Distress Oxide spray - spiced marmalade, squeezed lemonade
Art Stamps - journaling essentials, sketchy flowers, freehand borders
Wordage - mixed messages
Cream card
Distress Ink - mustard seed, spiced marmalade
Versafine Clair - morning mist

Thank you so much for taking a look at my tag and I hope I've inspired you to take part in the challenge. 
Alison

Saturday, March 18, 2023

Sally CT - Kraft Journal pages

Hi There! Thought I would show you how I made this journal page, which would be equally suitable for the front of an A6 card. 


I began by stamping the script stamp in Unicorn white ink down the centre of the page.


When this was dry, I dry brushed some gesso down the centre of the script and dried it.

I added some mermaid lagoon Distress oxide ink through the circles dinkable ....
...and added some stamping using the oxide ink and some Versafine Clair acorn ink too. 

I blended some walnut stain distress ink onto a book page and drew 3 rough circles with a distress crayon. I then cut these out.

I attached them to the page using matte medium.

I used the doodle art Mandalas to add semi circles to the edges

I chose 3 of the sketchy birds and stamped them onto white card and cut them out. I also stamped the sentiment in Versafine Warm Breeze ink.

I attached the birds and sentiment using sticky pads.
Here is the finished page again.....


....and another using different stamps, different colours, and a little more paint (Dylusions bubblegum pink shimmer paint) The spring flowers and birds on these pages would make them suitable for the March facebook group challenge, so please enter if you can!

I used:
Kraft card
 Distress oxide ink - I used Mermaid Lagoon 
Versafine clair ink - I used black, Acorn, Warm Breeze and charming pink
Book page
Sketchy flowers #1 stamp set (on the pink one)
Sticky pads

Thanks for looking!

Wednesday, March 15, 2023

CAS Card by CT Ann

 CAS Card 

By Ann 


Stamps:

 Sketchy Flowers #1

Journal Essentials #1 

Freehand Boarders #1

Mixed Messages #1

Inkables: 

Big Ones - Circles for Circles

6x6 Perspective Circles 

Tags #4

Distress Oxide Inks:

 Weathered Wood / Salvaged Patina / Saltwater Taffy

Versafine Clair Morning Mist & Nocturne 

Masking Tape


https://www.beecrafty.net/


I started with a piece of smooth card 14cm x 14cm & masked off two sides of the card… 

Next I used Weathered Wood through the Circles for Circles Inkable…

Then I placed the Tag ‘wobbly lines’ Inkable over the previously inked circles, brushing Saltwater Taffy through it… 

Next I put the Perspective Circles Inkable on to the card & used Salvaged Patina… 

Using the stars from Journal Essentials & Versafine Clair Morning Mist I stamped over the Oxides … 

On a separate piece of card I stamped a flower from the Sketchy Flowers #1 set, in Versafine Clair Nocturne & cut it out… 

Then I stamped & cut out a sentiment from Mixed Messages #1 in Morning Mist…

After removing the masking tape I stamped one of the boarders, from Freehand Boarders #1 set along the bottom of the stencilling. I also stamped the flower on to the card as I didn’t want to cut all the fiddly bits out …

After gluing the flower & sentiment to the card & added some fine black splatters to the background. 

To finish I layered this on to a dark grey piece of card & a 6x6 card blank… 


Thank you for stopping by… Ann xxx