Monday, January 31, 2022

Sally CT - Black, white and one other colour

Hi There! We have a new Challenge starting tomorrow over in the Bee Crafty Facebook group, so I thought I would use today's blog post to make something to fit the theme. There is possibly a little more white space than I am used to, and I will try and fight the urge to add some splatters or a few sequins before the end of the post! 😂 

Here is how I put it together.

I began by blending some Peacock Feathers ink through the tag inkable. I used distress oxide but Distress ink would be just as good. 

Next I used versamark ink to stamp the circles and emboss using white embossing powder on a scrap of black card, which I cut out.

I used the lines stamps from the same set to add a line across the card about a third of the way up then added more down the left hand side.

Next I stamped the tape measure from the stitched borders onto a scrap of white card twice and cut out. I then cut the strips, one under the ten and one under the seven.
I used 3d glue to attach these elements to the base card.
Next I cut two small nesting circles from black and white card.
I stamped the butterfly onto the circle and also onto a scrap of card and painted both using Peacock Distress ink (again, distress oxide ink could be used for this purpose). I cut out the second butterfly and placed over the first using 3d glue.

Finally I stamped the sentiment using versafine clair ink.
Here is the finished card once more.
I used:
6x6 square white card blank

Sunday, January 30, 2022

Alison CT - Let Your Dreams Take Flight

Hi Alison here, I thought I would share another fairly simple card today.


To begin lightly spritz a piece of 5 x5 inch piece of card with water. Scribble one of the Ecoline pens onto an acrylic block, then using a wet paint brush dab it onto the central area of the card. Repeat with a second colour. Spritz lightly with water and leave to dry naturally.

Meanwhile stamp, colour and cut out the dragonfly. I used Ecoline pens and a waterbrush to colour it. Don't worry about cutting off the legs and splats around the dragonfly. Ink the edges with black ink. You can give the dragonfly sparkle by going carefully over it with a wink of stella pen.

Once the background is dry, stamp the dragonfly where you want it. 

Next use the worker stamps from the set and versafine clair ink in blue and purple to create a background for the dragonfly. Don't worry about stamping these over the dragonfly on the card, as it's only there for positioning.
Stamp your chosen sentiment directly on to the background piece. Inking only half the sentiment at a time. 

Glue the background to a piece of blue card, then mount onto a 6x6 card blank. Add your coloured dragonfly directly over the one on the card.

Products used:
Doodle Art Stamp: Dragonfly Regular
Wordage: Small Words 1
Versafine Clair ink pads: Nocturne, Paradise and Monarch
Wink of Stella pen
Paint brush and waterbrush 

Thank you for reading 
Alison


Saturday, January 29, 2022

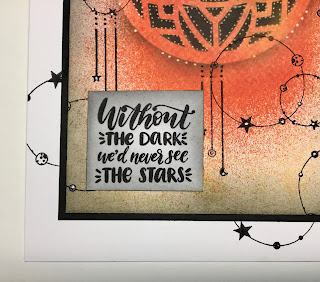
Jane CT - 'Without Darkness' Card

 Hello!

This week I decided to create a card without really knowing where it was going to lead...


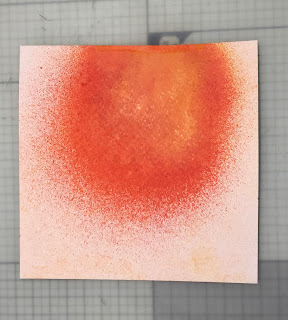
1) I decided to choose my first colour by just reaching for the first bottle of distress oxide spray that I came to and it was Candied Apple.  I sprayed it on one main area of a piece of watercolour cardstock then dried it...


2) As the first colour was red I decided to then repeat the process using Wild Honey and next Squeezed Lemonade...


3) As the colours were quite fiery and the spray reminded me of the sun or a planet I let that guide my choice of stencil and colour.  I went for one of the texture discs and Black Soot distress ink...


4) As the card was now developing a celestial feel I chose the La Luna stamp set and added some of the elements using black archival ink...


5) I wanted some contrast so added some white gel pen dots.  However this did take on some of the distress oxide colour from underneath, but I quite liked the effect.  Then to create more of a frame I blended some more Black Soot distress inks around the edges...


6) Finally I stamped out one of the sentiments and after edging it with more black adhered it straight to the front of the card.  I then decided to add a few more of the stamped images to the card blank before adding the decorated piece to the front...


Here are the products used:


Thank you for looking and happy crafting!
Jane xx


Friday, January 28, 2022

Sharon GDT - Whatever works!!!


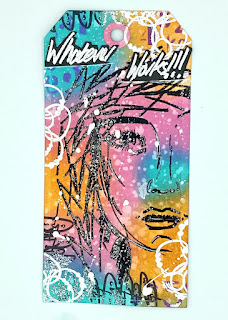
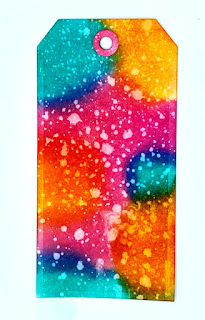
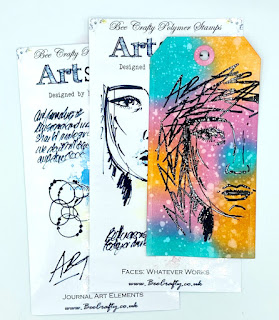
As we have a tag challenge going on in the Bee Crafty FB group I thought I'd make a tag for my post today. I've used some lovely bright colours as we all need cheering up this time of year. 

Stamps:  Faces - Whatever Works

               Journal Art Elements

Stencils: D'inkables set 5

Distress Oxide inks: Picked Raspberry

                                  Ripe Persimmon

                                  Peacock Feathers

Versafine Clair: Nocturne

Ranger embossing powder: Superfine white

Versamark clear ink

Posca white pen

Here's how I made my tag:


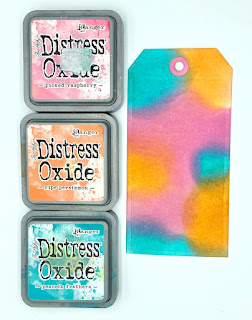
I started off with making my background by blending distress oxides, picked raspberry, ripe persimmon and peacock feathers onto my tag. 

Next I sprinkled over some water to give it some texture. I used the heat gun on it to help it dry before my next step. 


I used the large face from the Whatever works set and stamped it in versafine clair black ink and then embossed with a clear embossing powder. This helped the image to stand out from the bright background. I wanted to build up her hair so I used the Art stamp from the Art elements set and randomly stamped and clear embossed around her face.


Next using Wilted violet oxide ink and the number stencil from the D'inkables set 5 I stamped at the top corners and bottom right of the tag. 


I added a little border to some of the edges using the arched stamp from the Art elements with black ink and clear embossing. With a white Posca pen I added some highlights to her face and hair.


 To add a bit of light to the tag I white embossed the circles from the Art elements set around the edges. The powder stuck to some of the embossed black border but I liked the way it looked so left it as it was. It added some more texture. 


To finish off the tag I stamped the Whatever works stamp onto black card with clear ink and then used white embossing powder, cut around it and adhered it to the top of my tag. Then I just added some white spatters with my white Posca pen. 

Sharon x


Thursday, January 27, 2022

Sue CT Tag Inkables


I wanted to use some of my older items this week with the new Tag Inkables, so have used a bit of both. 

What I Have Used This Week

DistressInk Kitsch Flamingo

Distress Ink Dusty Concord

DistressInk Villainous Potion

DistressInk Mowed Lawn

Hero Arts Unicorn White Ink

Archival Black Ink

Ecoline Pens

Posca Pen

Bee Crafty Inkable Tag Stencils Sets 1, 2 and 3

Bee Crafty Ticker Tape Words Set 2

Bee Crafty Doodle Arts Stamps Butterfly Regular

Bee Crafty Doodle Arts Stamps Butterfly XL

Bee Crafty Doodle Art Stamps Bird

Bee Crafty Paper and Card Pack – Butterfly Ink

Mini Stapler

Gel Medium

Dina Wakley Tag size 10

Blending brushes


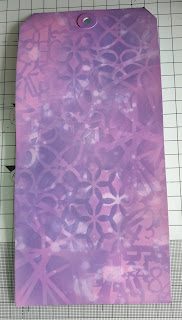
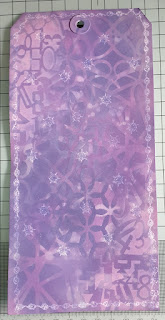
I started off this week by blending Kitsch Flamingo, Dusty Concord and Villainous Potion Distress Inks on a Dina Wakley Size 10 tag. Then I used the new Inkable Stencil Tags, sets 1 and 2 to add texture to the tag.


 Any waste ink left on the stencil I blended onto a second tag and will use that for another project later on. I chose one of the papers from the Butterfly Ink Paper pack and tore it into strips to fit on the tag and coloured the torn edges with the Villainous Potion Distress Ink that was left on my brush from the blending.


I then stamped a selection of the butterflies from the Doodle Art Butterfly stamps and coloured them with Ecolines. At the time I was intending using some of the flowers from the XL Bee Crafty Doodle Art Bee Set, so I stamped them as well, but I later changed my mind and added some more butterflies.


I cut the stamped images out and added some white detail to them with Posca pen.


I added some detail to the strips of torn paper using a stencil from Tag Stencil set 3 and used Mowed Grass Distress Ink to give the impression of grass.


 I added some white detail around the edges of the tag and in the centre using some of the extra stamps from the bird stamp set.


 I then stuck the strips of torn paper to the tag using gel medium.


After stamping the sentiment from Ticker Tape set 2, I cut them apart and attached them to the tag using tiny staples. Finally, I arranged the butterflies onto the tag and stuck the centres of the bodies down using gel medium.


Many thanks for looking at the blog today, I hope you have fun playing with the lovely new InkableTag Stencils.


Wednesday, January 26, 2022

Thank You by DT Ann

 Thank You

By DT Ann


Still a bit of time to enter the tag challenge over on the Bee Crafty Stamps Facebook page.. HERE

Stamps: Doodle Art ~ Dragonfly, Everyday Sentiments 1


Black & White pens


To create the background use the bubble wrap technique I shared in the group last week… HERE

Cut a tag out of your print… 


Stamp the flower head onto the watercolour paper 3 times & the leaves once, both in Versafine Clair Nocturne, leave to dry. 
Also stamp the flower head & leaves onto your tag… 


Colour your flowers, including the one on your tag. I started by adding water to a petal, then took some pink (1) from a Scribble Stick using a wet brush. Repeat with yellow (2), a bit more pink (3), some red (4) & keep adding colour until you’re happy… 


Colour the leaves in a similar way using yellow, green & Sky… 


Add some of the smaller doodle stamps to your background & fill in any gaps with black & White pens… 


I chose Thank You for my sentiment, inking the “You” first & stamping it straight onto the tag. Wipe the stamp & ink the “Thank” & stamp onto a piece of white card, adding black edges… 


 Layer up the flower heads, add a few white pen doodles & mini black sparkles… 


Thank you for stopping by… Ann xxx


Related Posts Plugin for WordPress, Blogger...