Monday, November 29, 2021

Sally DT - Chocolate and Cash!

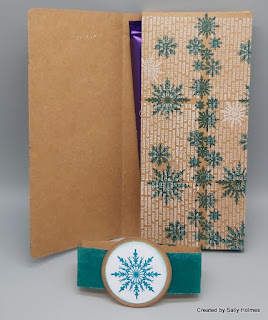
 Sometimes we want to give a small gift to someone either as a thank you or for a special occasion. Sometimes this might be a little something to accompany a gift card or some cash. My friend Valerie came up with this lovely idea which I have adapted slightly, and it could be adapted for a gift card too. 

I began with an A4 sheet of  200gsm kraft card, which I measured and scored as follows:

In landscape I scored down at 8cm, 9.5cm, 17.5cm,19cm and 27cm. I also scored along the top and bottom 1.5cms from the edges. 
I cut off the remaining piece of card to the right, along with the 9.5 cm strip along the top and bottom edge from the right hand end. This is what I was left with.
I rounded the corners of the flap and cut from the edge to the first fold top and bottom.
Next I randomly stamped snowflakes in white and chianti ink all over the card.
I used pva glue to attach the small flap to the inside-front of the box then stuck the sides together, making a 3d envelope. 
I used another piece of Kraft card, measuring 16x7.5cm to make a separate pocket, using a circle punch to make a semi-circular indent on one edge.

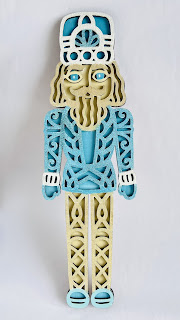
 I stamped this with snowflakes too, rounding the corners and adding a little brown ink along the edges.
Using double sided narrow tape around three edges I attached it to the front of the inner box.
I added the bar of chocolate and the cash into the pocket. If I was giving a gift card I would make a pocket smaller to fit it.

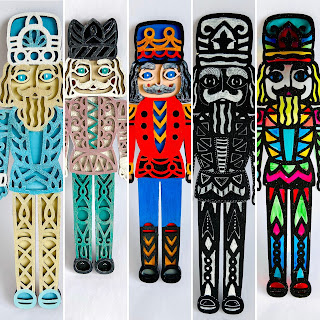
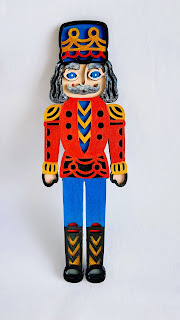
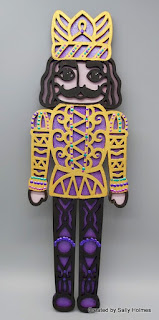
I created a belly band for it's closure using a ribbon, measured to be the correct length (approximately 22cm allowing for overlap) and secured with Gel medium. To cover the join in the middle I added the smaller nutcracker which had been stamped and coloured whilst I was making samples. 
Here is the finished gift.
This was made to fit a 110g bar of a well known brand in a purple wrapper and cash, but could easily be adapted to fit other brands and, if needed, a gift card. I am sure it would be useful for gifts at other times of the year too. 
Here is another without the money wallet and just using the snowflake border set. 

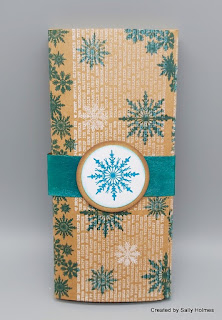
For this one I used the strip of card from the end of the A4 sheet, painted with Polished Jade Dylusions shimmer paint for the belly band. The inks were Versafine Clair Warm Breeze and the Hero Arts unicorn white.
For the first I used:
One and a half sheets of A4 200gsm Kraft card
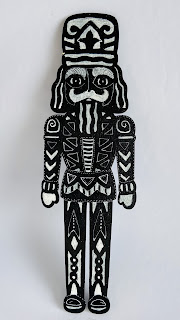
Versafine Clair Chianti
Hero Hues Unicorn white ink
Approximately 22cm of coordinating Ribbon 
Coloured pencils
gel medium

Thanks for looking! 

Saturday, November 27, 2021

Jane DT - A Nut Crackin' Christmas!

 Hello!

This week I have made a fairly quick and easy card using up a background created by mopping up some ink!...

1) The background had been created by printing off the distress oxide spray from the snowflake inkable.

2) I stamped out the nutcracker and the baubles onto watercolour card using archival ink.

3) The images were cut out then coloured using ecoline markers.

4) I stamped the lights across the top of the card, lining them up to get a continuous string, then coloured them with the ecoline markers too.

5) The baubles and nutcracker were glued onto the card, then I used a fine liner pen to draw in the strings and a shadow under the nutcracker.

6) I stamped out the sentiments and edged the piece of card with black ink before attaching to the card.

7) Finally the card was matted onto black card then a 7" x 5" card blank.


Here are links to the products used:

* Nutcrackin Christmas Stamps - https://www.beecrafty.net/bee-crafty-yuletide-doodle-art-stamps-nutcrackin-christmas.ir
* Snowflake Mask - https://www.beecrafty.net/inkables-template-snowflake-mask.ir
* Ecoline Markers - https://www.beecrafty.net/ecoline-brush-pens.irc
* Distress Oxide Sprays - https://www.beecrafty.net/tim-holtz-distress-oxide-spray.irc

Thank you for looking and happy crafting!
Jane xx


Wednesday, November 24, 2021

Nutcracker mdf by DT Ann

Nutcracker MDF 

By DT Ann 


https://www.beecrafty.net/


Hope you all enjoyed the shows on tv last Friday, sadly we didn’t get the stamps in time to make samples but here’s my mdf ones… 

•••

This one I painted in a turquoise & vanilla on the bottom piece & similar on the top. I  then added embossing powders in turquoise, gold & white to the top piece… 


For this monochromic one I painted it with black gesso & dried it. Then using a white Gelly Roll pen & the top piece as a stencil, I drew on to the bottom piece. Once traced I coloured in the large spaces & added a few doodles, again with the white pen.. 


This left me with a top piece which I traced the outline of onto acetate & cut it out just on the inside of my marks. Then I painted the mdf with black Gesso, dried it & glued the acetate to it. I coloured each section with alcohol pens… 


This next one was mainly painted but used crackle paint on the top piece to add texture.. sadly it doesn’t show up on the photos. I dry brushed with some Dina Wakley Sterling paint over the crackled bits.. 


This next one was painted with Dylusions paints colours: London Blue, Postbox Red, Black Marble
& Pure Sunshine adding a little bit of grey to his hair… 


Thank you for stopping by… Ann xxx 

Monday, November 22, 2021

Sally DT - Bold Colours and Nutcracker samples

Hi There! I have been enjoying getting inky and combining some different colours into a simple card where the sentiment is the focus. Here is how I made it.

I began by blending seedless preserves and faded lilac distress oxide inks onto a 14cm square of mixed media paper. 
I then placed over the mandala 4 inkable and blended prize ribbon ink through it 
Next I splattered it with water...
...and some Pretty Gets Gritty Artemis Explosion powder mixed with water. I set it aside to dry. 

I stamped the sentiment in versamark ink and embossed with gold embossing powder before matting and layering it to the card on sticky pads.
Here is a closer look at the finished card. It makes me think of batik fabric. 
I used 
6 x6" blank card
Black card
Mixed media card
Sticky pads or 3d gel for attaching the sentiment
Before I go here are my Nutcracker samples for the Craft Store show last week
I decorated 4 of the regular sized mdf nutcrackers


For this one I used alcohol pens on parchment paper stuck behind the front piece
This was the same nutcracker but not backlit
I also made a couple of cards combining the stamps with some older stamps...


Next week's project may well involve a nutcracker too! 

Thanks for looking and I hope you can join in the challenge over in the Bee Crafty Facebook group where the theme is Stay subtle or Be Bold with your colours! 

Saturday, November 20, 2021

Jane DT - Nutcracker MDF Samples

 Hello!

The Bee Crafty ladies were on The Craft Show this week with some fab new Nutcracker themed products.  

For my design team samples I decorated some of the regular sized MDF and I used a variety of mediums including paint, embossing powder, gilding wax and more.  You can also add on embellishments and I have used gems and sequins, but your only limit is your imagination...


Thank you for looking and happy crafting!
Jane xx


Wednesday, November 17, 2021

Festive Artboard by DT Ann

Festive Artboard

By DT Ann


Don’t know about you but the festive season is creeping up fast!! No cards made, but trying to get into the spirit of things, I decided to create a scene on an mdf Artboard… you could do something similar on a card using paint instead of texture paste… 

Gesso
Glitter
Collage Gel


First mask off the bit that slots into the base of the Artboard so that it fits later… I use washi
tape. Using collage gel, glue old book pages to the Artboard. Add some wordy circles from the Dina Wakley collage papers.. And finish with a layer of collage gel.  


Next add some texture paste using the Trees Frame 6x6 (the inner bit) .. leave to dry. 


When dry use Versafine & stamp part of the large snowflake boarder in between the trees… (in hindsight I should’ve done this before I used the texture paste) then emboss in white… 


When cool start adding some colour with Ecoline Brush Pens, I used blues & blue-greens.  Blend as you add each colour & then splatter with water & leave to dry… 


When dry, wipe the Artboard with an anti static bag. Then stamp the words “Baby It’s Cold Outside “ in Versafine Clair Nocturne & emboss with clear powder. I also stamped some of the individual snowflakes in Unicorn White.. 


Paint some snowflake’s from a PopOut sheet in white (use shimmery/ glittery paint if you have any).. 


Remove the washi tape & slot the Artboard into its base. Paint in white gesso, add some texture paste & sprinkle with fake snow & sequins…  


Add the Pop Out snowflake’s & some glitter/flakes/sparkle/Sequins to the trees.. a few sparkles in the background & done .. 


Thanks for stopping by… Ann x


Related Posts Plugin for WordPress, Blogger...