Thursday, December 30, 2021

Sue Whatever Works


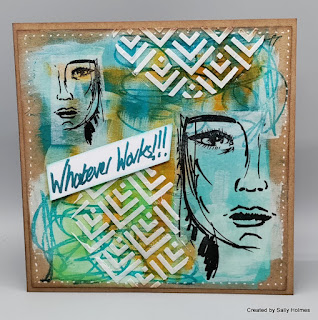
Sue CT Whatever Works

Hi everyone! I am Sue and this is the first time I have ever written a blog post of any sort, so please be kind to me. I am sure I will soon get used to it and hopefully not break the blog! It's really great to be here on the Bee Crafty blog and can't wait to get going.


Products I have used
 
White 6x6 card
Black card 5¾ x 5¾ inches
Scraps of white card
Anti-Static Bag
Versamark Ink pad

 I have decided to go dramatic with this one which is very unusual for me!


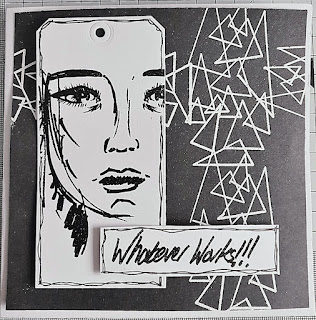
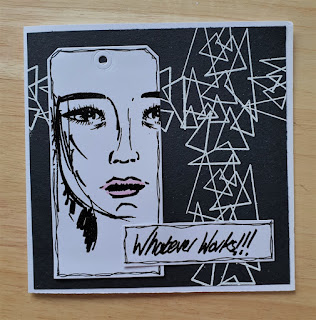
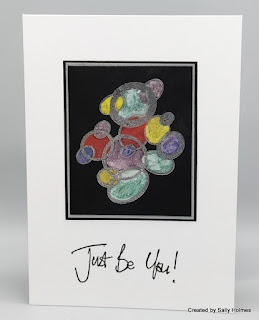
I wanted something fairly simple so went with black and white. Rub the anti-static bag over both the black and white card.


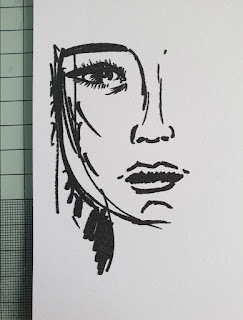
Stamp the Whatever Works face onto white card using Versamark and emboss using Ranger Black Fine Detail Embossing powder. I also added the second eye to add more detail as you can see from my later photo.


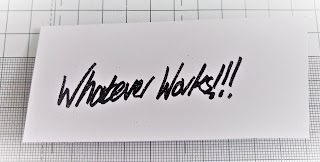
Stamp the Whatever Works words onto a scrap of card and emboss with the black fine detail embossing powder.


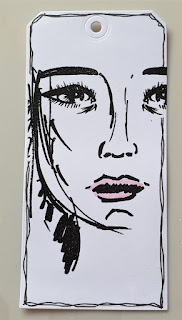
Using the largest tag die, cut the face, positioning the die where it suits you. 


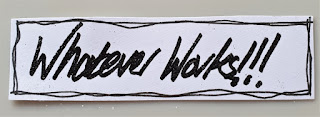
Cut the words out using a paper trimmer or scissors. Draw lines around the edges of both the tag and words using a black Micron pen.


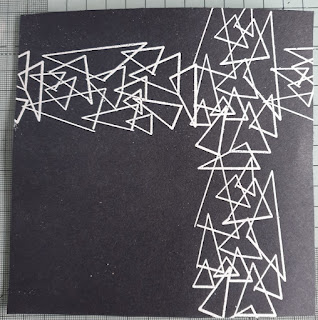
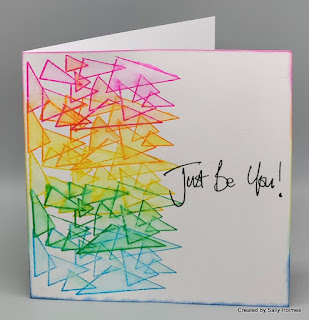
Using the triangle stamp from the Art Background 1 stamp set, stamp the triangles along one side of the card using Versamark and heat emboss with white detail embossing powder. Then repeat in the opposite direction, making sure not to overlap the first image.

Arrange the tag and words on the black card and adhere using your chosen medium. If you wanted to add some extra colour, you could use Moonlight Pens to colour some of the triangles.


Thank you very much for reading my first post. Enjoy the rest of your day and I hope you all have a very Happy New Year.


Monday, December 27, 2021

Sally DT - Sassy Journal spread

 Hi There! Hope you have had a great time over the last few days. I am here to share a step by step for a rather cheeky journal spread I made recently in my Kraft Journal.

I began by painting white gesso on each page leaving a kraft border. I then painted over with the dylusions paint and dylusions shimmer paint in random patches.

Next I added some Dina Wakely metallic paint.
I used a dinkable and a texture disc to add some texture - some with texture paste and some with white gesso
Once this was dry I added stamping in Black versafine clair - First the ledger stamp...
Then some coffee rings and numbers from the coffee stains set. I set this aside to dry.
I stamped the Sassy Journaling Girl in black onto white paper and cut out.
I stuck her to the page with Distress Collage Matte medium.
Next I selected a back chat sticker and added it to the opposite page.

Finally I added a few sequins, white splatters, and highlights using moonlight gelly rolls, a posca pen and the Dina Wakely white gloss spray.
I used:

Thanks for looking! 

Sunday, December 26, 2021

Alison DT - Dream


Hi everyone. I have created an art journal page using the Dream face stamp. 

I started by using three distress inks and one of my superskinny slims.
I smooshed two of the ink pads onto the block and spritzed with water, then swiped it on a page in my Dina Wakely journal. 
I repeated the above with the third colour.
Next I used Dinkables and the same inks to add detail to the background.
Then I used the Coffee Stain and the Art Backgrounds 2 stamps to add more layers.
I then stamped Dream onto Collage paper and stuck her to the page using Collage Medium.
Finally I used Ecoline and Sakura Glaze pens to colour her and added white highlights using a gel pen.

Products used:
Art Stamps: Dream 
Art Stamps: Coffee Stain
Art Stamps: Art Backgrounds 2
Dinkables sets 1, 2 and 9
Distress Inks: Festive Berry  Worn Lipstick, Villainous Potion and Kitch Flamingo

Thank you for stopping by. Happy Boxing Day. 
Alison
 

Saturday, December 25, 2021

Jane DT - Merry Christmas!

 Hello!

I am starting by apologising as I have not made anything new for todays blog post but instead I thought I would share some of the previous festive makes and wish you all a...


Wishing everybody a peaceful and healthy season,
Jane xx


Wednesday, December 22, 2021

Cracking’ Christmas Baubles by DT Ann


 Cracking’ Christmas Baubles 

By DT Ann


I’d like to wish you all a safe & happy Christmas 


Stamps: Yuletide & Snow Boarder 

Inkables:  Big Ones Pearls, Snowflake Mask 

Easy Frames: Baubles 4”

Micron Pen ..230 Hunter Green

Distress Ink: Evergreen Bough

Distress Oxide: Antique Linen

Acrylic Paint: Green, Dylusions Shimmer Calypso Teal, Cream, Dusky Pink Gold.

Memento Ink:Teal Zeal

Brilliance Ink: Galaxy Gold

Pretty Sparkles: Midas

Gelli Plate & Brayer

https://www.beecrafty.net/


Thinly spread mid-green paint onto your Gelli Plate with a brayer. Place the Pearls (Big One) onto the Gelli plate, then a piece of copier paper, press carefully & remove the excess paint. Depending on the size of your Gelli plate you may need to repeat this process… 


Let the paint dry a little then add some Calypso Teal Shimmer paint, this time place the Snowflake Mask onto the Gelli plate & repeat the copy paper method.. 


When that’s dried a little add a layer of gold paint. Using one of the larger snowflake stamps from the Boarder set, stamp off the ink (from the Gelli plate onto a piece of paper).
When done add some cream paint & take a print. 


Leave your prints to dry.. 

Using the 4” bauble template draw around the inside with a Micron Pen & cut out… 


Add some Evergreen Bough Distress Ink around the edges & some extra down one side… 


Add some snowflake’s from the Boarders set, with a teal ink … 


Cut your print down to approximately 14cm. Stamp, freehand, some of the text onto your background… 


Stamp some snowflake’s in gold ink onto your background . Add some Distress Oxide Antique Linen & Distress Ink Evergreen Bough around the edges… 


Glue the baubles to your background, I used some foam pads behind two of them.. 


Using an off cut of a background paper stamp the Crackin’ Christmas sentiment, cut out & add a white piece of paper to create a ‘mat & layer’ … 


Glue  the sentiment to your card & add a few sparkles.. 


Thank you for stopping by and Happy Christmas … Ann xxx

Monday, December 20, 2021

Sally DT - Craft Store Samples and a mini book from the Facebook live

 Hi There! Did you see Bev on the The Craft Store last Tuesday? She had some wonderful new background stamps along with the previously released Faces and Journal art background stamps.

Here are the samples that I made with the new stamps.

For this first one I also used Faces: Whatever Works stamps and Inkables texture plates


This used the Faces: Dream stamp

I also made a little mini book in the facebook live on Tuesday night using the new stamps and Dylusions paints


The New stamps can be found here on the website as a bundle but are also available singly too on this page 
If you would like to watch the live, You can find it here
Thanks for looking! 
Related Posts Plugin for WordPress, Blogger...