Sunday, December 31, 2023

Alison CT - Versafine Clair Ink

Hi everyone, today I'm sharing some information and uses of Versafine Clair ink pads.

Versafine Clair is a fast drying oil based ink, which is waterproof, fade resistant and light fast. It is perfect for fine detailed stamping, but is also suitable for silhouette stamps. It can also be used with embossing powder.
However, it is not only a great ink for stamping, it will also blend to create backgrounds and can be used through stencils. There are 24 colours in the range.
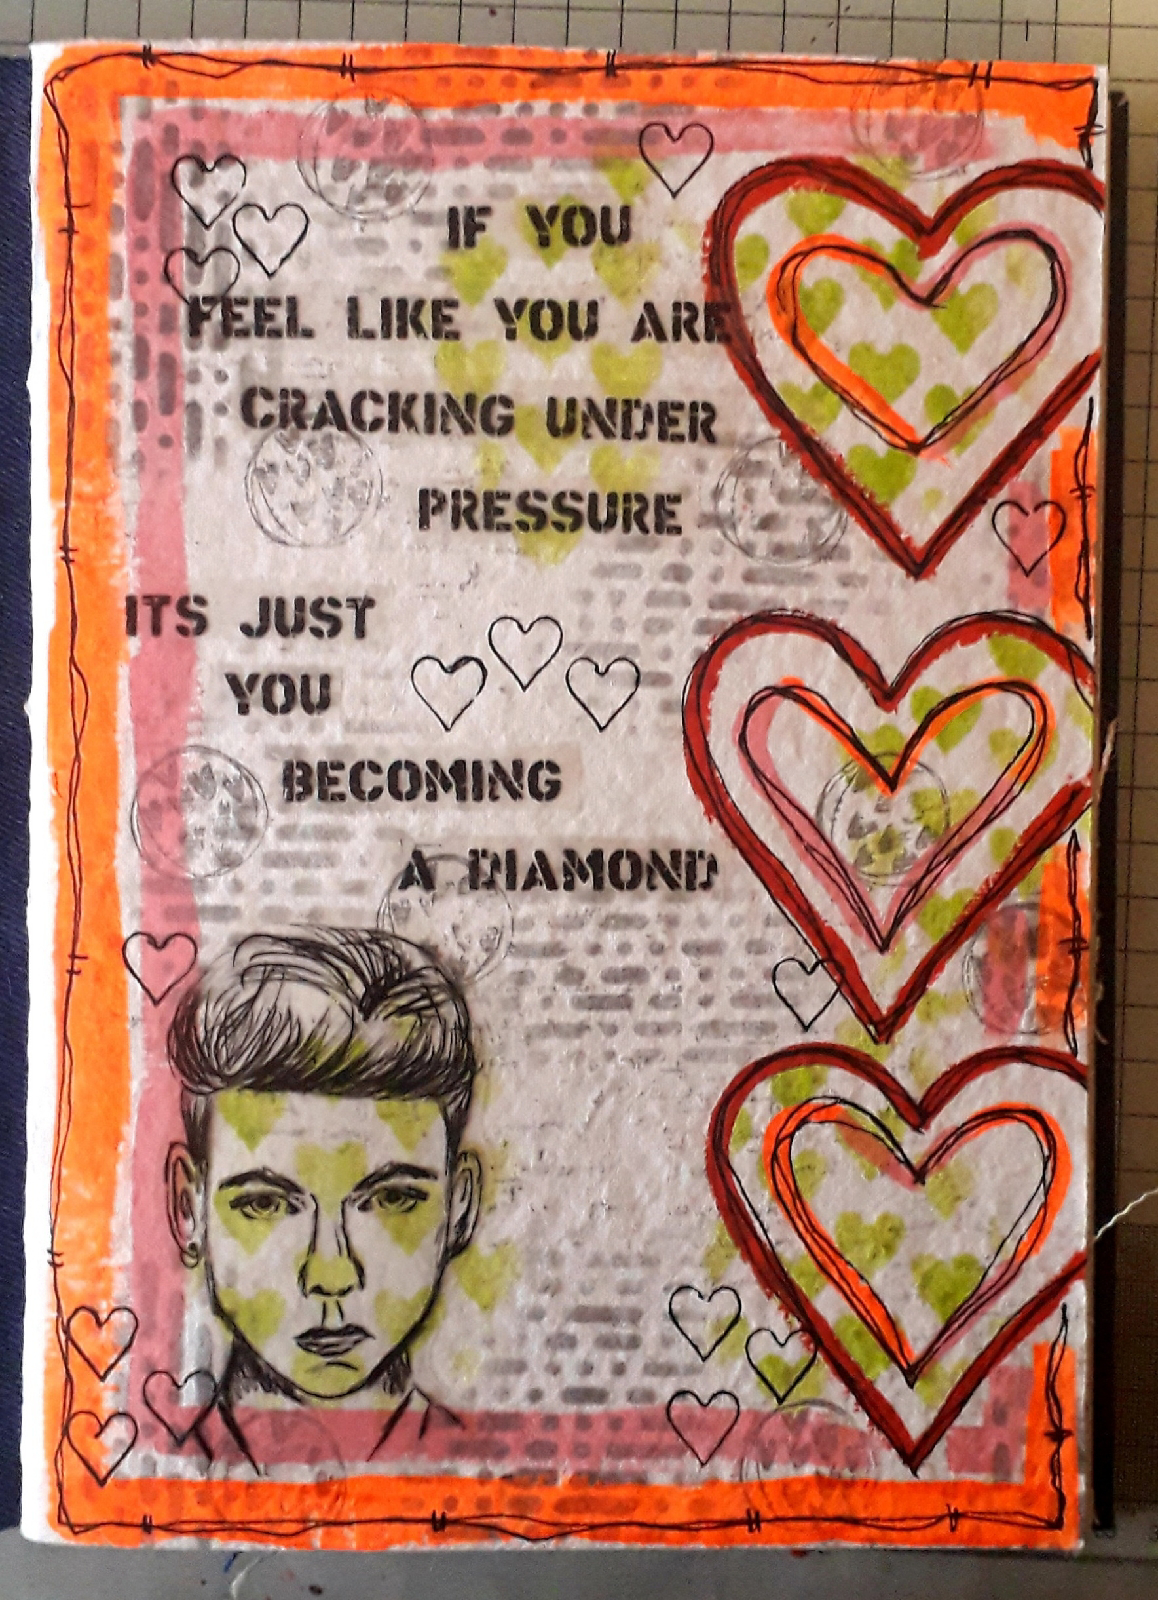
Below is a step by step guide to creating an art journal page using only Versafine Clair ink and watercolour paints. 

To begin, I blended charming pink and warm breeze ink over the page. I have found that foam blenders are the best for this. The inks don't blend as smoothly as other ink, but for art journaling this just adds more texture to the background.

Next I blended purple delight through the numbers inkable tag from set 1.
As soon as you have finished wash the inkable as the ink will stain it, although even if it does dry it won't reactivate as it is waterproof. You can not spritz with water and transfer the ink to the page like distress inks.

Next I blended warm breeze through the Moroccan tile inkabke tag from set 1 to add more layers.

Then I used purple delight to stamp one of the coffee stains and the numbers from the coffee stain stamp set. I also stamped the splats, from the asemic splats stamp set, using the twilight ink pad.


Next I added some asemic writing, using the stamp with twilight ink.

Next I used the twilight ink to stamp the film strip (unfortunately this set is now discontinued). I had to extend this by stamping half of it a second time.

I then added stamps from the journaling art elements 3 stamp set using puple delight and warm breeze ink.  I stamped the large numbers using charming pink ink.

On seperate card I used twilight ink to stamp my images and sentiment. I then watercoloured the bird and flowers. Once they were dry I cut them all out.

Finally I glued everything to the page using distress collage medium. 

Products used:
Versafine Clair ink pads - charming pink, purple delight, warm breeze, twilight
Bee Crafty Art Stamps - coffee stains, textures, film strip and circles, journal art elements 3, journaling essentials 2
Bee Crafty Doodle Art  stamps - rainbow birds, dandedaisy
Watercolour paints

Thank you for taking a look and I hope it's helped you to know that versafine clair is quite a versatile ink pad.
Alison 

Wednesday, December 27, 2023

Sally CT - Rainbow Bird Card

Hi there! thought I would show you how I made this quick and simple card today. I do love the contrast of a dayglo image on a neutral background. 

I began by taping mandala inkable #5 to a blank 6x6" kraft card. I blended white ink through the mandala  then removed the inkable. 
Using freehand borders #1 and brown versafine clair ink I added a border around the edge of the card. 
using the same ink I stamped the leaves and square of crosses from Journaling Essentials #2 onto the base card. 
I stamped one of the Doodle Art rainbow birds in Versafine Clair ink onto a scrap of mixed media card. Once this was dry, I painted the image using Dina Wakley gloss drops before cutting it out. 
I stamped the sentiment onto a scrap of kraft card using brown ink and cut it out.
Finally I added both sentiment and bird to the front of the card. 
I used:
6x6" Kraft card
Hero Arts Unicorn white ink
Versafine Clair ink in Pinecone and Nocturne
mixed media card

Thanks for looking! 

Sunday, December 24, 2023

Alison CT - Cracking under pressure

Hi everyone, today I'm sharing an art journal page created using transparencies, and different inkables.
To begin I used a pencil to draw through the 4" heart easy frame three times down the edge of a white page in my Dina Wakley media journal.
Next I used dylusions paint to paint the outline of the hearts and a freehand one inside it.
Next I used two of the colours of dylusion paint to create a birder around the page. I left this to dry fully.
I decided it needed the border between the hearts, so I painted this and left it to dry. Then I blended verdent versafine clair through the hearts dinkable from set 1.
Next I blended hickory smoke distress ink through the circle and line texture disc from set 4, turning it botth horizontally and vertically.
Then I freehand stamped some areas of the script background using hickory smoke distress ink. 
Next I used a black posca pen to add freehand lines to the three big hearts. I also drew through the hearts dinkable and stamped the circle with hearts, from journaling essentials 1, using versafine clair morning mist. 

Then I cut out the face transparency, leaving a small border. I glued it to the page using distress collage medium. 
Next I chose and cut out a sentiment from the transparency sheet and glued it to the page with collage medium. 
Finally I added a freehand border using a black posca pen.
Products used:
Easy Frame - 4" heart
Dylusions paint - mango punch, rose quartz, postbox red
Versafine Clair - verdent, morning mist
Dinkables - set 1
Art stamps - script background, journaling essentials 1
Black posca pen
Bee Crafty transparencies - faces 4, walk your own way

Thank you for taking a look and Merry Christmas.
Alison 

Wednesday, December 20, 2023

Sally CT - A pastel Daisy card


Hi there! Thought I would show you how I made this card today. with a change of sentiment it is suitable for almost any occasion.

I began by blending a little dusty Concord, peacock feathers and mustard seed distress ink along one side of an A6 piece of mixed media card. 
I brushed over it with a damp brush to blend the colours a little more. 
Once this was completely dry, I stamped the script background stamp in faded lilac over most of the card. You can see where I accidentally splattered the card whilst cleaning my stamp, but I carried on regardless!
I added a little more ink through the circles dinkable and attached the panel to a blank card.
Next I stamped the Dandedaisy onto a scrap of card in memento ink and coloured it with alcohol markers.
I cut out the daisy and added it to the front of the card along with a sentiment. 
Here is the finished card again. 
I used:
6x4 card blank
Distress inks in Dusty Concord, peacock feathers, mustard seed and faded lilac
Everyday sentiments #2 stamp set (Set 1 available here)
Memento ink in black
Alcohol markers 

Thanks for looking! 

Sunday, December 17, 2023

Alison CT - Dancing Daisy

Hi everyone, today I'm sharing an art journal page created using the Dancing Daisy stamp set on a denim page in my Dina Wakley blue journal. 
To begin, I carefully tore around all four sides of an old book page and used distress collage medium to glue it to the denim page. I left this to dry.

Next I dry brushed white gesso over the page. Again leave to dry.

When dry, I blended broken china distress ink over parts of the page.

Next I added areas if distress texture paste through the egg timers inkables big one.
Whilst the texture paste was drying, I stamped two of the large dancing daisy using versafine clair nocturne ink. I coloured them using my distress watercolour pencils and gel pens. Then I cut them out.
Next I glued the daisies to the page so that they looked like they are just one stem.

Finally I stamped the two sentiments directly on to the page using nocturne ink.
Products used:
Old book page
Distress Ink - broken china
Inkables big ones - egg timers
Doodle Art Stamp - dancing daisy
Distress watercolour pencils 
Blue, white and green gel pens
Wordage stamps - creativity words
Versafine Clair - nocturne 

Thank you so much for taking a look. 
Alison 

Wednesday, December 13, 2023

Sally CT - Snow Globe Sunrise

Hi there! Thought I would show you how I made this last minute Christmas card today. 

I began by inking through the snow globe aperture with Wilted violet around the edge, Saltwater Taffy next, then mustard seed in the middle.  
I removed the inkable and splattered with water, blotted, and then spattered with some white pearlized watercolour paint.
Once this was dry I stamped the text and snowflake corner stamps in opposite corners, and left to dry again. 
I inked up the snowflakes, using versamark ink and heat embossed, using fine detail silver embossing powder. 
Next I added a sentiment with versafine clair ink and matted and layered onto a base card.
Here is the finished card once more...
And here is a close up of an almost identical card but embossed in gold. 
I used:
6x6" card blank
5.5" square of smooth white card
Distress oxide inks in Wilted Violet, Saltwater Taffy and Mustard seed
water/ pearlized paint/ mica powder  to splatter
Snow Blizzard stamp set (no longer available) 
Distress ink in Spun Sugar
Versamark ink 
Paper for matting and layering. 

Related Posts Plugin for WordPress, Blogger...