Showing posts with label Hochanda. Show all posts

Wednesday, May 09, 2018

Marleen DT - Large Flowers - Hochanda Samples

Hey bloggers..
Wednesday again and im back with another bit of inspiration for
BeeCrafty..
 This time sharing the samples I made for the last show the Bee's had on Hochanda.

 For this show we used the beautiful large flowers.
Find the full selection in the STORE..


The rose, the script stamp and oxide inks. The flower is coloured with watercolours.


 This one was made with the sunflower stem. Sadly my sunflower stamp had a wee flaw in it so I couldent use the flower head, hence why I decided just to use the stem. I then added the tulip in with it. Ive stamped with oxide inks.


 Craft card and gold embossing powder.

For this one I only used the head of the rose. I coloured with watercolour pencils and finished with Nuvo drops.
 
 Brusho tag, stamping and then removing some of the colour with water and a paper towel.


This one is alcohol inks on photo paper and stamping with archival inks.

 For this one I made a mask for my flower. I stamped the flower, masked it and then stamped all my greetings. I coloured my flower with watercolour pencils and finished with a glitter pen over it.

 Another water colour.. This time a water colour background. Stamped and finished with black splashes.


 Ehhh I dont remember this one lol.. I think it was water colour cardstock.. I THINK it was distress ink but it might have been watercolour... I do remember I coloured the rose ink with a wink of stella shimmer brush though!!! Sorry


This one is a distress ink mop up background I made for my last demo in Belfast.. It made on crumbled watercolour cardstock, mopped up and then ironed to straiten out. I then stamped my flower and sentiment and finished with the crackle stamp.


 Once again the beautiful sunflower, with no flower lol.. Again I just used the stem, stamped with oxide ink, same with the sentiment and finished with clear nuvo drops..

Now, that is it.. A bunch of samples this time.. Sorry for the text being all over the place, my pc wont play nice today but hope you can make it all out ok.
  Thank you for popping by and for any comments left behind.
Dont forget to come visit me on FaceBook, Twitter, Instagram, Pinterest, Youtube or my FB page.
 Happy Crafting


Wednesday, January 10, 2018

Marleen DT - SNEAK PEAK

Hello Bloggers..

I have a very exciting post to share today..
I have gotten the honour of sharing a sneakpeak of the BRAND NEW stamps from
BeeCrafty.

Make sure you tune into Hochanda this friday at 10am & 3pm.
Image may contain: 1 person, smiling, text 

The stamps for this brand new release are amazing and its all about Safari.
They are'nt yet in the BeeCrafty STORE, but will be avaliable on Hochanda from Friday.

Here are my samples, and DO look forward to se what all the other girls have made.. Their samples are amazing as always..
 Stamping and black embossing powder.

 Alcohol inks on vellun, stamping and black embossing powder.

 Gelli plate background with acrylic paint. Stamping and high lights with white gel pen.

 Distress ink background, water sprayed through star stencil. Circles die cut, stamped and tripple heat embossed with black embossing powder, smothered in distress ink.

 Another Gelli plate background and plain black stamping.

The sentiments I've used are the new BIG sentiments. The sentiments are the same as previously released BUT they are BIIIIGGG.. I just love them. Next week I will share a few more samples I have made for the show, but only used the sentiments.

And that is it for today. Thank you for popping by and for any comments left behind.
Dont forget to come visit me on FaceBook, Twitter, Instagram, Pinterest, Youtube or my FB page.
 Happy Crafting

Wednesday, November 01, 2017

Marleen DT - Hochanda Samples

Hello Crafters

Today I want to share my samples for the resent BeeCrafty show on Hochanda. Sam did 2 fab shows with the music collection.
Sadly due to storm Ophila, post in Ireland was delayed and by the time my stamps landed, my samples was due to be returned.
Never the less I just had to play and I made a stack of cards.

You can find the stamps in the STORE HERE

 Distress ink, black stamping, white ink through stencil and white gel pen.

 Piano stamp heat set with embossing powder, partial stamping of my greeting, Treble cleft stamped and fuzzy cut. Everthing smothered in distress ink.

 
Lustre Luxe on MDF tags, more Lustre Luxe through stencil. Staming with Archival.

Distress ink with water splashes. Black stamping.
 
 Just a lot of making and stamping. Microphone stamped and fuzzy cut as is sentiment.

More Distress ink and just stamping on top.

Stamping with Distress Oxide

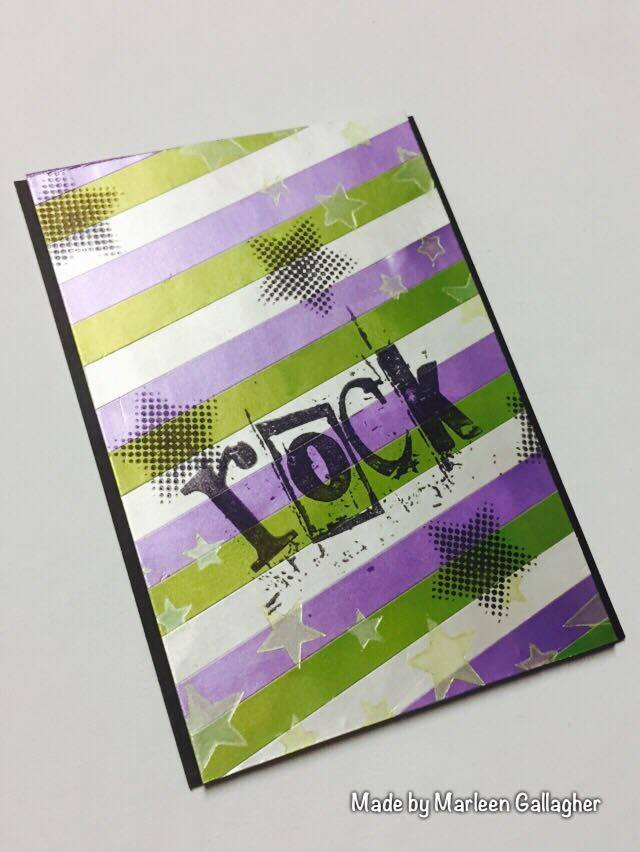
This one is strips of paper coloured with Lustre Luxe and then assembled and stamped with Archival ink. I also used Lustre Luxe through the star stencil.

I loved making these. I am (was) trained in music and singing so anything with a music theme is very close to my heart. Each stamp is so amazing and although they all fit so perfect together, each can easily stand alone or work with whatever stash you have.

And that is it for today. Thank you for popping by and for any comments left behind.
Dont forget to come visit me on FaceBook, Twitter, Instagram, Pinterest, Youtube or my FB page.
 Happy Crafting

Wednesday, October 18, 2017

Marleen DT - Hochanda Samples 12th October

Hey Bloggers..

Once again my turn to share some inspiration for
BeeCrafty

Today I was to share my samples from last weeks show (the 12th Oct) on Hochanda.
I love this collection of stamps as I love making backgrounds and just finishing my cards with a greeting.. And this collection fits perfect for that.

Find all the stamps and many more goodies over in the online STORE.

This was the very first sample I made.. I LOVE the circle art boards BUT I still dont have much confidence when it comes to the MDF.. I dont know why as its really just like working on a piece of card.. But this is what I can up with and the result is growing on me lol..

Anyway, its Lustre Luxe and stamping on stop. Use a waterproof ink to stamp on top of Lustre Luxe. I finished with a bit of Lustre Luxe through one of the Dinkables..

A MDF tag.. and more Lustre Luxe. and more Lustre Luxe through a Dinkable..

 
And more of the same.. MDF tag, Lustre Luxe, Stamping and more Lustre Luxe through a Dinkable..

This one got to be my favorite of my samples.. But if you know my crafting, you'll know how much I love using rainbow colours.. I simply stamped with the smallest circle from the set randomly around my card and coloured in with distress ink. My greeting is stamped with waterproof ink onto vellum. Make sure you leave your vellum well to dry, It takes time, but its worth it..

Using a vellum overlay for your greeting, means you can still SEE the background behind, but your sentiment takes pride of place.

Made just like above only using the little square stamp and a different sentiment.

And another one, only using the little heart, a different greeting and alcohol markers to colour in. 
As I used a cardstock not designed for alcohol ink markers, the colouring turned out a bit streaky. I thought of changing it, but I actually really like the effect it gave so decided to leave it.

Well I carried on along the same lines with this one. Only my satmping was more deliberate this time. I also used the middle square and then the smaller square inside. And instead of a vellum overlay, I heat embossed my greeting on to black card stock.

And then I finally changed gear lol.. This background is one I have tried before and I still love the result.. I used the harlequin stamp and simply lined up my stamping. I then did the mop up tecnique with some purple distress ink. I diecut the heart out and stamped my greeting strait onto my card blank before adding my background.

And then it was time for oxides.. It just had to be done lol..
I used various coulours through various Dinkables.. I sprayed a bit of water over my inks and that gave this card this dusty look. My greeting is stamped on a white piece of card and just cut out before sticking to my card.

And then this one came alive.. It was simply just me cleaning my Dinkables from the above card.. I just sprayed a bit of water onto the stencils and preiing the card onto the stencil.. I did it to all the Dikables and this is the result.. I then stamped a few of the wire border stamps and my greeting and voila..

For this one I used paste through a Dinkable.. I love this wee stencil and I thought it really lended it self to paste as the lines are sooooo wee. (small)
Once my paste was dry I once again did rainbow colours, once again using oxides, and finished woth water spalshes.
And last but not least..
My very first play with the Skylines.. Ohh these was lying staring at me while I made all the other samples.. And I was nearly scared of playing with them... I have never done anything like this card before and its sooo out of my comfort zone.. BUT I love the result..
I used the bridge stencil and made the bridge... I then cut out the bridge.. I then made my "sunrise" and added my buildings in the back. I then finished by adding foam tape on the back of my bridge and adding it to my card..

I could have added a greeting in the sky but to be honest I really liked it as is..
And that is all from me today. I hope I have given you a bit of inspiration for what you can do with your stamps.

Thank you for popping by and for any comments left behind.
Dont forget to come visit me on FaceBook, Twitter, Instagram, Pinterest, Youtube or my FB page.
 Happy Crafting


Wednesday, October 04, 2017

Marleen - Da Vinci Samples

Hey Bloggers..

I just realised that I didnt share my samples from the last Hochanda show for 

So today I thought Id share with a little write up on how I made them..
 Bev was on Hochanda last week with the Inspired by Da Vinci series. Some older stamps but added with some new amazing ones.. 
 This one is using the Vetruvian Man stamp over a background made with Oxides. I used the script stamp to add a bit of texture.
 This one seem to have gotten some serious attention.. But its a very simple card. I used a smooth card stock and added oxide inks. It was fun to see how they reacted to the smooth card stock. I then simply stamped the signature stamp repeatedly. The wings I stamped seperately, coloured with distress ink and fuzzy cut.. That was it..
 This one is also Oxides. But I heat embossed the script stamp in gold embossing powder. I then added my background to my card blank and die cut a circle. The circle I cut out, I added glue on the back, closed my card and stuck the circle "back in place". When the card gets opened the circle will be stuck to the inside of the card. I then stamped my Vetruvian man onto accetate and heat embossed with black. I stuck him behind the window of my card and finished by die cutting a black border to go around the edge.
 For this one I decided to make a shaker card. The whole card front is made as 1 piece. I used my circle stencil/mask to make the darker circle in the middle. I then stamped my Horse image and used the crackle stamp to add a bit more dimention.. I then die cut my circle, added accetate to my window, loat of double sided foam and added shaker bits before sticking it all together.
 This one is done as the blue signature one as above. Smooth card, oxide inks and signature stamp. I just cut my panel to fit, stamped my wings, coloured and fuzzy cut.
 Oh this one is my favorite of them all. The Da vinci stamps what the ones that made me discover BeeCrafty. And the vetruvian man is my favorite of them all. Here Ive used him on an A5 card over a distress ink rainbow. The white circle is just me stamping on to white card and die cutting.
 Another rainbow.. Individual pieces of card coloured with distress ink and pieced together. Cracle stamp for extra texture and vetruvian man in the middle.
 Last but not least.. An MDF tag.. I used my beloved Lustre Luxe strait on to the tag and used a seection of the stamps. I made the circles also with Lustre Luxe and just used my ink blending tool to make them.

And that is all from me today. Thank you for popping by and for any comments left behind.
Dont forget to come visit me on FaceBook, Twitter, Instagram, Pinterest, Youtube or my FB page.
 Happy Crafting


Related Posts Plugin for WordPress, Blogger...