Showing posts with label Bee crafty Stamps. Show all posts

Wednesday, February 08, 2017

Marleen DT - Dance in the rain...

Hey Bloggers..
Back again with my Wednesday post for
BeeCrafty
.
 I missed last week due to circumstances out of my control but have a wee project to share with you for today.

For this week I have made a little wall hang. Its one those project I started a while back but just didnt know how to finish. I had the black MDF heart painted and the lace added but that was it.. 
It came together as I had pulled out a stack of unfinished projects, the heart lying on top, while I still had al my BeeCrafty goodies on the table.. And the 2 just merged together..

I love this saying from BeeCrafty..
"Life isnt about waiting for the storm to pass.. Its learning to dance in the Rain"
(Get the stamp HERE)
I often use this quote in my own life and something I try to teach my children.. Sometimes we really just have to get on with it, no matter what life throws at us"..

Anyway, very easy to make.. MDF heart, painted with crackle glaze, painted over with black. Lace and pearls added round the edge.
Sentiment stamped and heat set with black embossing powder before diecutting with a circle die. 
Few flowers added and voila.. all done..

And that is all from me for today.
 Thanks for popping by and for any comments left behind.
Dont forget to come visit me on FaceBook, Twitter, Instagram, Pinterest, Youtube or my FB page.
 Happy Crafting

Monday, October 24, 2016

DT Kerrie - 'Baby It's Cold Outside' - Beryl FASHIONette's

Hiya and Welcome to my Monday Post for Bee Crafty Stamps

This week I am sharing with you an 8x8inch Card that could be used as a Christmas or Winter Birthday card, I was inspired to use pale shades of ink for the background and bolder for the main image.


I love to use uncommon colours for my winter makes just to be a little different... blues with browns is one of my favourite combinations


For the background I used the 'Background Text' stamp from the 'Snow Words' stamp set which I stamped using 'Wheat' Versamagic Ink, I then stamped some 'Snowflakes' from the 'Snow Flake Flurry' stamp set using 'Aspen Mist' Versamagic Ink. I love the subtle look these pale inks give.


I stamped the gorgeous 'Beryl' from the 'FASHIONettes' collection using 'London Fog' Memento Ink and then coloured her using a mixture of my coloured pencils, I chose similar but bolder colours from the background to make her stand out. I drew over her eyes and eyelashes using an archival liner pen to make them pop


For the senitment I stamped 'Baby It's Cold Outside' from the 'Snow Words' stamp set, first using Aspen Mist and then I stamped again using 'Rich Cocoa' Memento Ink offset from the first to create a shadow effect.


I created the Flourishes using some diecuts and some snowflakes that i stamped onto pearlescent card using the Aspen Mist and Wheat inks from before. I cut the snowflakes out and layered them over the diecuts, adding gems for some bling.

I really love how this card has turned out, I may just have to make a few more for the festive season

Thank You so much for visiting my post today, please visit again soon for more gorgeous makes from the Awesome Design Team

Krafty Hugs xx
please visit Kerrie's Blog to see more her creations

Tuesday, August 23, 2016

Christmas Kaleidoscope

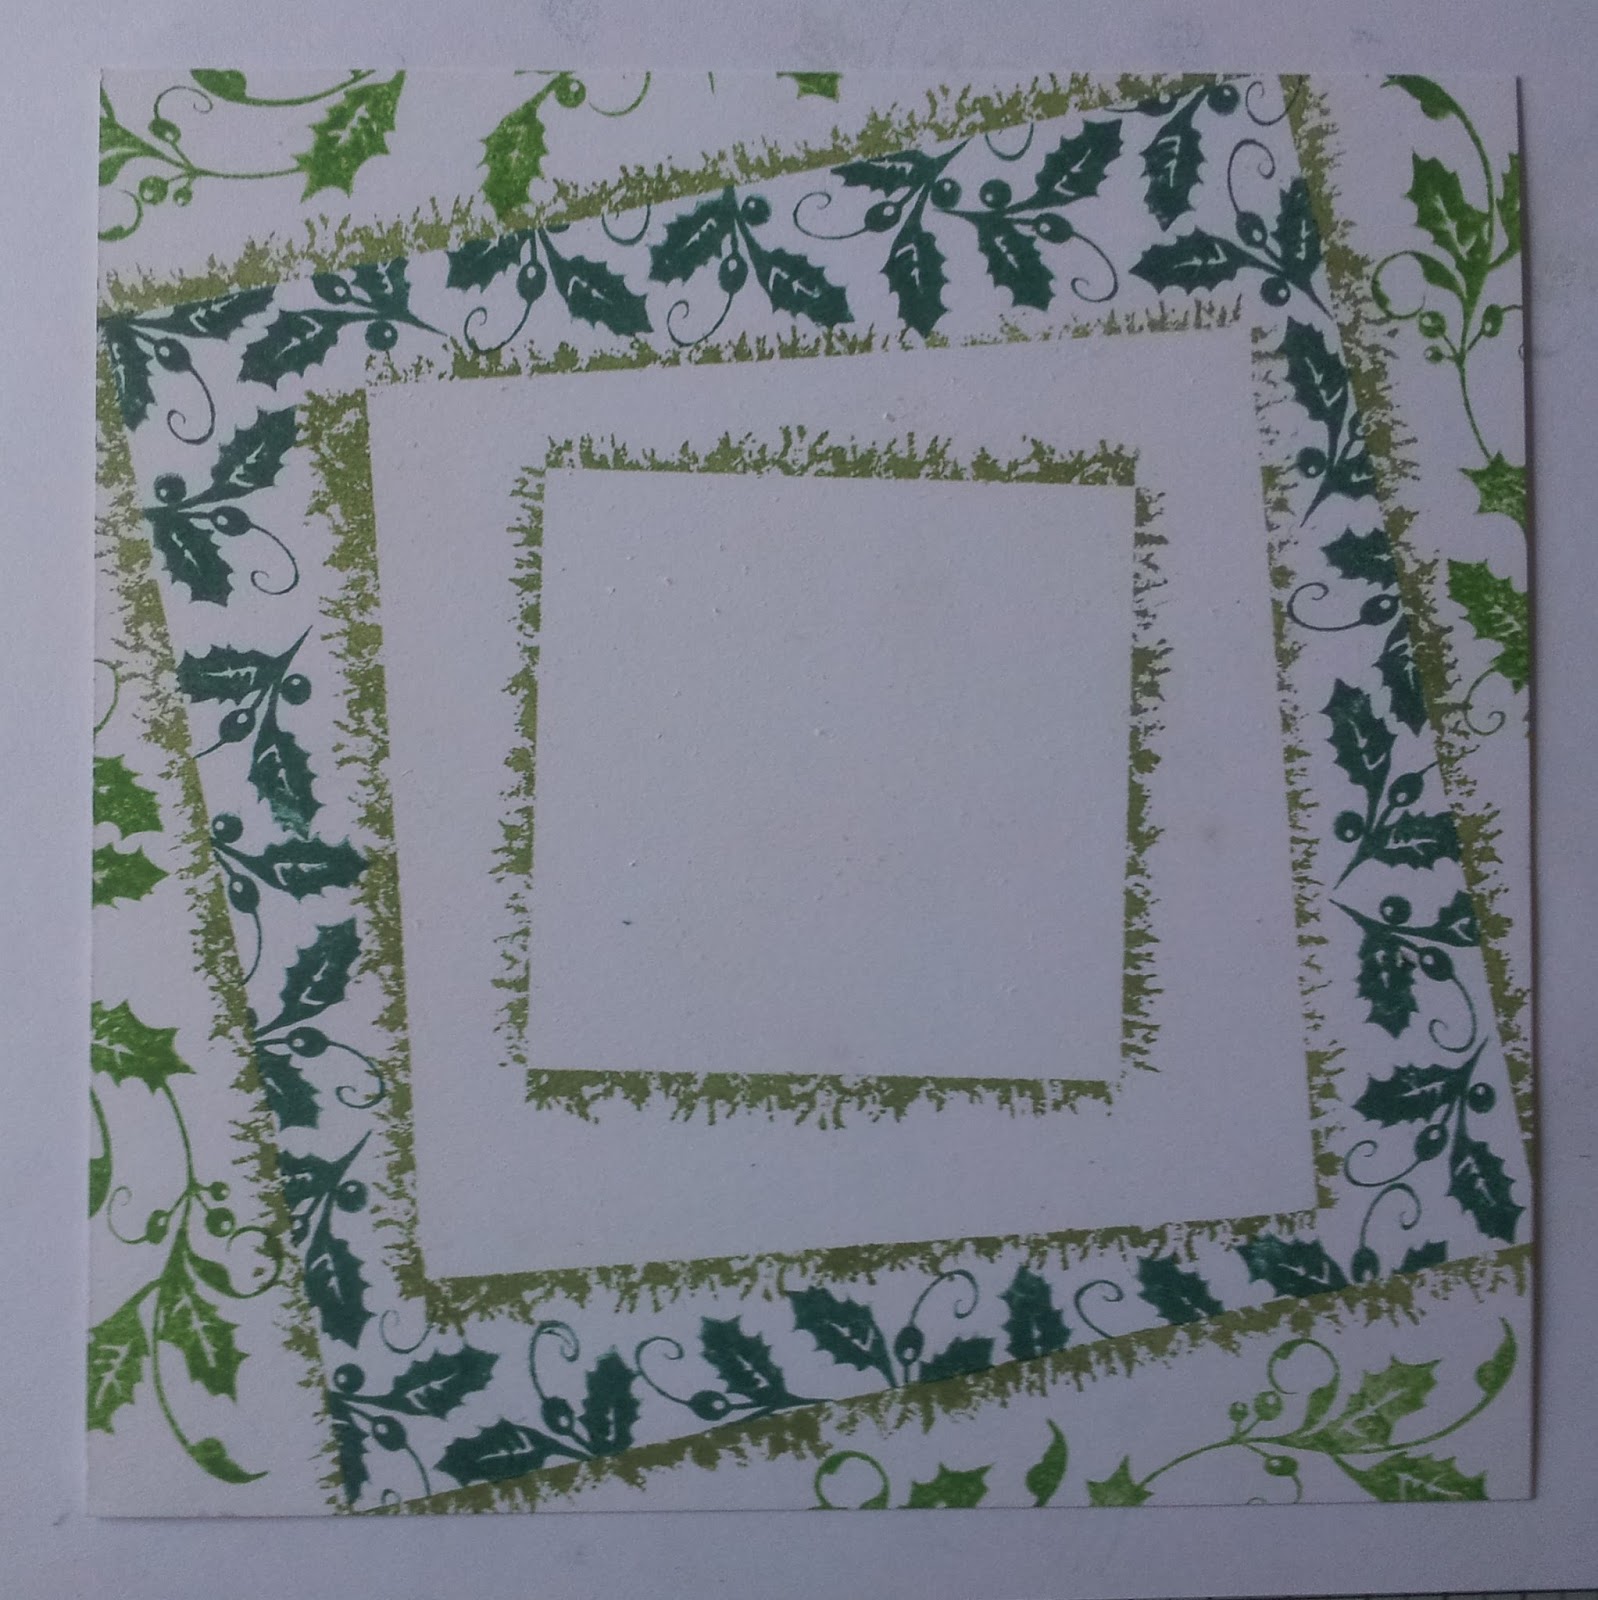
Morning, Today I want to share a card that shows just how useful the square Inkables are, this is just one use for them but there are many, many more. I have also used a selection of the Christmas Stamps that Bev launched on Hochanda last Thursday (18 August). I think we all take some tools for granted or look at them and dont realise how else we can use them,Me Included.

This card I completely flat, so brilliant for posting. However id does appear to be be fairly layered. By using the Inkables and overstamping it gives the illusion of dimension. To start with, I took my card base and put the largest Inkable in place using temporary spray adhesive, here I used Stick n Spray from Crafters Companion.

The using Memento Bamboo Leaves, I stamped around the outer edge using the large tree stamp. I then repeated this with the other sized Inkables, rotating them slightly each time ensuring the centre one was square with my card.

In the outermost square I stamped the white space using the Holly Flourish and Memento Bamboo Leaves. In the next space I used the individual Holly Stamp and this time used Pine Needles Distress Ink.

For the next space I used only the swirl part of the Holly swirl and stamped using both the Bamboo Leaves and the Pine Needles. I then overstamped all of the edges with Black Versafine, making sure the green showed from beneath.

In the centre square I stamped my Christmas sentiment and edged using the smaller Holly Flourish with Bamboo Leaves.

I then added the holly berries, using Cosmic Shimmer PVA glue in 'Festive Berry'. I then took a Zig glue pen and highlighted all of the edges with gold foiling to add even more dimension.

To compete the card I layered it first on to red Mirror Board and then a black base card.

I hope you have enjoyed the step by step I have shared with you today and the finished card. Thank you so much for taking the time to visit and hope you will come back again very soon. Take care and Happy Crafting.xx

Monday, July 25, 2016

DT Kerrie - Vera - Be Yourself

Happy Monday everyone - I'm back today with another make from me using some Gorgeous Bee Crafty Stamps

One of my Faves ever is 'Vera' from the FASHIONettes Collection - today I have teamed her up with one of my fave colours 'Aqua' xx


I stamped 'Vera' onto smooth caardstock using light grey ink and coloured her using my fave alcohol markers. Once coloured I drew back over her eyes and lashes using a black archival ink liner pen (a bit of a trade mark of mine 


I stamped the 'Star Flowers' from the Fabulous Flowers collection 7 times and coloured in the larger and medium flowers using the same aqua coloured markers from before. I added a little sparkle using a glittery gel pen around some of the edges and centres. Once dry I cut them all out, I then embossed them from the back on a moulding mat using a round embossing tool. Next I stamped the Larger Branch from the 'Beautanicals - Branches' set onto offcuts of cardstock using light grey and dark aqua inks which I then trimmed round them to create some foliage for the flowers.

To make up my Card I used a 7x7 Cardblank which I then trimmed some Aqua mirror board, textured mint cardstock and some aqua spotted backing paper and layered these onto the card front using multi purpose glue. I trimmed the 'Vera' Image and mat & layered using offcuts of the mirror board and mint cardstock from before, I also punched a strip of mirror board using a border punch which I glued accross the card front before mounting the Image topper onto it using foam tape.

Using a Glue Gun I attached the flowers and foliage at opposite corners of the image layering them up. I added gems into the flower centres, onto Vera's earrings and into two corners of the card front. To finish the card I stamped the 'WORDage Be Yourself' sentiment onto scrap cardstock, I trimmed the larger word away from the rest of the sentiment, mat & layered both sections and fixed to the cardfront at opposite corners using a glue gun.

Thank You so much for visiting my post today - please come back to the Bee Crafty Blog again soon fo rmore gorgeous makes from the Talented Design Team

Krafty Hugs xx

Monday, July 11, 2016

DT Kerrie - Fashionette 'Peggy' Blue Floral

Hiya and welcome to my Monday Post for Bee Crafty

Today I would like to share with you a nice simple make to show how you can team up your Bee Crafty Stamps with pretty papers/cardstocks in your own crafty stash 

I am a terrible hoarder of all things craft and I even have a massive box full of off-cuts that were either to big or too lush to through away. I always feel I need to use up every little bit. I also took a step back into my own comfort zone of colouring and pretty papers


I also used up the waste from this card by using some of my Die's to create the circular shapes of the image topper and matt aswell as the dark blue flowers

The cardblank is an old one from a set I never finished using from years ago - as i am on a no-spend ban I am making use of all my older stash - after the massive de-clutter I had over the last few weeks i found lots of hidden treasures that I had forgotten about


I stamped the gorgeous 'Peggy' - FASHIONette stamp onto hammered cardstock - which I had pre-cut using a circle die. I coloured her using lots of pencils from my pencils box... I have a random mix of lots of brands but I always use them together as they all blend together quite well, from basic crayola to more expensive brands

The lovely sentiment  'With Love' - WORDage I stamped onto white card and i used off-cuts from the backing paper and matting cardstock to tie it in with the colours used

I hope I may have encouraged you all to dig deep into your boxes of stash to possible use up some of your treasures

Thank You so much for visiting today - please do come back to the Bee Crafty Blog again soon to see Gorgeous Make from the Brilliant Design Team

Krafty Hugs xx

Monday, July 04, 2016

DT Kerrie - BEAUtanincals Oak - Life & Rain

Hiya and Welcome to my Monday Post for Bee Crafty

Over the Weekend I have been getting inky with my Bee Crafty stamps, I have been using some of the New Leaf Sets from the BEAUtanicals Collection 

These Leaves are really lovely to stamp and colour in using my Alcohol Markers - I coloured some Leaves and fussy cut out using sharp scissors to use them as embellishments on my projects


I shared a make using these Maple leaves into the Bee Crafty Stamps Facebook Group over the Weekend - dont forget to join that group if  you are not already a member as its a good way to get info about upcoming Hochanda Show and to see gorgeous inspiring makes from the Bee Crafty Team and other Bee Crafty Fans 

Items used in this Project from Bee Crafty...

For today's project I stamped and coloured some of the smaller Oak Leaf from the BEAUtanicals Oak stamp set, I coloured them using shades of brown alcohol marker to tie in with the colours I chose to colour 'FASHIONettes - Rosie' - I adore these cute girlies they are so much fun to colour


I picked a 7x7inch Cardblank and added some layers to the front using backing papers and brown cardstock which I distress inked the edges using Frayed Burlap distress ink, I also ran a dark brown alcohol marker along all the edges. I layered them up with a punched edge offcut of the same brown cardstock, I matt & layered the coloured image to create a toppeer and attached it to the card using foam tape to add some dimention

I used a glue gun to fix the leaves to the card, tucking them under the coloured image topper. I stamped the 'WORDage - Life & Rain' sentiment using brown archival ink, matted using an offcut of brown cardstock and fixed to the card front using the glue gun tucking the sentiment slightly under the image topper. I used some grey/blue flat back pearls to finish 


Thank You so much for visiting my Post today, please visit the Bee Crafty Blog again soon to see more Gorgeous makes from the Amazing Design Team 

Krafty Hugs xx

Tuesday, June 21, 2016

Autumn Lady

Morning. I am very excited to share this with you today. I have thoroughly enjoyed designing with these lovely stamps from Bee Crafty, hand drawn by Sam. The shows will be on Hochanda on Friday 24th June, Please tune in Bev's shows are always great and well worth watching.

I started by stamping the face onto my card using Memento Black Ink. My card measured 8 1/4 '' square.

I then started planning where to stamp the Maple and Oak leaves to complete my design. To do this I used masks made by stamping the stamps onto copier paper, I used 2 of each.


I arranged the leaves to compliment the face and features, then added branches to complete the look. I worked from the back forward to add interest.

Next I added my sentiment, also on the show. There really are some smashing ones to choose from.

Taking a selection of browns, reds, oranges and yellow alcohol markers, I coloured the leaves. Then the neck and face with skin tones.


I left the rest of the card uncoloured, completely white. Normally I would never leave the background plain, but for this project I felt it was the right thing to do. To finish the card I backed it onto brown cardstock. 

Thank you so much for joining me today, I hope you have enjoyed the step by step I have shared as well as the finished card and hope you will join me again very soon. Take care xx
Related Posts Plugin for WordPress, Blogger...