Friday, July 31, 2020

Odd Numbers by Ann DT

 Odd Numbers

                                                by DT Ann Roberts


Do you have a journal? Apart from being great to express yourself in many ways, they're good to use up your excess of paint & ink & to experiment/ play in. Often I look back through it, finding it inspires me when I get stuck on what to create. Odd numbers are a go to, for most projects be it 3,5 ,7 or more however there's always an exception to the rule!! 

  D'Inkables, Triangle Lattice, Regular Dots & Stitches 1
  Distress Oxides; Speckled Egg, Weathered Wood, Peacock Feathers & Squeezed Lemonade
Black Versafine
Stamps: Birds & Butterflies & matching dies & Ledger
Washi Tape; Vintage Numbers
Clear Embossing Powder 
Black Paint
Texture paste
Posca Pens


I used a 14cm x 14cmpiece of card.
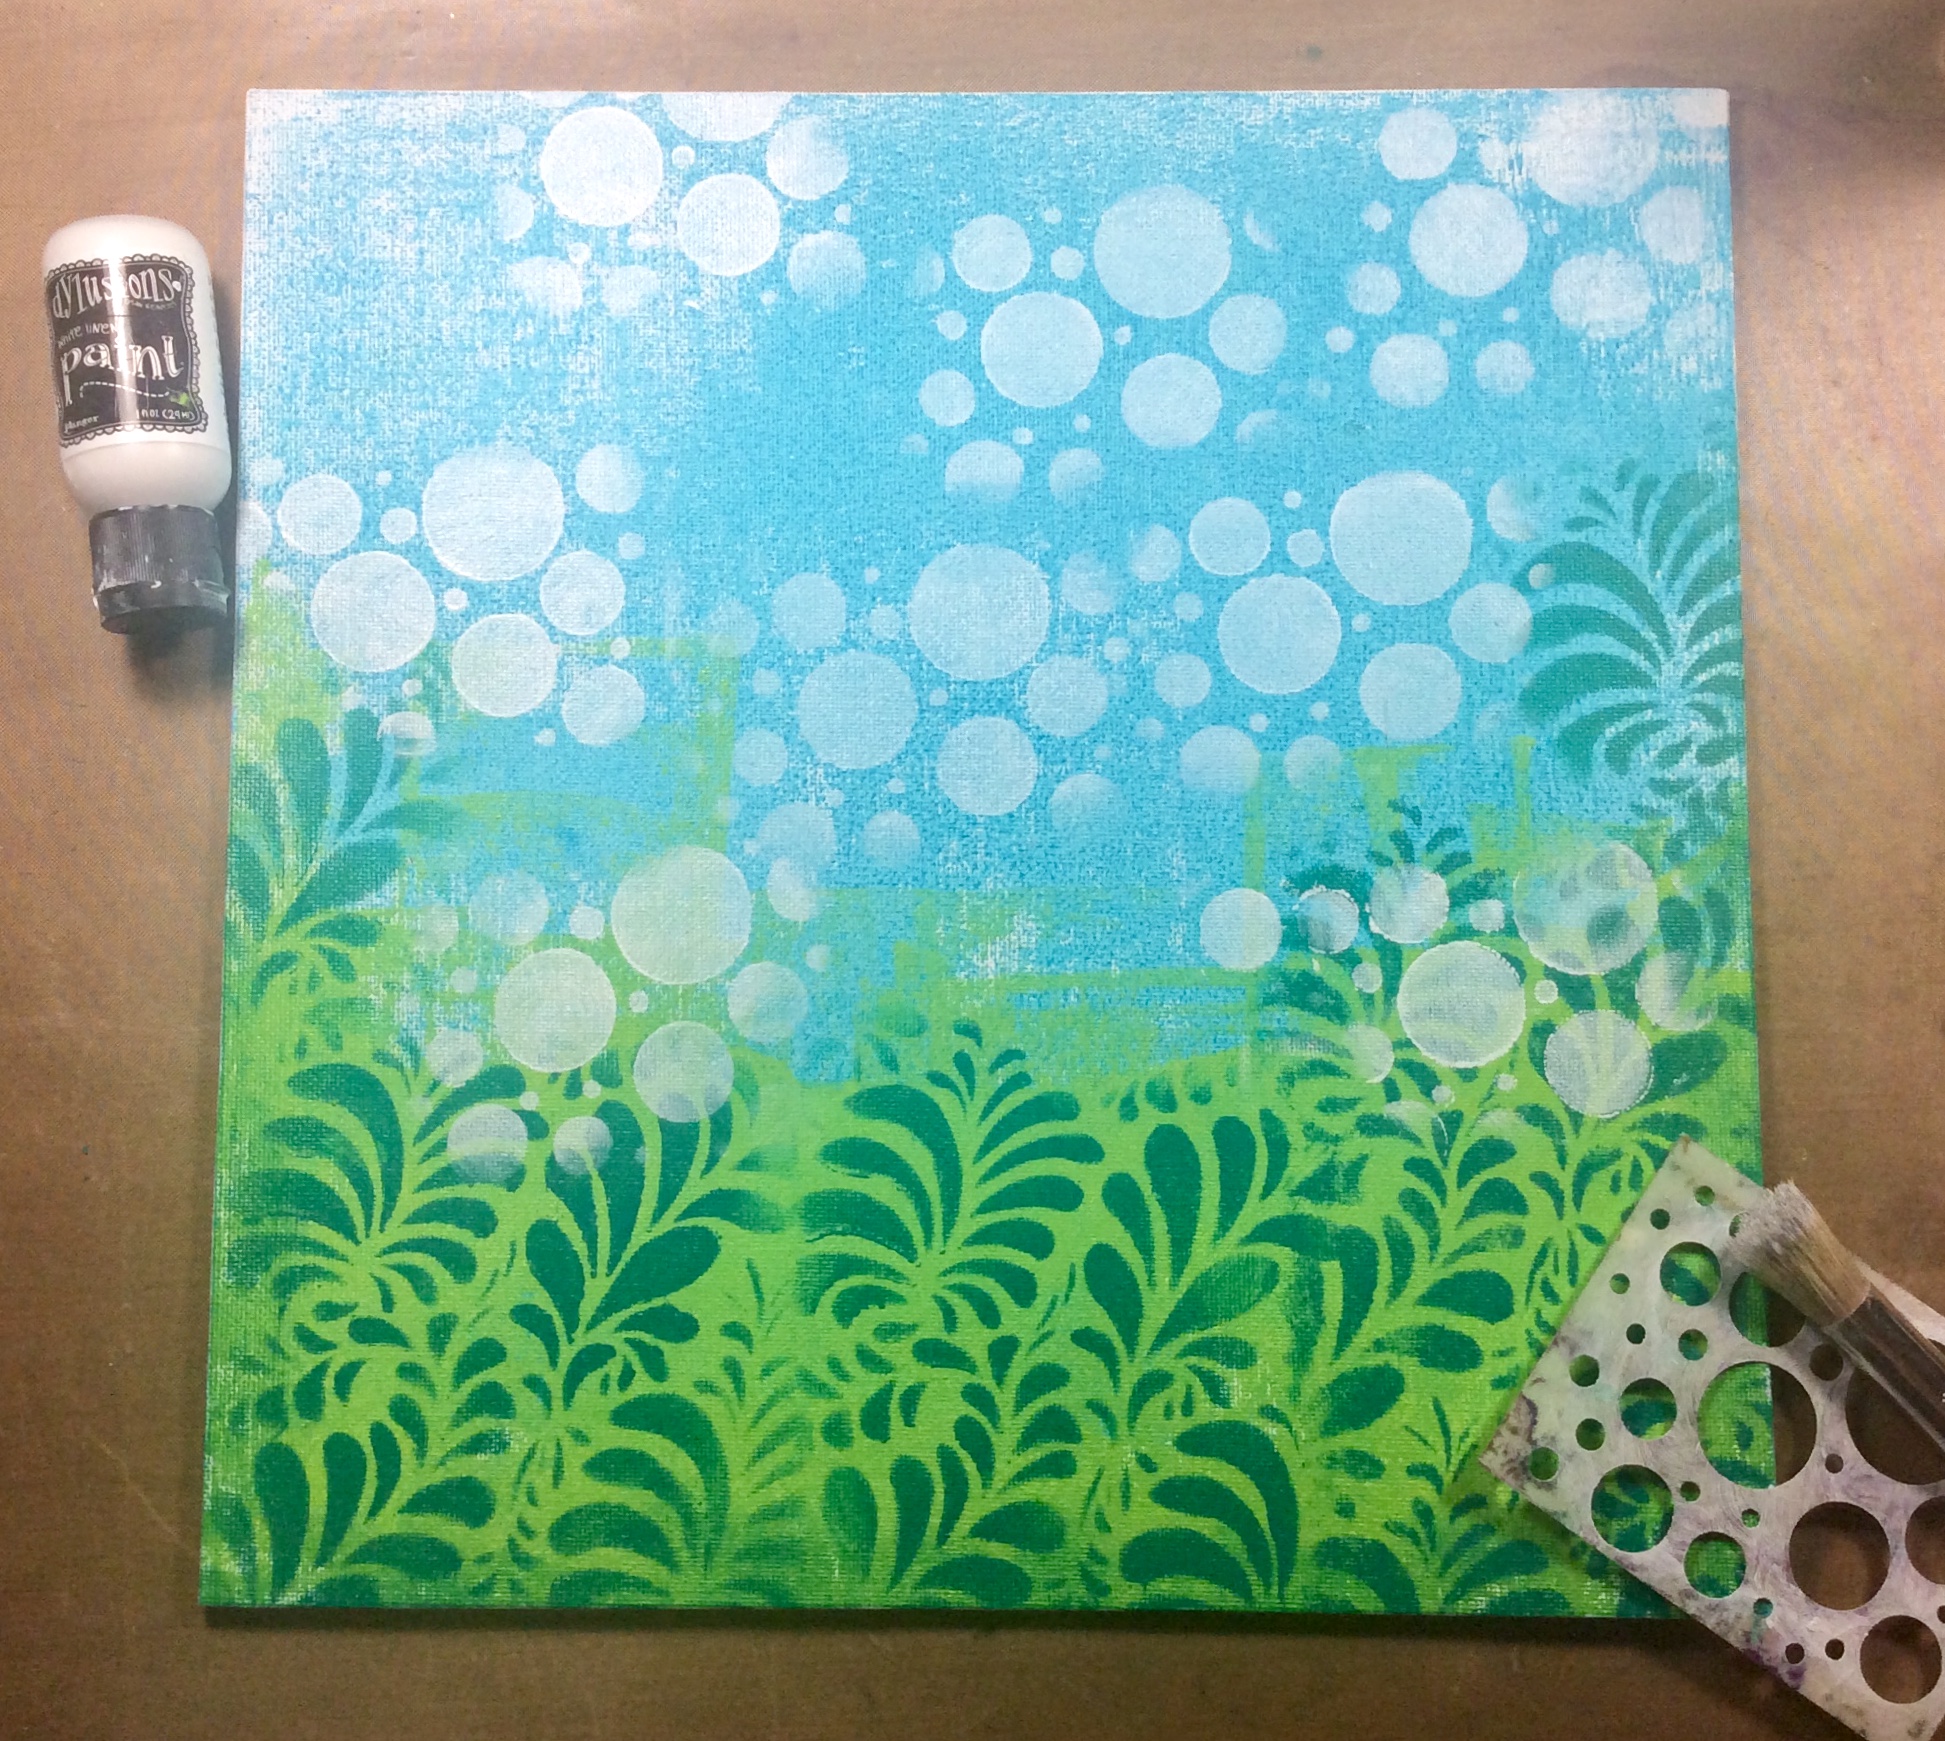
First ink through your Triangle Lattice & Egg Timer stencil as pic 1 & 2, this tends to work best in threes.
Add 3 strips of the Vintage Numbers Washi tape pic 3


 Pic 1


  Pic 2


  Pic 3

Using the Peacock Feathers & Squeezed Lemonade, add details to background, (once paint is dry) with Stitches 1 & Regular Dots stencils. Pic 4

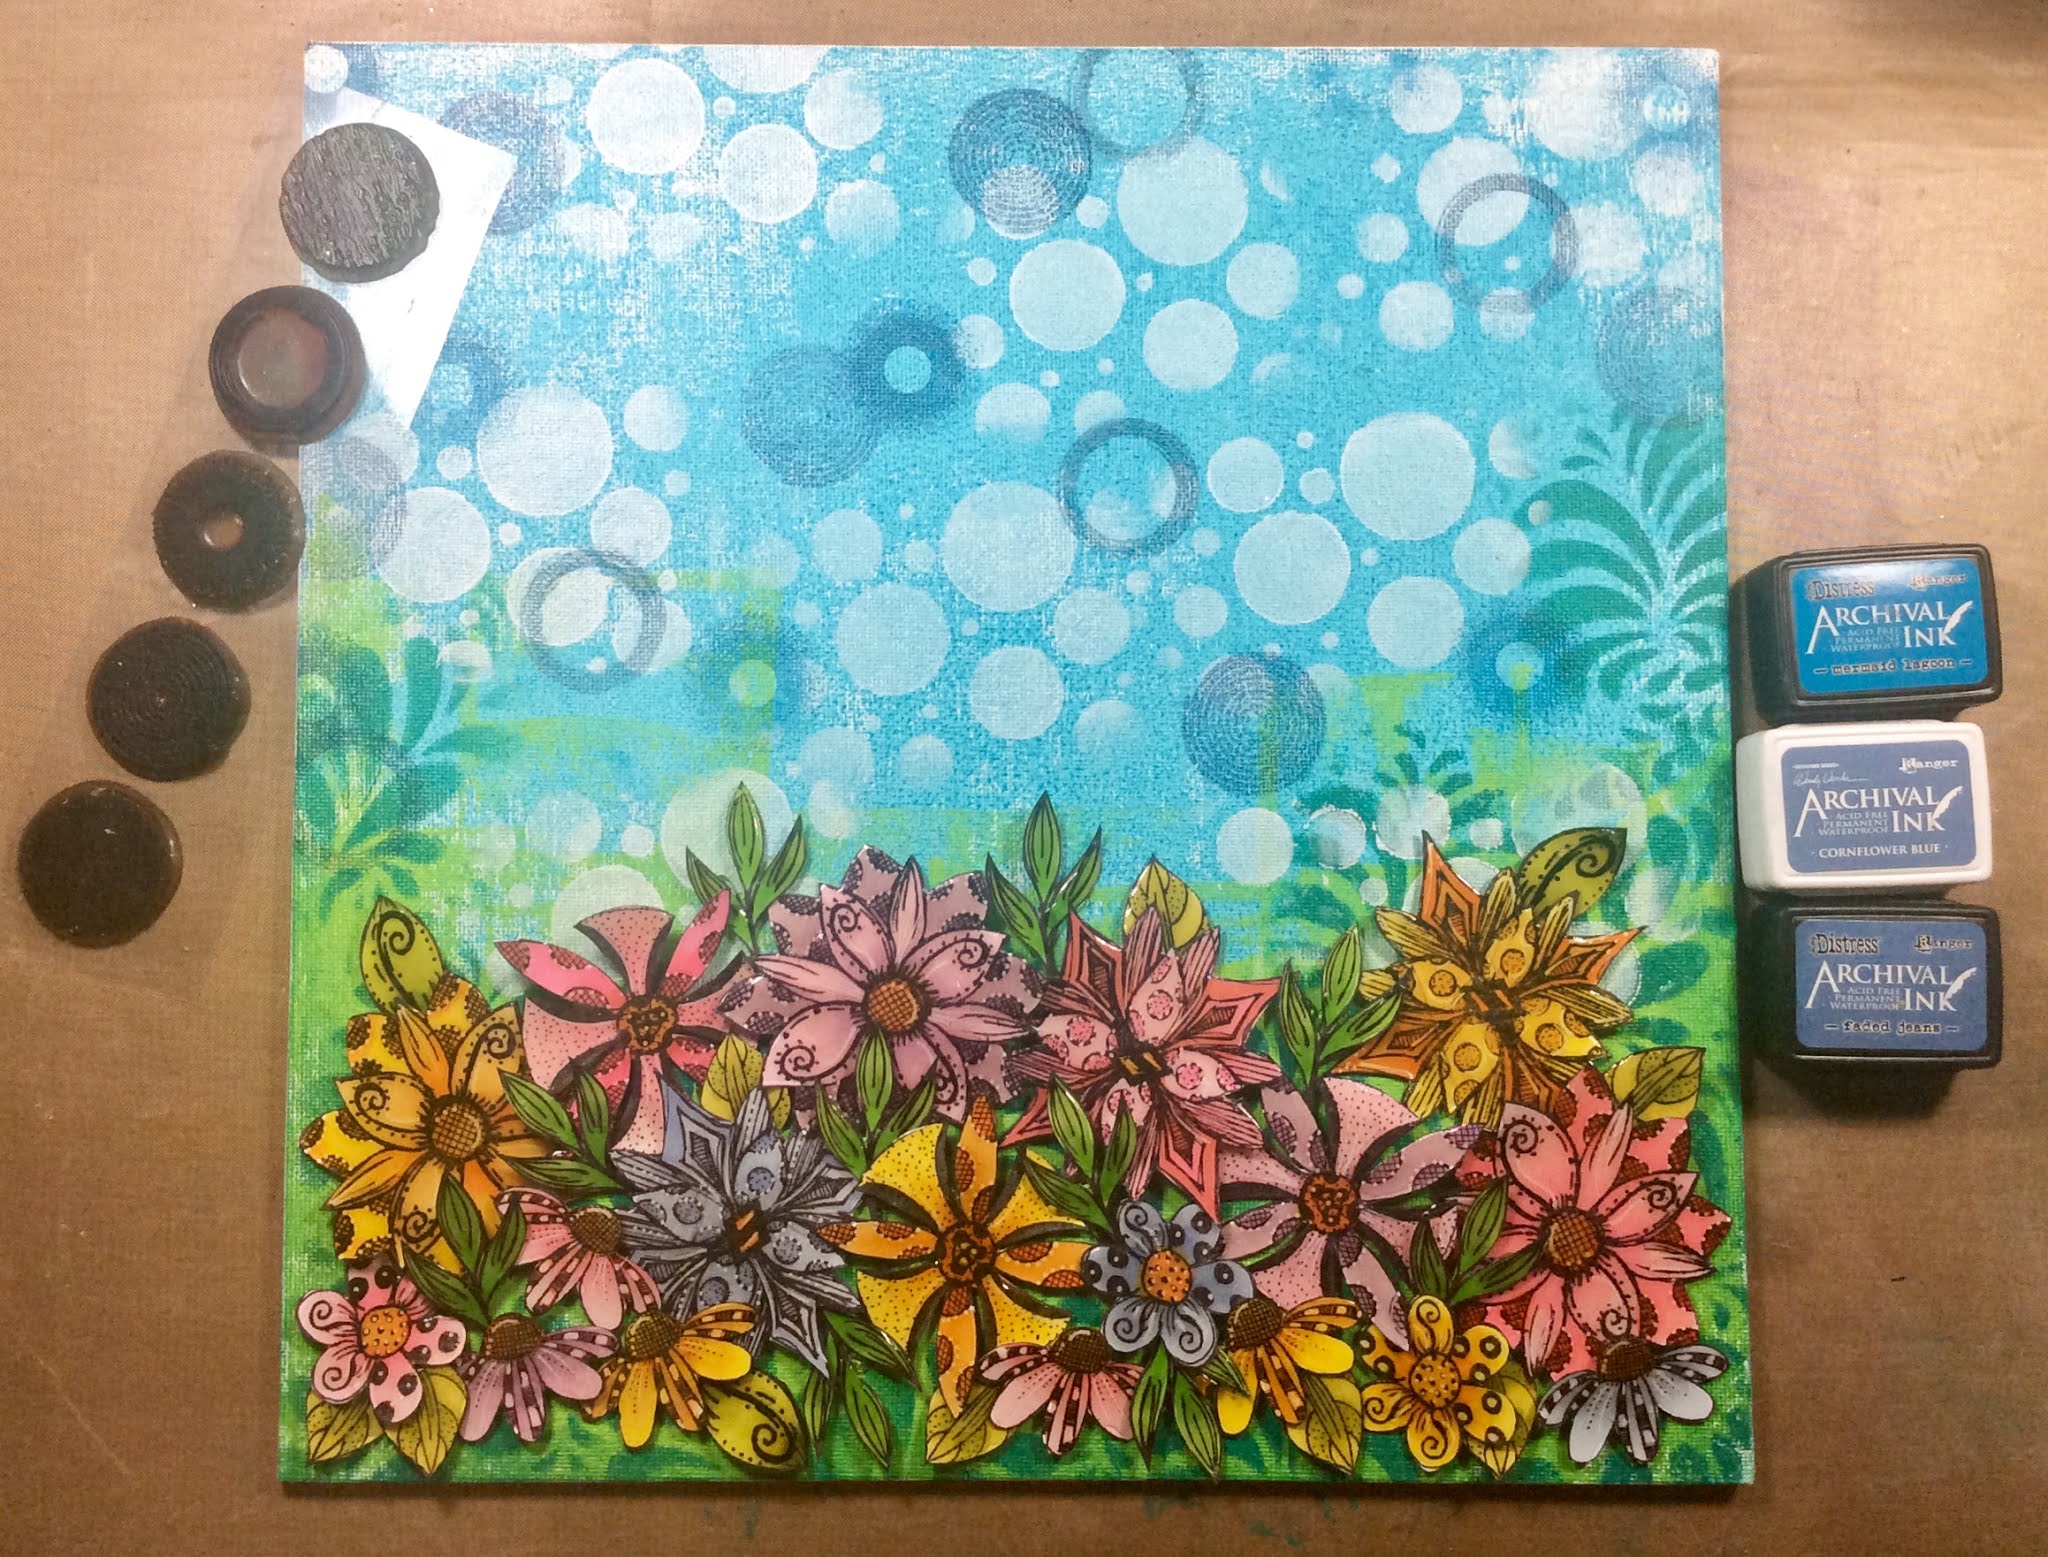
Next stamp the Ledger freehand, without a block giving a less rigid edge .. 
Add some black paint to different areas on your page, leave to dry. Pic 4


  Pic 4


Stamp the butterflies onto a separate piece of paper, in black & emboss with clear powder.
 Squish some Peacock Feathers & Squeezed Lemonade on to a blending mat & use to colour your butterflies.. either with a brush & water or smooshing!


I found that it was still a bit heavy looking ,so I decided to add some more Regular Dots using Texture paste.


Once it was dry I added details with my Posca pens
& attached the butterflies.

Then mat & layer on to a 6 x 6 card.

Thank you for stopping by... Ann x


Monday, July 27, 2020

Sally DT - HOCHANDA Birds and Butterflies samples

Hello! Did you catch the Bee Crafty shows on Hochanda last week? Here are the samples I made, and I have to say I thoroughly enjoyed myself, and could have carried on making lots more!


If you missed the shows you can still visit the Hochanda website and catch them on rewind (23rd July 11am and 3pm).

Thanks for looking!
                             Sally x

Saturday, July 25, 2020

Jane DT - HOCHANDA Birds and Butterflies Samples

Hello!

Today on the Bee Crafty blog I am sharing the samples that I made for last weeks Hochanda shows using the Birds and Butterflies stamps along with the new dies...


If you missed the shows you can still visit the Hochanda website and catch them on rewind (23rd July 11am and 3pm).

Thanks for looking and happy crafting!

Jane xx


Friday, July 24, 2020


Take Flight 

                                              by Ann Roberts


The first step is always the hardest, be it a blank piece of paper or a new venture... Bee Crafty took another first step yesterday introducing their first DIES!
The shows were fantastic and a sell out, if you didn't catch their shows yesterday on Hochanda you can catch up...
This is a how too for one of my samples:


You will need: 
A Tag
Gesso / Acrylic Paint / Brayer
Birds & Butterflies set 1 stamp set & matching Die
Stitchy Boarders stamp set
Small Words stamp set
Dinkables Circles stencil
Distress Oxides
White Pen

Available at Bee Crafty


Gesso tag

Lightly brayer two colours of paint onto tag, leaving some 'white space'

Add some washi tape 

Then some splatters of paint

Blend edges of tag with Distress Oxides (I used  Tumbled Glass & Seedless Preserves )

Leave to dry...


Stamp " Swallows from the BIRDS & BUTTERFLIES set in Archival Jet, onto a seperate piece of paper.

Use Distress Oxides to colour the swallows ..

When dry...

 Use the *NEW DIES* to die cut them out..


Use the Stitchy Boarders to add interest to the background .. I used the  3 circles from this set too .. see pics below

With the Dinkables stencil, add some random circles to the background with your distress oxides .. and use the stencil as a template to create circles with your white pen... see pics below


Stamp your sentiment from the Small Words stamp set onto a seperate piece of paper, cut out & glue sentiment & swallows to your tag, add some co-ordinating ribbon.. hope you'll try this


Thank you for stopping by ... Ann x


Wednesday, July 22, 2020

Caz DT - Time measure butterfly tag

PRODUCTS USED:

Bee Crafty time measure stamp

Bee Crafty random numbers stamp

Bee Crafty large butterfly art stamp

Bee Crafty wordage small words stamps

Bee Crafty coffee stain script ink'able

Ranger tag
Embossing powder
Versamark ink
Black archival ink
Distress oxides
Texture paste
Sparkle gel pen

HOW TO MAKE:

First I stamped the time measure stamp onto my tag using versamark clear and heat embossed in clear....

Then I blended the whole tag with peacock feathers distress oxide ink...


Next I used the random numbers stamp to add detail to the background...


Using the coffee stain script ink'able I added the stain circles using twisted citron oxide...


Then with texture paste added script detailing over the top for more interest...


Stamped and fussy cut the large butterfly...


Coloured with twisted citron oxide and stamped the sentiment and mounted - also coloured in twisted citron...

Added the butterfly and sentiment to my tag,
Then took a sparkle gel pen to add some accent details to finish...And that's it! 

Hope you liked 
❤️
Thanks for looking.


Monday, July 20, 2020

Sally DT - Gelli print real estate

A week or two ago, I decided it was time to get my gelli plate out and have a play with it, using some dylusions paints and mandala stencils.  I'd watched a Seth Apter live on facebook (Crafting with All Brands group) and learned not to rush in to pull prints off, but to let the paint dry a little. The result was 22 sheets of gelli prints, my favourite 4 in the photo above 😂
I often have an evening making backgrounds and then leave them for ages before using them. 

This time I am pressing some in to use straight away as a nice bold background for one of the wonderful doodle art house stamps. Just like last week I have stamped the Villa Rose onto book pages and cut it out, but this time I've coloured some parts of the stamps with ecoline brush pens. I stamped the leafy border onto the base card using Versafine Clair Summertime. 
Don't forget Bev and Sam will be on Hochanda on Thursday at 11am and 3pm with some fabulous stamps and some other brand new products. Thanks for looking!

Saturday, July 18, 2020

Jane DT - Bright Butterfly Canvas

Hello!

This week on the Bee Crafty blog I am sharing a 12" x 12" canvas that I created to hang in my living room...


This project was a labour of love as I really wanted to create something that used as many of my stamp designs as possible and was really bright to contrast with our cream walls.

1) I started by brayering Calypso Teal Dylusions paint onto the canvas...


2) Next I brayered Lime Dylusions paint onto the bottom part of the canvas...


3) Using the large Fernando inkable with Polished Jade Dylusions paint, I stenciled on top of the green area...


4) After that I added stenciling using the Circles d'inkable and White Linen Dylusions paint...


5) Next came the part that took the longest but was really enjoyable to do.  I stamped a range of the different flowers, leaves and butterflies using Memento ink then coloured them using alcohol pens.  After that I coated them using glossy accents and left them all to dry thoroughly...


6) I then started arranging the flowers and leaves across the bottom part of the canvas until I was happy with the placement then stuck them down using glue gel...


7) At this point I decided that I wanted a bit more interest in the sky area so I used the Texture Circles with different shades of blue Archival inks...


8) Then I added the butterflies...


9) Finally I had to decide if I wanted to add any words (which of course I did!) and how I wanted them to look.  So I stamped the same word out in two different ways and then with my families help decided which way we wanted to use...


Here are a few close up pictures...


Links to the products used can be found below...


Thank you for looking and happy crafting!

Jane xx

Related Posts Plugin for WordPress, Blogger...