Showing posts with label Backdrops. Show all posts

Wednesday, December 28, 2016

Marleen DT - Backdrops XL

Hey Blogger
and first of all let me wish you and yours a MERRY CHRISTMAS.
I hope you had an amazing time full of love and way too much food lol.

Its once again wednesday and my turn to share some inspiration for
BeeCrafty..

For today I've had a play with my new stamps..
I ordered some of the backdrop XL stamps. I have had my eye on them for a long time and Im so delighted to finally get my hands on them lol.


 These stamps truly ARE XL and they are amazing. The are the same fantastic quality as all the other BeeCrafty Stamps.. Perfect impression first time and so easy to use.

I decided to just have a play with these, to make a basic background with each of them simply to "get to know" them. I lay down a light background colour of distress ink on my card stock and left to dry. Once totally dry, I stamped my XL stamps with versamark and heat set with clear embossing powder.
I then took a darker colour of distress ink and smothered over my stamped piece.

The clear embossing powder trap the lighter colour so when you add the darker ink, the embossing powder resists the ink and the light colour shows up.


 The 2 cards above are made the same way. I made my backgrounds as above and then used some word dies to cut out my sentiments. I added a darkers mat under to make the letters stamd out a bit more and finished with a few gems (on the brown one).

 
On this one I decided to only use a cut out of my background. I simply too my background and ran it through my bigshot using a start die. (If you dont have a diecutting machine, you can use one of the INKABLES and handcut it)
I matted and layered my star and finished my card with a diecut sentiment and a few sequins.

I had a ton of fun making these 3 wee cards and I look forward to explore more ideas using these XL stamps.

 And that is it from me for today. Thanks for popping by and for any comments left behind.
Dont forget to come visit me on FaceBook, Twitter, Instagram, Pinterest, Youtube or my FB page.
 Happy Crafting

Monday, November 21, 2016

Dreams and Things - MDF Tag

Hiya and Welcome to my Monday Post for Bee Crafty Stamps

We hope you all watched and enjoyed Our Bev's Brilliantly Inspiring demos on the Saturday Show's on Hochanda wowser they were amazing

Today I would like to share another one of my Sample that were on the shows... This was one of my favourite makes using the new MDF tags and the gorgeous stamp sets

Bee Crafty Products used:

MDF large tag
Backdrops; Textures stamp Set
Wordage; Dream, Beautiful Things

I painted the tag first with white gesso and then with a translucent lime green paint. Once dry I used purple and pink paints to stamp the Textures over the tag. I stamped the words using black archival ink. For the bubbles I used various pen lids dipped into white and black paints.

Thank you so much for visiting today... come back soon for more amazing creations from the Vee Crafty Design Team

Kraft Hugs xx
KERRIE

Wednesday, May 06, 2015

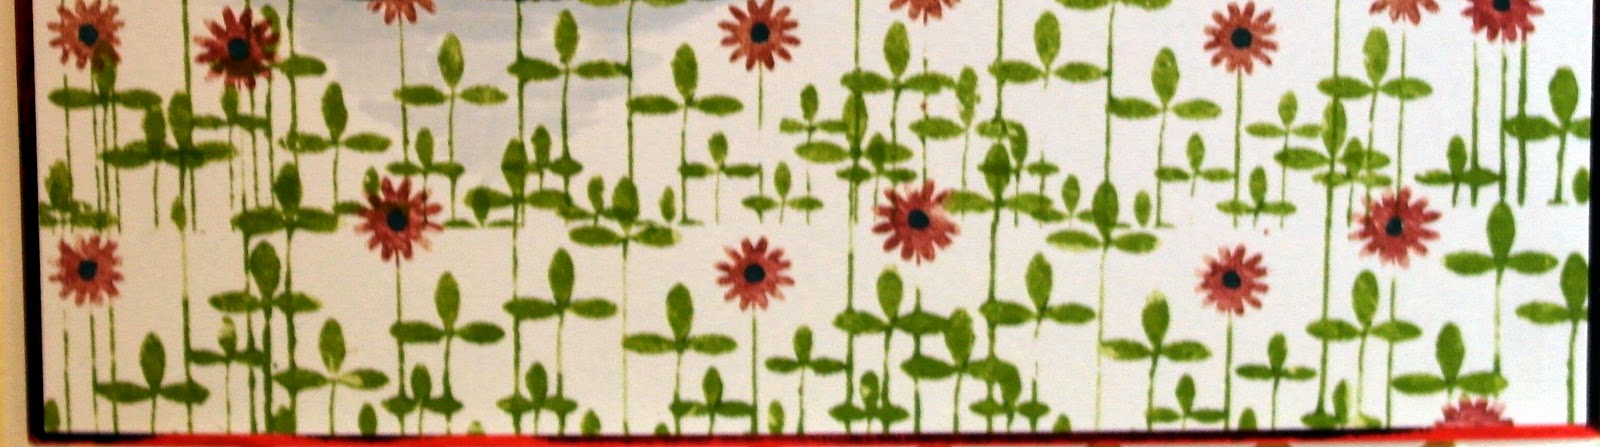
Marleen DT - "Clover" backdrop border stamp.

Hi guys.. 
Back with another post for 
For today I've made another scrappage. I've used the Backdrop border stamp called "Clover"
 You can find it in the STORE with all the other goodies.

 This stamp is one of those that can be used for so many things. So far, Ive only had a couple of plays with it, but it is one I will be using over and over.
 
For todays project, I wanted a subtle look. I wanted the stamp to frame the photo of my daughter yet to really set it off, and I really think I achived that.
 
 
 Ive used my border stamp arround the 2 sides of a sheet of A4 card stock. I used Adirondack ink in Aqua. I just inked up the stamp and stamped one after the other till the whole side was covered.
The stamp is a clear stamp so its really easy to line them up..


 The rest of the LO is simply just layering up. The tag, the flowers, the gems and washi tape is all bits from my stash and the text is made on my dymo and just added to the page with foam pads to raise the words.

And that is all from me for today. 
Thank you for popping by and for any comments left behind.

Friday, March 27, 2015

Kerrie DT - 'Dreams Come True'

Hiya and welcome to my Friday post for Bee Crafty which is now my weekly posting day on the blog

This week I got inky and messy with a load of my fave Bee Crafty stamps along with distress inks and embossing powder it was a lot of fun


The Bee Crafty stamps I have used are...


I trimmed a piece of gold Mirror Board to a few mm smaller than my 8x8 cardblank - I measure up against the card and make with a pencil at the length and width I like by eye then trim using a guilotine. I then did the same using a piece of patterned cardstock. I embossed the cardstock using a Burlap embossing folder and my die-cutting machine. Inked the edges of the cardstock using 'Frayed Burlap' Distress Ink and a mini round inking tool I also edged the cardstock with a dark brown alcohol marker

I fixed the gold Mirror Board to the cardblank using a strong glue and then fixed the embossed panel onto the card front using narrow foam tape


Next I trimmed a piece of watecolour card to about a cm smaller than the embossed panel all the way around then chose my inks and stamps to use

I stamped the 'Bubble Wrap' stamp using versamark ink, tipped clear embossing powder over, tapped off excess then heated with a heat gun leaving a glossy image on the card. I randomly stamped the 'Script', 'Maple' leaves 'Cow Parsley' and 'Branches' stamps around the edges and working in towards the centre with distress inks 'Tattered Rose', 'Victorian Velvet', 'Frayed Burlap' and 'Pumice Stone' - I wiped over the bubble wrap areas to reveal the uninked embossed areas. I inked the edges using 'Tattered Rose' and 'Frayed Burlap' inks I edged the card using a dark brown alcohol marker to match the other layer. Once dry I fixed the watercolour card panel to the card front


I was going to use one of the Fashionista's but after seeing how the background came out I thought it would be a shame to cover most of it - so I opted for a lovely sentiment instead I stamped the sentiment using brown ink and then using the Branches, Cow Parsley and Script stamps and similar random stamping as the background piece, inked edges and the matted onto gold Mirror Board. I fixed this topper I created to the cardfront using narrow foam tape

I really like how this one turned out and was a nice boost to my mucking crafting Mojo

Thank You so much for visiting the Bee Crafty blog today 

Krafty Hugs xx


Tuesday, March 17, 2015

Kerrie DT - BEAUtanicals 'Dandelion'

Hiya and welcome to my Tuesday post for Bee Crafty 

For my card today I have used a mixture of my favourite Bee Crafty polymer stamps


I stamped the Script stamp over the background using 'Pumice Stone' distress ink, then the Bubble Wrap stamp into the corners using 'Walnut Stain' distress ink.

Using 'Spun Sugar' distress ink using one of the small round blending tool in circular motions darker into the corners and lighter around the sides, then using a piece of blending sponge i inked the edges using 'Walnut Stain' distress ink.

I stamped the Bubble Wrap again using White chalky paint 


I stamped the Dandelion using 'Black Soot' distress ink, then stamped just the blown away seeds randomly around the outside of the card. Using 'Black Soot' again I stamped the Being Happy sentiment near the corner.


I have used some Pink textured cardstock and some Mink mirror board from my stash for the layers and before i fixed the stamped section I inked over all the edges of the layers and card blank using 'Spun Sugar' distress ink.

Thank you for visiting today please do visit again soon to see more Bee Crafty makes from the team 

Krafty Hugs xx


Wednesday, January 21, 2015

Marleen DT - Backdrop

Hello Blogger friends..

Once again wednesday and my turn to share some inspiration.

For today Ive had a play with making a tag. Its not something I do very often as I never really know what to do with them, but I absoutly love the shape and the size.

The size of the tag is just one I cut myself. I decided how long I wanted my tag, then how wide, and then measured (so they would be even in both sides) and snipped of the corners.

My tag is 155mm long, 90mm wide.
The corners are cut at 30mm on the length and 25mm in from each side.

For this tag Ive used the following stamps:
&

You can find them in the STORE with all the other amazing stamps.


This tag is made from water colour card stock and LOTS of paints. The paints are simple acrylic paints from my crafty stash.
I started by stamping my backdrop stamp with versamark and covered with black embossing powder.
Once powder was melted and cooled I started to play with my paints. I used a baby wipe to clean of the stamping between coats of paints.

The greeting is stamped on to the back of water colour card that I had dipped into the left over paints on my craft sheet.

I finised with a strip of hessian, also coated in paint, a wooden heart from my stash a a few half pearls.

And that is all from me for today.
Thank you for popping by and for any comments left behind.


Tuesday, January 06, 2015

DT Kerrie - Backdrop Boarder - Clover & Cowardly Lion

Hiya and Welcome to my first Tuesday Post for Bee Crafty Stamps 

I was so so chuffed to be asked to join the team by our Bev quite a while ago and keeping it a scret has been so tough - I first met Bev at a craft show at Alexandra Palace I was looking for Wizard of Oz stamps at the time which of course I found on Bev's gorgeous stand and I got hooked on Bee Crafty from there - I then also took part in a workshop with Bev at NEC Birmingham where I brought even more of the Gorgeous Stamps - I fast became a Bee Crafty addict

Today I get to share with you an idea I had while deciding how to use the 'Backdrop Border - Clover' stamp, where I have used the stamp look like a field of Poppies - I also used 'Wizard of Oz - Cowardly Lion' and 'Wizard of Oz - Sentiment - Courage'


I stamped the Lion first and then using Distress Markers to colour directly onto the stamp I stamped the Border twice to resemble the field of poppies for the Lion to be sitting among - I then coloured him using Copic Markers.

I die cut the sentiment stamp using a circle die which i then cut out a slightly larger circle from mirror board and attached ribbon behind it to look like a rosette. I chose a simple matt of mirror baord behind the stamped background and image as I wanted no distraction from the stamps.

I hope you have liked my first Tuesday Post and I will be back next week so I hope to see you then x

Krafty Hugs


Wednesday, December 31, 2014

Marleen DT - Backdrops Borders

HAPPY NEW YEAR everyone..

I hope you all have a great evening/night but PLEASE STAY SAFE..
Me and my family are partying at home with a big group of loved ones but I still wanted to make a quick post to share my project for this week for

as well as an old favorite "Glad I did it" 


I made this card using the stamps, black embossing powder, mica powder, distress inks, a paper ribbon and flat back pearls.
I wanted to make something that was still festive but no longer christmas, hence the choice of colours. The whole card is smothered in mica powder to give it a real shine..

Anyway its PARTY TIME... Have a great and SAFE new year everyone and I will see you all soon again. 
Thank you for popping by and for any comments left behind.

Monday, July 07, 2014

Yellow, Grey and A Tin Man

Hi Guys, 

Thanks for stopping back in today. 

Today I have a card that is great for a male. 


To create the card I folded and created an A5 Card base, matted with a grey layer. I added fake stitching to this layer to give the eye somewhere to stop. Next I cut down some stamping card to fit within the grey. I used a yellow ink pad and stamped the "Bark Positive" background stamp. I repeated this to create three sections. On the bottom layer I added twine and finished it with a knot. I matted this on 2 layers of foam tape and placed it at the bottom, the middle section is on one layer of foam tape and the top section I glued down flat.  I then used a yellow piece of card blank cut it down using a circle die, and used my grand calibre to run it through with my Inkables "Honeycomb" mask to give the embossing to it. Finally I stamped my "Tinman" stamp added stitching around him and matted him onto the grey card stock, I cut a shape out for the sentiment and used the Wordage "Thank You" Stamp, and added three pieces of card candi. 


That is all for me for today, don't forget to pop back tomorrow for more creations from Sue.

Crafty Hugs
Kelly
xxx

Friday, May 16, 2014

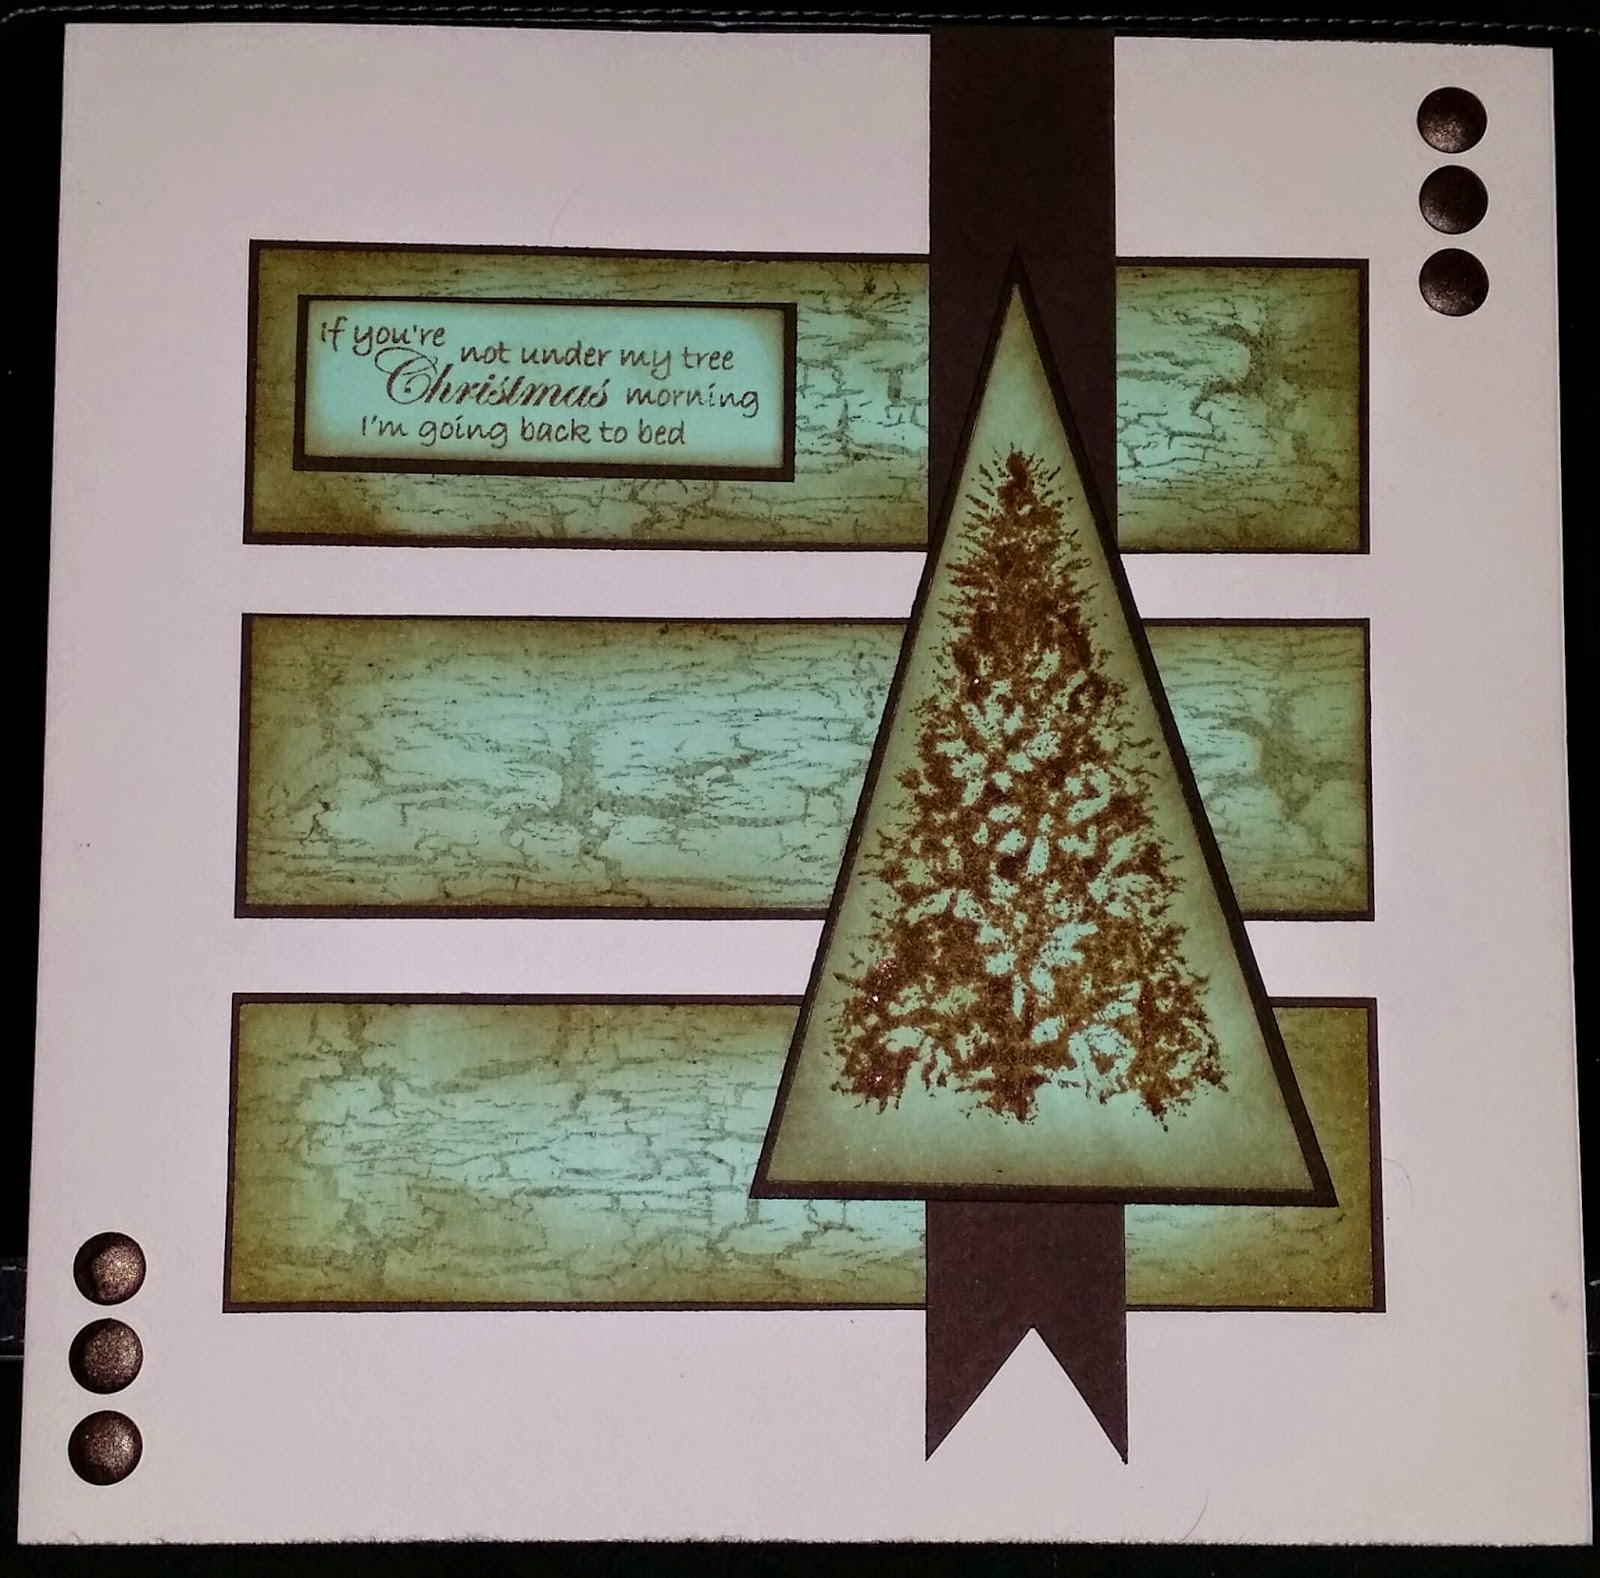
If you're not under my tree...

...on Christmas Morning I'm going back to bed!!!

Hi Everyone

Hope you've all had a good week.

Who has started their Christmas cards yet?  Someone told me the other day they have finished theirs!!! Madness but perhaps I am just jealous not to be so organised?

So for this weeks blog post I have used two stamps from the Yuletide range and another from the Backdrops.

I took some Mint and Chocolate coloured cardstock adn stampeed the Bark Positive Backdrops on there in Walnute Stain Distress Ink.  Then inked the edges with the same using my Blending Foam.  I chopped this up into 3 pieces and layered it up onto the dark chocolate coloured card with just a small enough edge for it to make a lovely contrast. 

Doing the same with the  Fir Tree made a lovely way to top the card I stamped this in a slightly darker shade - Vintage Photo.

I had some spare cardstock so made the long Rosette Tail finish to place under the layered up Fir Tree.  Stamped out the Under My Tree (small) in the same colour and layered it too - and put it all together.  

I really like the simple effect of this one hope you do too.

Take Care

Sam xxx


Friday, February 15, 2013

The Wonderful Wizard of OZ. Tinman ATC by Pauline

Good Afternoon Everyone, 

If you haven't seen them yet be sure to check out the gorgeous NEW  
range of self cling polymer stamps from Bee Crafty.

This great range of stamps has ink drawing style images based on the original illustrations from the very first publication of the book.

There are framed card style images as well as individual characters and accompanying circle messages with quotes from the book.

Our DT have been hard at work and I would like to show you this gorgeous ATC made by Pauline

 This is a standard size ATC featuring the Tinman one of the Wizard of Oz story's most beloved character's, the background was created using Tim Holtz Distress Inks and the ground he is standing on is the Bark Positive Backdrop stamp, the gorgeous glittered arrows have been made using the Arrows Inkables template exclusive to Bee Crafty and the heart is from the Unbreakable Heart sentiment. As you can see Pauline has expertly coloured him in and cut and layered him up to give this ATC lots of texture and dimension,

What I love about this ATC is the same techniques could easily be applied to a card or Art Journaling Page.

Keep your eye on the blog for lots more samples coming from the DT and us.

Bev :) x
Related Posts Plugin for WordPress, Blogger...