Showing posts with label Stamping. Show all posts

Tuesday, March 08, 2022

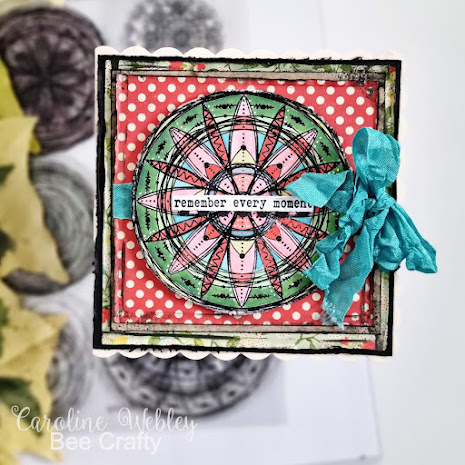
Caroline - Remember Every Moment

 The Mandala stamps by Bee Crafty are wonderful to use!


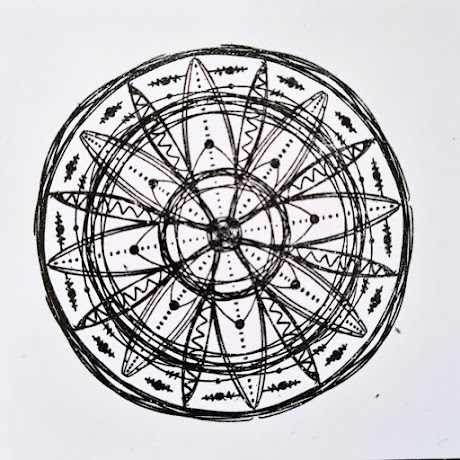
Stamp and heat emboss the Mandala.


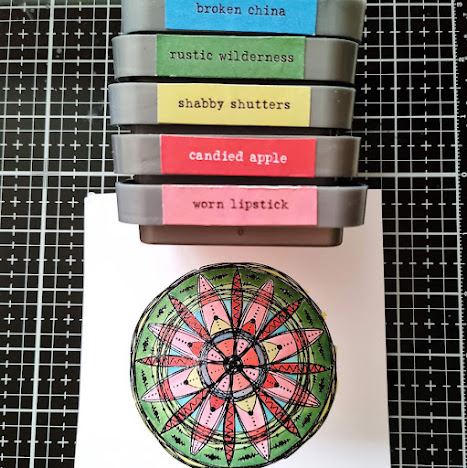
Always lovely to have something to colour and Distress Oxides colour so nicely. I use my watercolour brush to add the ink.


Fussy cut the mandala.  I found some coordinating patterned paper and layered with ribbon and added a sentiment, which was stamped and heat embossed.


Tuesday, January 25, 2022

Caroline - Art Journal Page - Live Learn Create

 Art pages are not something I do very often, but I would like to do more. I thought it would be a good way of using up some of my 12×12 paper too and this spotty paper would make a good base. I was pleasantly surprised how it stood up to having ink all over it too, stayed nice and flat ready for me to add to my mixed media spiral pad, which will then be a base for a homemade art journal book!!

I cut the 12×12 piece to fit onto the A5 pad when finished.

I used the Birds & Bees stamp set XL and Journaling Girls:Arrows.

Stamp the large butterfly with embossing ink and then heat emboss with white powder.

I chose a colour palette with Distress Oxides:

Smooshed the ink over the page.

Added some stamped images from the Arrows set and then splattered with black paint.

I drew a random shape with white gel pen onto black cardstock – inspired by a shape I saw by Birgit Koopsen-Bernstein. I coloured randomly in the leaves using Inktense pencils, and fussy cut. Drew and fussy cut the ‘rainbows’.

I then glued the black shapes to the page, ready then to be added to my spiral album. Stamped a sentiment.

I will, at some point, add these pages into an art book but that is a project for another day!


Tuesday, January 04, 2022

Caroline - One Day

 Hello!  This is my first post as part of the Bee Crafty Design Team!


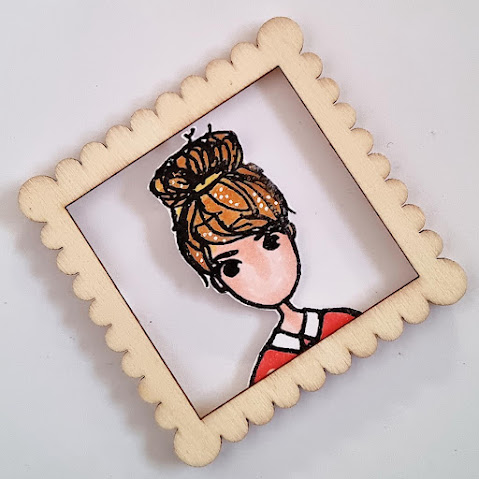
I used one of the Art Stamps Journaling Girls for this card.  I had found a lovely wooden frame and thought it would be perfect to create a portrait type effect!  I also used a D'Inkable stencil to create the sun in the background.


First of all I cut all layers for the card:


Using the stencil and Distress Oxide I inked the background, blending the sun first and then the sky around.


I stamped Journaling Girl-Sam and heat embossed.  I only stamped the top part as this is all I would need.  I coloured with Copics.


I then glued her to the back of the wooden frame:


I used one of the flower stamps and stamped and heat embossed onto kraft before fussy cutting and adding to the side of the frame.


I then added a part of the sentiment from the stamps 'One Day at a Time' and thought that just 'One Day' would be enough.  I added to the layered card with small foam pads, and added a little bit of twine around the frame and tied into a bow.


I used:
Distress Oxides - Stormy Sky, Speckled Egg, Squeezed Lemonade, Mustard Seed, Wild Honey

Caroline x


Wednesday, November 08, 2017

Marleen DT - Helraldic Samples

Hey guys..

Its once again wednesday and my turn to share some inspiration for BeeCrafty..
Today I want to share the samples I made for Bev's recent show live from the NEC.
Did you go to the NEC?? Was it amazing?? I have never been to the NEC but its a dream of mine.. Maybe when my kids gets a bit older?

Anyway, samples... Sadly, mine didnt make it to the screen. Stamps landed with me in Ireland too late so even though samples was made same day as I recieved the stamps, there wasnt enough time to get them returned in time.. It happens, post here in Ireland can be a bit of a.. challenge.. lol

But.. I still loved making my samples and although I already shared them on my facebook and in the BeeCrafty Facebook Group, I still wanted to share them here with a few words on how I made them.


 This one is a wee bit hard to show off. Basically I made the card with distress ink and stamped the wee crowns and used the alphabet to stamp "BeeCrafty". I then made an accetate overlay that matched the card size (I folded a wee sliver to attatch it on the back, so it folds around the card), I stamped the helmet with archival ink onto the accetate (please not it takes quite sometime to fully dry) and once fully dry, attached it to the card.

This one is all about the Lustre Luxe.. I coloured the art board with the Golden Gate Lustre Luxe and I used the Honey Pearl Lustre Luxe through the Shattered Glass Dinkable. I put more Golden Gate Lustre Luxe through the Feather Dinkable.

I then stamped my Heraldic images on to white card and fuzzy cut them. I then used the Moon Stone Lustre Luxe as a gilding wax and added, with my finger tip, a wee bit over the images.
I added the images with silicone glue to add a bit of dimention.

 This one is very simple, its just distress ink with stamping and black heat embossing. I made the wee banner with the alphabet and more distress ink. I finished with a few water splashes.

 This one is my favorite I think. I come from Denmark and have always been a royalist and very proud of our royal family. This set of stamps just scream "royal" at me hence how this card came together.

Its a simple matter of distress ink, water splashed and stamping. And I just finished with a few gems.

 This one is a play on a tecnique I have done several times now. I have a YOUTUBE HERE on how I make it. The strips are coloured with Lustre Luxe and I stamped with archival.
You need a permenant ink to stamp on the Lustre Luxe.

And then this one.. Last one.. Again image screams royal lol.. Its made a s the blue royal one above, simple distress ink, heat embossed with black and water splashes. I used purple as this too is a very royal colour. A greeting could always be added later if needed.

And that is it for today. Thank you for popping by and for any comments left behind.
Dont forget to come visit me on FaceBook, Twitter, Instagram, Pinterest, Youtube or my FB page.
 Happy Crafting


Wednesday, October 18, 2017

Marleen DT - Hochanda Samples 12th October

Hey Bloggers..

Once again my turn to share some inspiration for
BeeCrafty

Today I was to share my samples from last weeks show (the 12th Oct) on Hochanda.
I love this collection of stamps as I love making backgrounds and just finishing my cards with a greeting.. And this collection fits perfect for that.

Find all the stamps and many more goodies over in the online STORE.

This was the very first sample I made.. I LOVE the circle art boards BUT I still dont have much confidence when it comes to the MDF.. I dont know why as its really just like working on a piece of card.. But this is what I can up with and the result is growing on me lol..

Anyway, its Lustre Luxe and stamping on stop. Use a waterproof ink to stamp on top of Lustre Luxe. I finished with a bit of Lustre Luxe through one of the Dinkables..

A MDF tag.. and more Lustre Luxe. and more Lustre Luxe through a Dinkable..

 
And more of the same.. MDF tag, Lustre Luxe, Stamping and more Lustre Luxe through a Dinkable..

This one got to be my favorite of my samples.. But if you know my crafting, you'll know how much I love using rainbow colours.. I simply stamped with the smallest circle from the set randomly around my card and coloured in with distress ink. My greeting is stamped with waterproof ink onto vellum. Make sure you leave your vellum well to dry, It takes time, but its worth it..

Using a vellum overlay for your greeting, means you can still SEE the background behind, but your sentiment takes pride of place.

Made just like above only using the little square stamp and a different sentiment.

And another one, only using the little heart, a different greeting and alcohol markers to colour in. 
As I used a cardstock not designed for alcohol ink markers, the colouring turned out a bit streaky. I thought of changing it, but I actually really like the effect it gave so decided to leave it.

Well I carried on along the same lines with this one. Only my satmping was more deliberate this time. I also used the middle square and then the smaller square inside. And instead of a vellum overlay, I heat embossed my greeting on to black card stock.

And then I finally changed gear lol.. This background is one I have tried before and I still love the result.. I used the harlequin stamp and simply lined up my stamping. I then did the mop up tecnique with some purple distress ink. I diecut the heart out and stamped my greeting strait onto my card blank before adding my background.

And then it was time for oxides.. It just had to be done lol..
I used various coulours through various Dinkables.. I sprayed a bit of water over my inks and that gave this card this dusty look. My greeting is stamped on a white piece of card and just cut out before sticking to my card.

And then this one came alive.. It was simply just me cleaning my Dinkables from the above card.. I just sprayed a bit of water onto the stencils and preiing the card onto the stencil.. I did it to all the Dikables and this is the result.. I then stamped a few of the wire border stamps and my greeting and voila..

For this one I used paste through a Dinkable.. I love this wee stencil and I thought it really lended it self to paste as the lines are sooooo wee. (small)
Once my paste was dry I once again did rainbow colours, once again using oxides, and finished woth water spalshes.
And last but not least..
My very first play with the Skylines.. Ohh these was lying staring at me while I made all the other samples.. And I was nearly scared of playing with them... I have never done anything like this card before and its sooo out of my comfort zone.. BUT I love the result..
I used the bridge stencil and made the bridge... I then cut out the bridge.. I then made my "sunrise" and added my buildings in the back. I then finished by adding foam tape on the back of my bridge and adding it to my card..

I could have added a greeting in the sky but to be honest I really liked it as is..
And that is all from me today. I hope I have given you a bit of inspiration for what you can do with your stamps.

Thank you for popping by and for any comments left behind.
Dont forget to come visit me on FaceBook, Twitter, Instagram, Pinterest, Youtube or my FB page.
 Happy Crafting


Tuesday, September 12, 2017

Marleen DT - Rainbow scull

Hey bloggers
and welcome to my blog.

Today is my turn to share a bit of inspiration for

Todays card was actually my daughters idea.. Long story short, I was stuck for an idea for my digital design team, and my girl suggested making a rainbow.. The background I used today was my first play and just didnt look for the intended card, but I then teamed it with my tophat scull stamp and bingo, we had a winner.. I also used one of the cog stamps. Find them all in the STORE.
Its a very simple card, but guess that is what I do best lol
I used distress inks but I guess you can use what ever inks you want.
I used the following colours:
Fired Brick, Spiced Marmalade, Mustard seed, twisted citron and mermaid lagoon.

I started in the middle with the yellow, and then worked my way out on either side letting the colours overlap a little bit.
I then stamped my scull stamp and heat embossed in black. I also made a mask of the scull on post-it notes while I had the stamp out.

I then masked of the scull and stamped my cogs around it. I didnt heat emboss the cogs as I didnt want them as bright as my scull.

And that is it really. A very simple card, but very colourful.
Thank you for popping by and for any comments left behind.
Dont forget to come visit me on FaceBook, Twitter, Instagram, Pinterest, Youtube or my FB page.
 Happy Crafting

Thursday, July 13, 2017

Karen DT - Moon and Birds On A Wire

Good morning everyone

I'm very excited, and nervous,  to be blogging my first ever sample for Bee Crafty, since being chosen to join their very talented Design Team. I have a lot to live up to so I'm hoping I do their gorgeous products the justice they deserve.

I will be blogging every Thursday so watch out for me. I would love for you to support me by commenting, I do read them all and try to reply

Anyways enough chatting....

Today I'm showcasing the following stamp sets
Moon
Birds On A Wire
Friendship

Also used:
Distress Inks : Squeezed Lemonade, Spiced Marmalade, Worn Lipstick, Brushed Corduroy, Walnut Stain
Black onyx versafine ink


  • I cut a square of black card and a square of white card, in decreasing size, slightly smaller than my 6x6 card blank
  • I inked up the Moon stamp in the Squeezed Lemonade, Worn Lipstick and Spiced Marmalade Distress inks and stamped it on the white card, in the centre, slightly towards the top of the card
  • I masked off the stamped Moon 
  • I then blended the Squeezed Lemonade, Worn Lipstick,Spiced Marmalade, Brushed Corduroy and Walnut Stain over the card, working from the lightest colour out to the darkest colour
  • I splattered water droplets onto the card and dabbed off with a paper towel 
  • I stamped the Birds On A Wire and the Friendship sentiment in the black onyx Versafine ink 
  • This was adhered to the black card and then onto the card black , with wet glue
And there we have my first ever Bee Crafty DT sample lol

I really hope you like my use of these gorgeous stamps and don't forget to leave a comment and let me know what you think


Crafty hugs xx 

Thursday, June 08, 2017

Marleen DT - Hochanda Samples and this weekd YouTube

Hey Bloggers
 
  I've made a little youtube for BeeCrafty for this weeks DT post.
I recreated one of the samples I made for Bev's show on Hochanda.


This is the one is the original one I made for the show. The ones in the youtube are copies I made.
 
 Below is all the other samples I made for the show:
 
Lustre Luxe background. Birds in gold embossing powder. Lustre Luxe and white paint splatters on top.

 Coloured strips are Lustre Luxe. Sentiment stamp I cut up and used here.

Journal page. Lustre Luxe circles, Distress crayons and sentiments in white embossing powder.

 MDF tags with Lustre Luxe background. Butterflies stamped and fuzzy cut and Lustre Luxe added on top.
 
 Once again MDF with lustre Luxe and butterflies stamped. This one I just added crackle glaze on top and once dry rubbed a bit of gold Lustre Luxe over the whole piece. Finished with a couple of the sentiments.
 
 Distress Oxides with water splashes. Butterflies with white embossing powder.

 Background made with Memento inks and a spray of Lustre Luxe.

Distress Oxide circles sprayed with water. 
 
And last but not least. Lustre Luxe background and Lustre Luxe through a dinkable.
Lustre Luxe and all the stamps can be found in the BeeCrafty STORE.

 Thanks for popping by and for any comments left behind.
Dont forget to come visit me on FaceBook, Twitter, Instagram, Pinterest, Youtube or my FB page.
 Happy Crafting
Related Posts Plugin for WordPress, Blogger...