Monday, August 31, 2020

Sally DT - A 'thinking of you' card

 Hi there! I am here with a clean and simple card for Bee Crafty today, using some of their older stamps. I wanted a simple 'thinking of you' card for a friend.


 I used:

Mandala 7 inkable

Script background stamp 

Beautanicals Wildflower 2 

Wordage Everyday  sentiments 2

I also used Tim Holtz distress inks in Cracked Pistachio, Antique Linen and Tea Dye. The wildflower and Sentiment were stamped with Versafine Clair in Pinecone. I used an ivory 6" square scalloped edge card.

Here is how I made it as a step by step


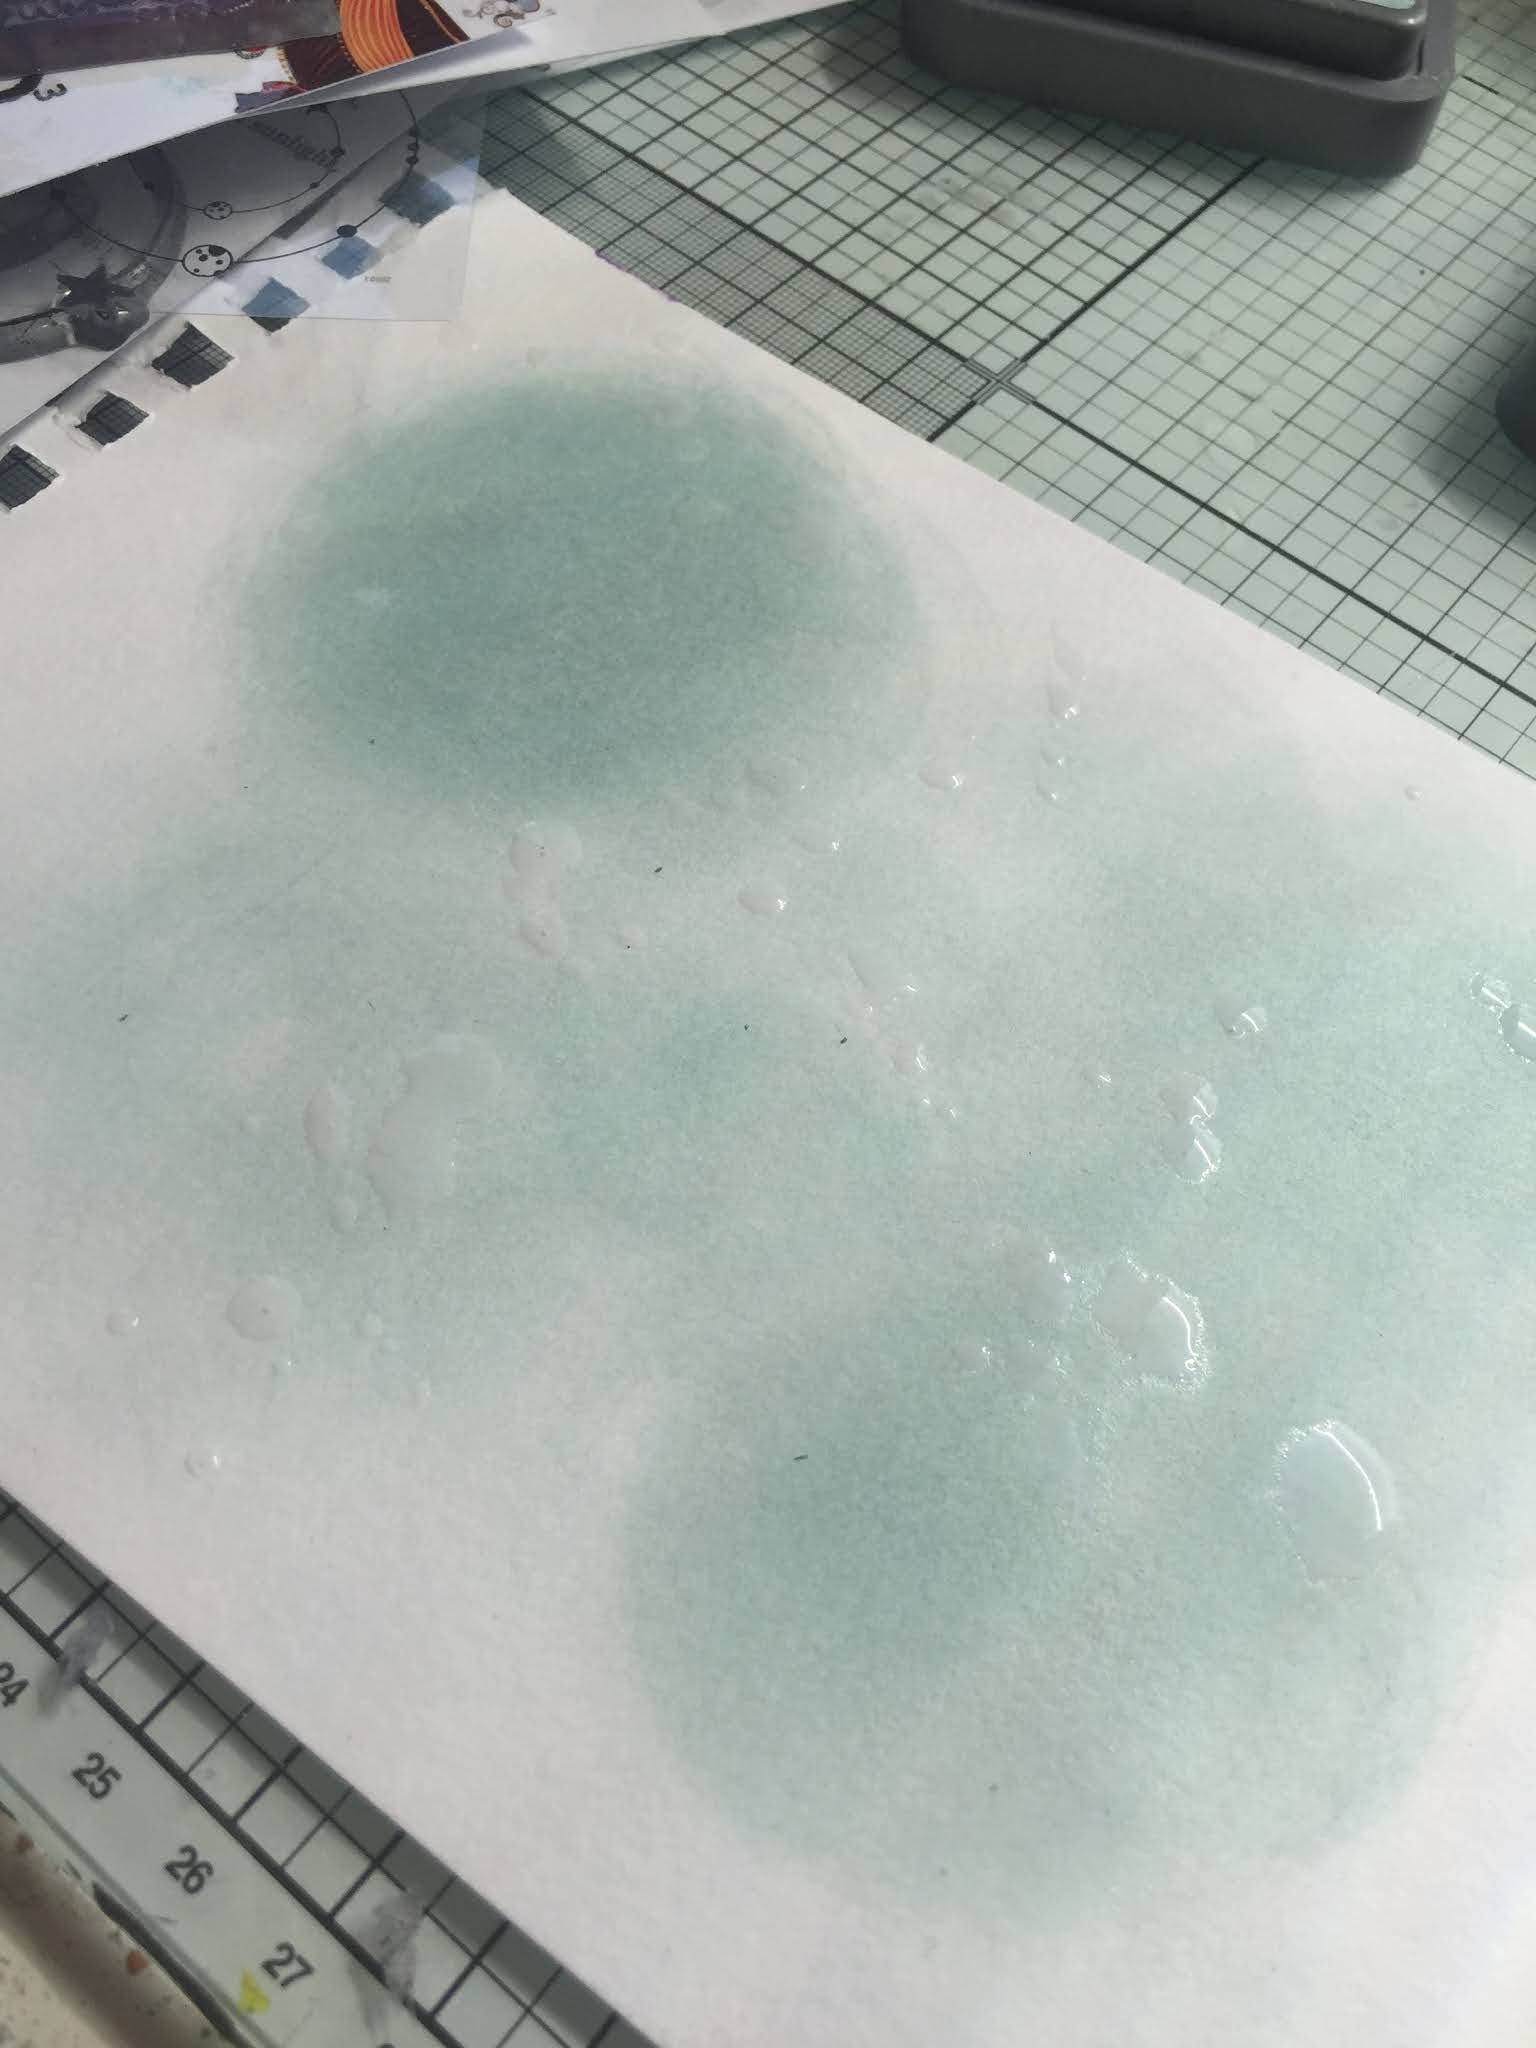
I inked through the stencil with a make-up brush. I have tried a range of brushes recently and this type are great with stencils. 
I stamped the script in antique linen distress ink to the right of this, up to the edge of the card.
I used the blending brush to add some tea dye distress ink around the edge of the card before stamping the wildflowers in Versafine Clair pinecone.

Finally I stamped the sentiment in the same ink.

Here is another look at the finished card. I think it is another 'all occaisions' card, and any of the sentiments in the everyday words sets would work with it. It would also make a good set of notelets, with stamping in different colours. Very simple, but I hope you like it!


Thanks for looking!

Saturday, August 29, 2020

Jane DT - Distress Crayon Tags


Hello!

This week on the Bee Crafty blog I have finished off some tags that I started in a Facebook live over on the Bee Crafty Facebook page this week...


I was using Distress Crayons on a variety of surfaces with different techniques but they all remained incomplete so I have finished off three of them.  If you would like to see the video of the live you can do that by clicking the link... https://www.facebook.com/BeeCraftyStamps/videos/318661192680476

This first tag was made with stamping card, washi tape and a tissue butterfly then sealed with collage medium.  Next I added distress crayons across the whole tag then wiped back the colour on the butterfly.  The tag was sealed with micro glaze then stamping was added using one of the texture borders.  

After the live I added extra colour to the butterfly using permanent markers, stenciled on the circles using more distress crayon then added extra around the edges.  Finally I added some text from the Small Words set.


The next tag was created by adding the distress crayons to a tag cut from canvas out of the Dina Wakley mixed media journal.  The crayons were scribbled on then water spritzed on top.  I added the Roman Numerals stamp using memento black ink.

Afterwards I did some more stamping using the Pocket Watch.  I added another tag underneath created with the burlap also from the journal then built up a sentiment from the Small Words set.  
The tags were joined together using a piece of twine and also some staples.


This third tag was made by creating the coloured background using the crayons then wiping some off with water through the dahlia stencil.  To create a border around the tag a black distress crayon was run around the edges then smudged in.

I felt that this tag just needed a bit of silhouette style stamping, so after the live added the teasels then  another sentiment from the Small Words, but this time on black with white embossing powder.


Here are the links to the products used:


Thank you for looking and happy crafting!

Jane xx


Friday, August 28, 2020

Stars Textures by DT Ann


Stars Textures

by DT Ann

Hi All, hope you're going to be able to enjoy some creative time this weekend, it being a bank holiday.

Using the NEW Stars Textures stamp I created this card, get your white pen ready !!!


You'll need:

Texture Stars stamps

Small Words Stamp set

Inkables Circles

Dies Tags & Banners #1

Versa Clair: Nocturne

Versa Mark Ink

Clear Embossing Powder

Posca or similar white pen

Gelli print, background paper or use the method I showed in last weeks blog to create a background.


Start with your background paper & cut to a 14cm by 14cm square., keep off cuts for sentiment.


Ink Circles stencil with Versa Mark Ink, then lay ink side down, onto your background paper.

Put through die cutting machine using the machines emboss 'sandwich'. If you don't have one, don't worry, press stencil into paper as firmly as you can.


Remove stencil, cover with clear embossing powder, remove excess, heat with heat gun, cool. 

Clean & place stencil back over your paper, and tape down, with masking tape or washi tape (there should be enough overlap to do this).


Stamp Texture Stars through the apertures in Versa Clair Ink, as usual I used my rule of three !! ;) Once ink is dry ,remove stencil, add hi- lights, dots ,fill in wherever you feel necessary ....


On a cut off from your back ground paper, cut the large banner from the Tags & Banners #1 set, add a sentiment, adhere to your card.


Mat & layer onto black card then onto 6 X 6 card front.


Thanks for stopping by... Ann x


Wednesday, August 26, 2020

Caz DT - purple butterfly tag!

PRODUCTS USED: 

Ranger tag
Black archival ink
White gesso
Sparkly thread

HOW TO MAKE:

Blend wilted violet distress oxide ink onto the tag...

Lay over the sunset ink'able and spritz with water so the colour lifts...

Ink up part go the crackle stamp and randomly stamp about around the sunset...

Use white gesso to stamp out the smallest of the butterfly trio...

Then stamp over with black archival ink slightly offset so you get a highlight (halo)...

Then stamp the tape measure onto card and fussy cut, stick down and add the stitch border stamp detail along side and a couple coming in from the edge for more interest...

Take your white posca and tap the scissors onto the side of it to get white spatters across your background...

Stamp and fussy cut the medium butterfly in the trio and a ticker tape sentiment, plus a length of sparkle thread... 
Glue these down onto the tag for your focal point. 
That's it! 

Hope you like
❤️
Thanks for looking.


Monday, August 24, 2020

Sally DT - Moon and Stars samples for Hochanda

  Did you see Bev on Hochanda on Friday Morning? There was just one show featuring the brand new Moon and Stars stamps, designed by Bev and Sam, that you can find here as a bundle. These are stamps that will be suitable for so many different occaisions, and I am sure I will be playing with them on a regular basis. Also on the show were some new inkables Which will be on the website soon, and the brand new tag dies, which are so useful! 

Anyway, here are my samples...


If you did miss the show you can still watch it on Rewind here.

The stamps are also available individually:

La Luna

Over the Moon

Star textures

Moon and stars sentiments 


Thanks for looking!

Saturday, August 22, 2020

Jane DT - Live By The Sea ATC's

 Hello!

This week on the Bee Crafty blog I am sharing a pair of artist trading cards that I made using some of the lovely art stamps designed by Sam...


1) I started by applying metallic watercolours (black, blue and green) to watercolour card and added lots of water to blend them around.  Then I cut them into pieces measuring 2 1/4" x 3 1/4"...


2) Next I stamped the seaweed and moon from the regular conch shell set using clear embossing ink and added silver embossing powder.  After it was heated it was still a bit tricky to see, but I left it as it was to add some extra detail in the background...


3) Next I used the night and white Dina Wakley gloss sprays to add some splatters...


4) I took the smaller conch shell from the XL set and stamped it onto watercolour card with archival black ink.  Then I coloured them using some more metallic watercolour paints (pink, purple, blue and green).  I also stamped out the sentiment from the regular set onto some of the original card that was left over...


5) These were then attached with some glue gel and foam tape and I matted the cards onto black card measuring 2 1/2" x 3 1/2"...


Here are the products used:


Thank you for looking and happy crafting!

Jane xx


Friday, August 21, 2020

Over the Moon

Over the moon ...

by DT Ann


First don't forget Bee Crafty are on Hochanda at10am today with their

 *** NEW*** stamps, Inkables & Dies!!!!!!

The Dies are just up my street... and who does love a star or moon!!

Great for all occaissions & genders..

Here's a quick 'how to' ...


You will need;

Distress Oxides... Speckled Egg, Wilted Violet, Peacock Feathers, Faded Jeans.

NEW STAMPS... LA LUNA, STARS TEXTURES & OVER THE MOON

NEW DIES... TAGS#1

Versa Clair Ink.. Twilight

Versafine.. Imperial Purple

Posca Pen in Silver


To create a galactic background on my paper, I started to blend, with the lightest colour in the middle. Spritzing with a fine water spray, in between each colour, quick dry bend spritz, dry...  keep going in a circular motion, towards the outside of your paper.


 I used Speckled Egg, then Peacock Feathers, Faded Jeans & Wilted Violet in that order..


Next I put some of each colour on my craft mat, spritzed again ( so it 'beads 'rather than 'pools' & dabbed my paper onto it, letting it dry naturally...


When the paper is dry die cut a tag from it.

 Stamp your stars, I chose 3 from the set Texture Stars & a circle from the  La Luna set.


1st star
add 2nd star


Add circles
Add £rd star


Next add some text, I added "I'm Over the Moon" in Versa Clair  & the small crescent moon.


  I added a few small stars with a silver ink from my stash & some hi-lights with a silver Posca Pen. Finally add some  thread or ribbon to your tag.


Thank you for stopping by... Ann x


Related Posts Plugin for WordPress, Blogger...