Monday, June 28, 2021

Sally DT - A quick sunflower card


Hi there! I have been busy making samples for the Bee crafty show on the Craft Store tomorrow (Tuesday 29th at 1pm) so my step by step today is a very quick one! 

I used 

a 6x6" white card blank

Big ones inkable - eclipse trellis

distress inks in Twisted Citron, mustard seed and Spiced marmalade

Regular Doodle Art sunflower stamps

Versafine/ versafine clair black ink

Ecoline brush pens

a small piece of watercolour paper

adhesive - I used Matte Medium

Everyday sentiments 1 regular

liquid pearls 

I began by attaching the inkable to the card with stencil tape. The folded edge is left without the inkable covering it. I applied the distress inks with blending brushes.

Next I removed the inkable, stamped the sunflower directly onto the card and coloured the leaves with the light green and chartreuse ecoline pens.

I also stamped the small border stamp from the Sunflower set at the two outer corners.
I set the base card aside and stamped the head of the sunflower onto watercolour card.

Then I used a selection of ecolines to colour the flower. 

I cut out the flower and stuck it onto the base card using matte medium.


I added a sentiment using black ink then used liquid pearls to add a little interest to the corners.
Here is the finished card again. 
Don't forget to tune in to the Craft Store at 1pm to see Bev demonstrating with the fabulous new Journaling Girl stamps tomorrow.
Here is a sneaky peek! 
Thanks for looking! 

Saturday, June 26, 2021

Jane DT - Vintage Bees ATC's

 Hello!

This week I have created some artist trading cards...


They were started from a bit of mopping up that I did on a Facebook live this week over on the Bee Crafty Facebook page... https://www.facebook.com/BeeCraftyStamps
I decided that they needed to be finished off, but instead of doing a photo step by step I videoed the process which can be seen here...


Here are some more close up photos...


Here are links to the products used:


Thank you for looking and happy crafting!

Jane xx


Friday, June 25, 2021

Dotty Dragonfly Tag by DT Ann


 Dotty Dragonfly Tag 

By DT Ann 


I’ve been busy painting this week.. our kitchen that is!! 

Creating for this weeks blog was a welcome break, although I  still used paint :)

I used : 

MDF Tag

Dylusions Shimmer Paint 

Dragonfly Set - Stamps & dies

Black Gesso 

Versafine Clair Nocturne 

Ecoline Pens - 233/337/522/601

Gelly Roll Pen -White

Clear embossing powder 


https://www.beecrafty.net/


Cover the MDF tag with black Gesso & dry… 


Chose 3 colours from the Dylusions Shimmer Paints… 

I chose Calypso Teal, Bubblegum Pink & Fresh Lime

Paint a stripe down the centre of the tag… 


Add the next colour, it doesn’t have to be dry as the two colours mix .. 


Add the third colour, again it doesn’t matter if they mix, let the paint dry… add some lines with black Gesso & a flat brush, as in photo 


On a piece of card stamp the largest dragonfly &  the word DRAGONFLY, in Versafine Clair Nocturne, sprinkle with clear embossing powder & heat… when it’s cooled colour the dragonfly with Ecoline Pens… 


Die cut the dragonfly & word …

Using a small ball tool ( I think mine’s  for parchment) add some paint dots around the edges … 


Glue the Dragonfly & word to your tag, add a few white dots with a Gelly Roll pen … 


Thank you for stopping by… Ann xxx


Monday, June 21, 2021

Sally DT - a Dragonfly Tag

  Hi there!  This month's challenge over on the Bee Crafty Facebook group is to show us your journal pages and tags. There are 3 entries allowed per person so you can do both if you wish to! Today I have an mdf doodle art dragonfly tag for you. 

I used

MDF tag

Ranger Distress grit paste

coffee stain script and perspective circles inkables

Dina Wakely heavy body acrylic paints - Ocean, Turquoise and Lime

Dina Wakely clear gesso

Pretty gets Gritty explosion powder - mars

Dina Wakely gloss spray -Lime

Texture Border stamps

Texture circle stamps

Doodle Art XL dragonfly stamp

Ecoline pens

Watercolour paper

Glossy accents

Black card

White embossing powder

Small words stamp set

Versafine ink - tuxedo black

Archival inks

Versamark ink 

Copper gel pen

gel medium

I began by applying some grit paste through the stencils to the mdf tag

Once this was dry, I painted the tag with the three colours of paint.
Next I mixed a little clear gesso with the explosion powder and applied it over the raised areas on the tag.
I stamped the borders and circles with the archival ink.
Next I splattered the tag with a little of the gloss spray and left it to dry.

I stamped the dragonfly in versafine ink onto the watercolour paper, then coloured it with the ecoline pens.

I cut it out and stuck it to the tag with gel medium, applying a little glossy accents along the body.

Finally I stamped a sentiment onto black card and heat embossed in white, adding it to the bottom corner. I also added a few bits of copper gel pen to the tag and the butterfly.

Here is another look at the finished tag with a piece of coordinating ribbon. 
Thanks for looking and I hope to see your tags in the challenge album too! 

Saturday, June 19, 2021

Jane DT - Altered Journaling Girl Tag

 Hello!

Over in the Bee Crafty Facebook group Sally is running the monthly challenge and this month the theme is to create a tag or journal page.  All you have to do is create a project using Bee Crafty products and put it into the challenge album and you are in with a chance to win a £20 Bee Crafty stamps voucher!!

So this week I thought I would create a tag...


1) I started by creating a background on my tag using two of the d'inkables with some distress inks - the d'inkable range are on special offer this weekend!


2) Next I cut out some circles from the Bee Crafty paper range.  To create my girl I stamped the top half of the Elegant Journaling Girl and some of the flowers.  This was then cut out and I altered her hair style and coloured her using Ecoline markers.  To create a longer skirt I cut out another piece of the paper and then a small butterfly wing from one of the sheets...


3) Then the pieces were layered onto the tag with some black ink added around some edges to make them stand out more...


4) Finally I added some of the flower stamps from the same stamp set and a sentiment from the Dylusions Back Chat stickers...


Here are links to the products used:

* D'Inkables On special offer this weekend
* Dylusions Back Chat Stickers

Thank you for looking and happy crafting!

Jane xx

Friday, June 18, 2021

Journal Page Inspo by DT Ann

Journal Page Inspiration 

By DT Ann 


Where to start in your journal can be scary, the BeeCrafty team have been doing some fantastic ‘lives’ this week showing you different ways to start… here’s mine. 


Dylusions 8x8 Journal

Acrylic Paint: Red, Fuchsia, Lemon & white or white gesso.. (You could use Dylusions Pillarbox Red, Bubblegum Pink, LemonDrop)

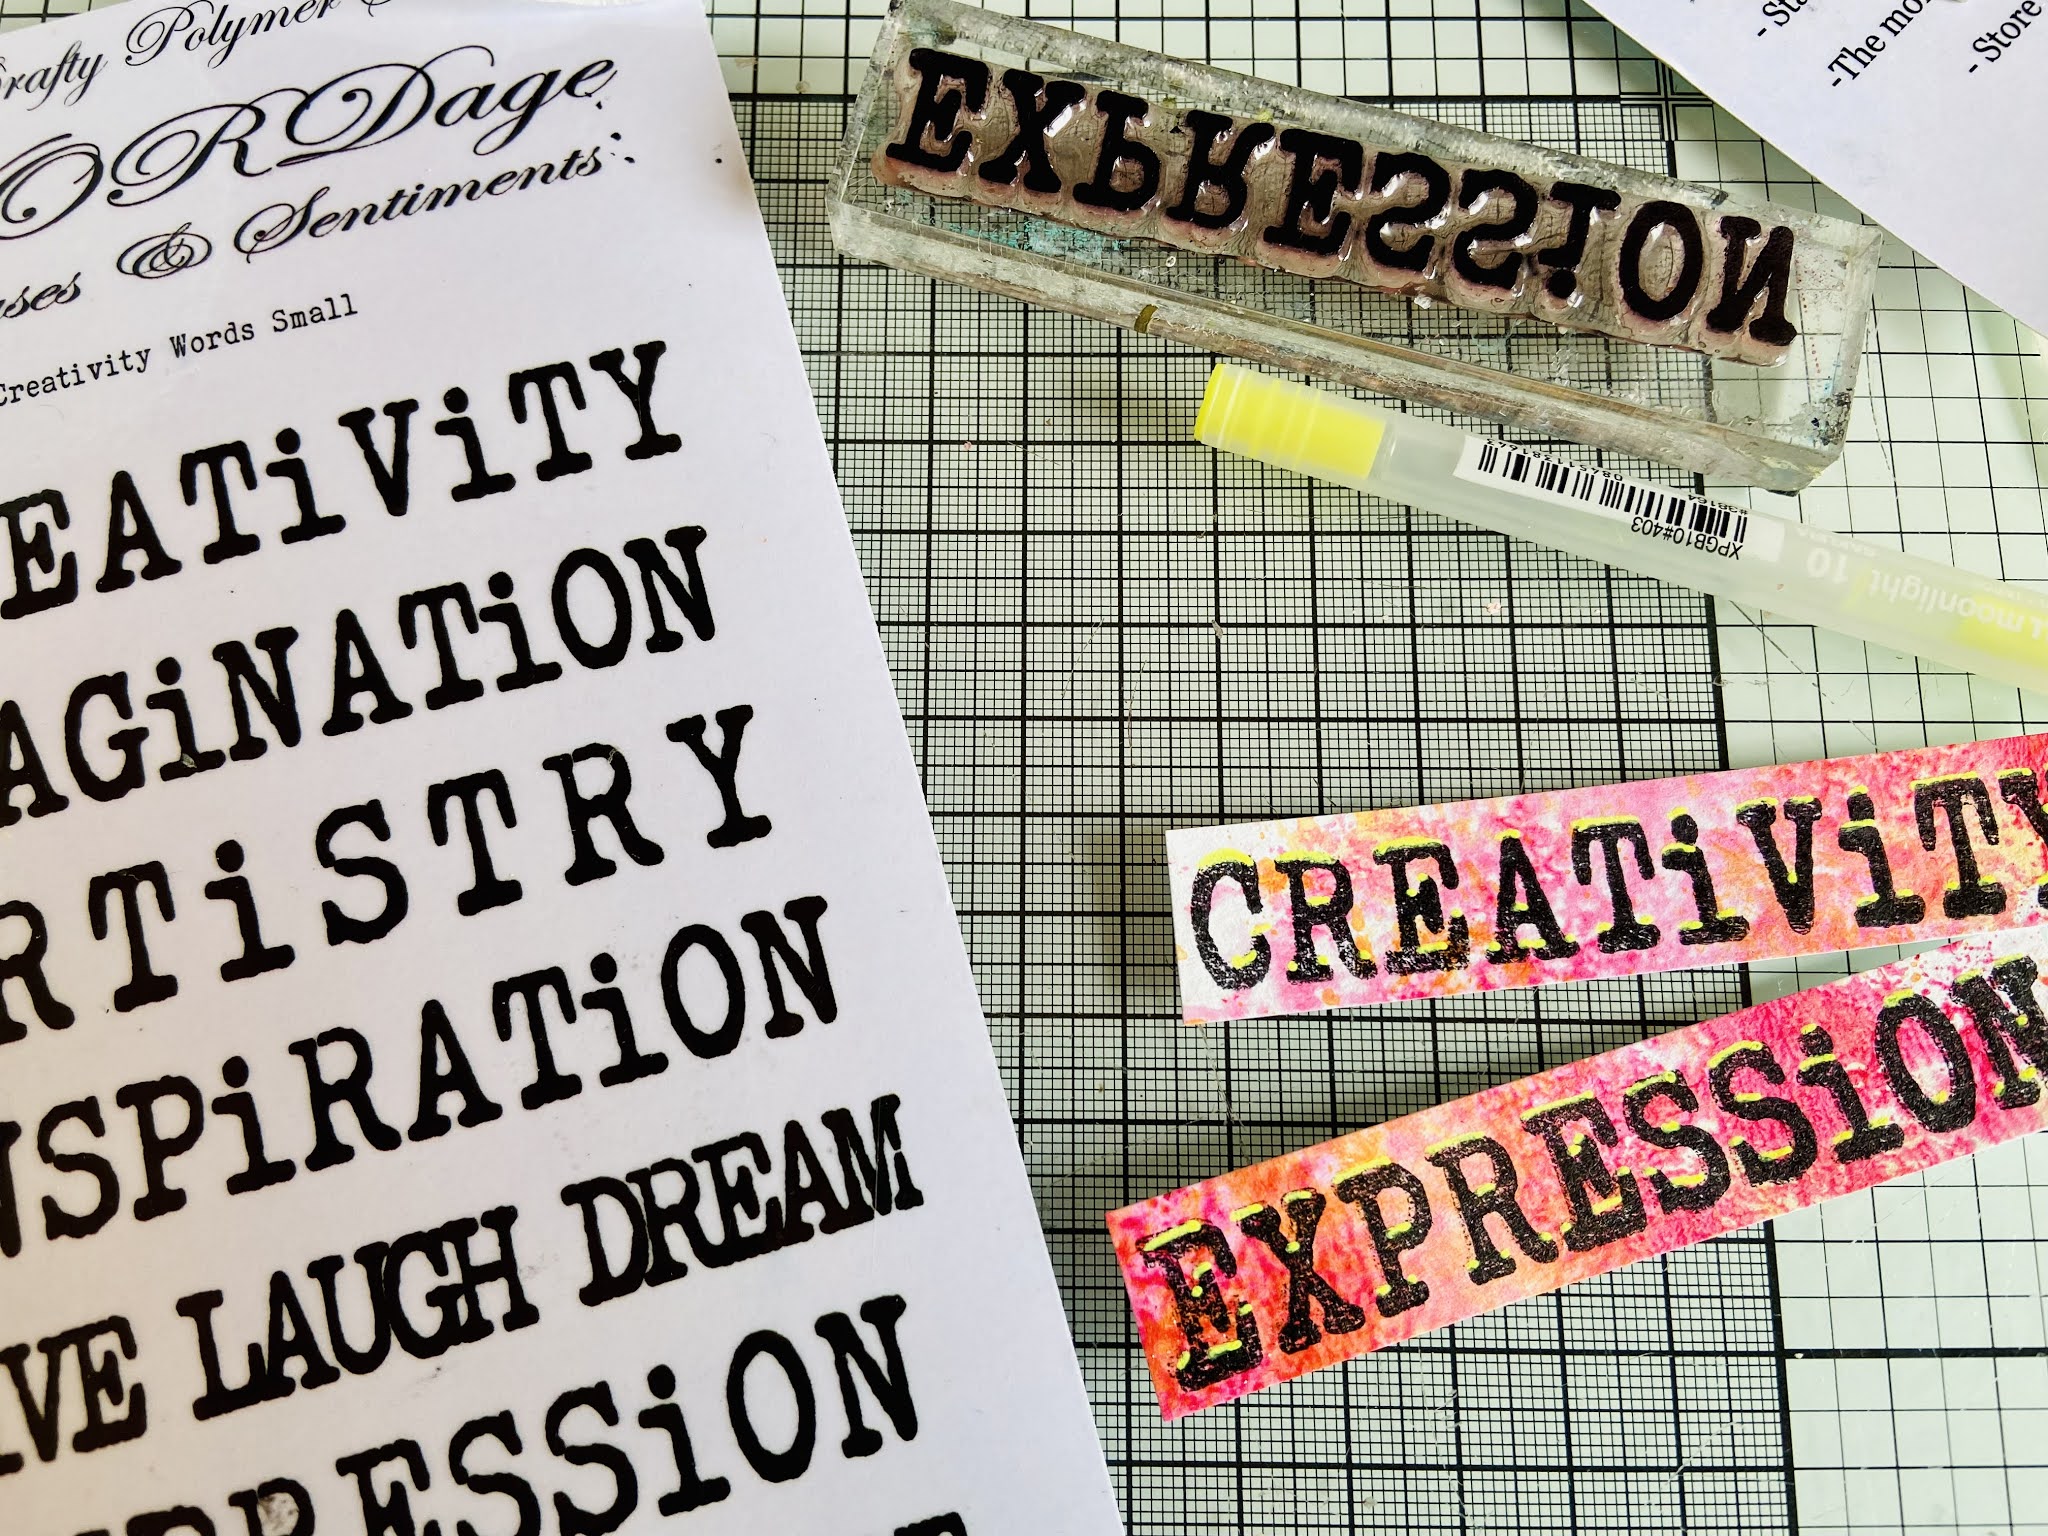
Stamps: Backgrounds, Textures & Boarders/ Creativity Words

 D’Inkables: Reg Dots /Distressed Harlequin/ Stitches

Inkables: 6x6 Regular Dots 

Gelly Roll Moonlight Pens 

 Stazon Black or Versafine Clair Nocturne 

Black thread & an old credit card


https://www.beecrafty.net/


Imagine a horizontal line across your page, with vertical lines running through it. The vertical lines are shorter in the middle & get longer towards the outside edge… 


Start with one colour ( I used ruby ) & paint 3 vertical lines… Add a second colour (fuchsia) & a third (lemon) overlap each colour creating oranges & corals ( use a little water if needed)  then dry … 


Add some extra details (vertically) using the 3 D’Inkables & the same colour paints… I mixed them up a bit to create more colours.. put any excess paint onto a spare piece of paper for later.. 


Make sure your paint is dry before you add any stamping. 

Add, again vertically, some of the texture & boarder stamps in black ink ( Versafine, Versafine Clair & Stazon all seem to work on paint) 


I used the bold squares, the mini dotty one & the wider dotty one…  

Dip an old credit card into some lemon paint (tap off the excess) & added a few lines in darker areas… & a few white gesso dots through the 6x6 Regular Dots Inkable. Leave to dry…

Chose two of the words from the Creativity Set  & stamp in black ink onto your spare piece of paper. Cut around them, ink the edges & add some Moonlight Pen hi-lights…


Add some doodles to your page using the Moonlight Pens… 

Decide where you want your words on your page, glue with some collage gel, cut some thread & add under your “words” …


Remember it’s your journal, just enjoy the process, that’s what it’s there for… Thank you for stopping by… Ann xxx 


Related Posts Plugin for WordPress, Blogger...