Wednesday, September 29, 2021

Create One Background Part 2


Create One Background Part 2

By DT Ann 


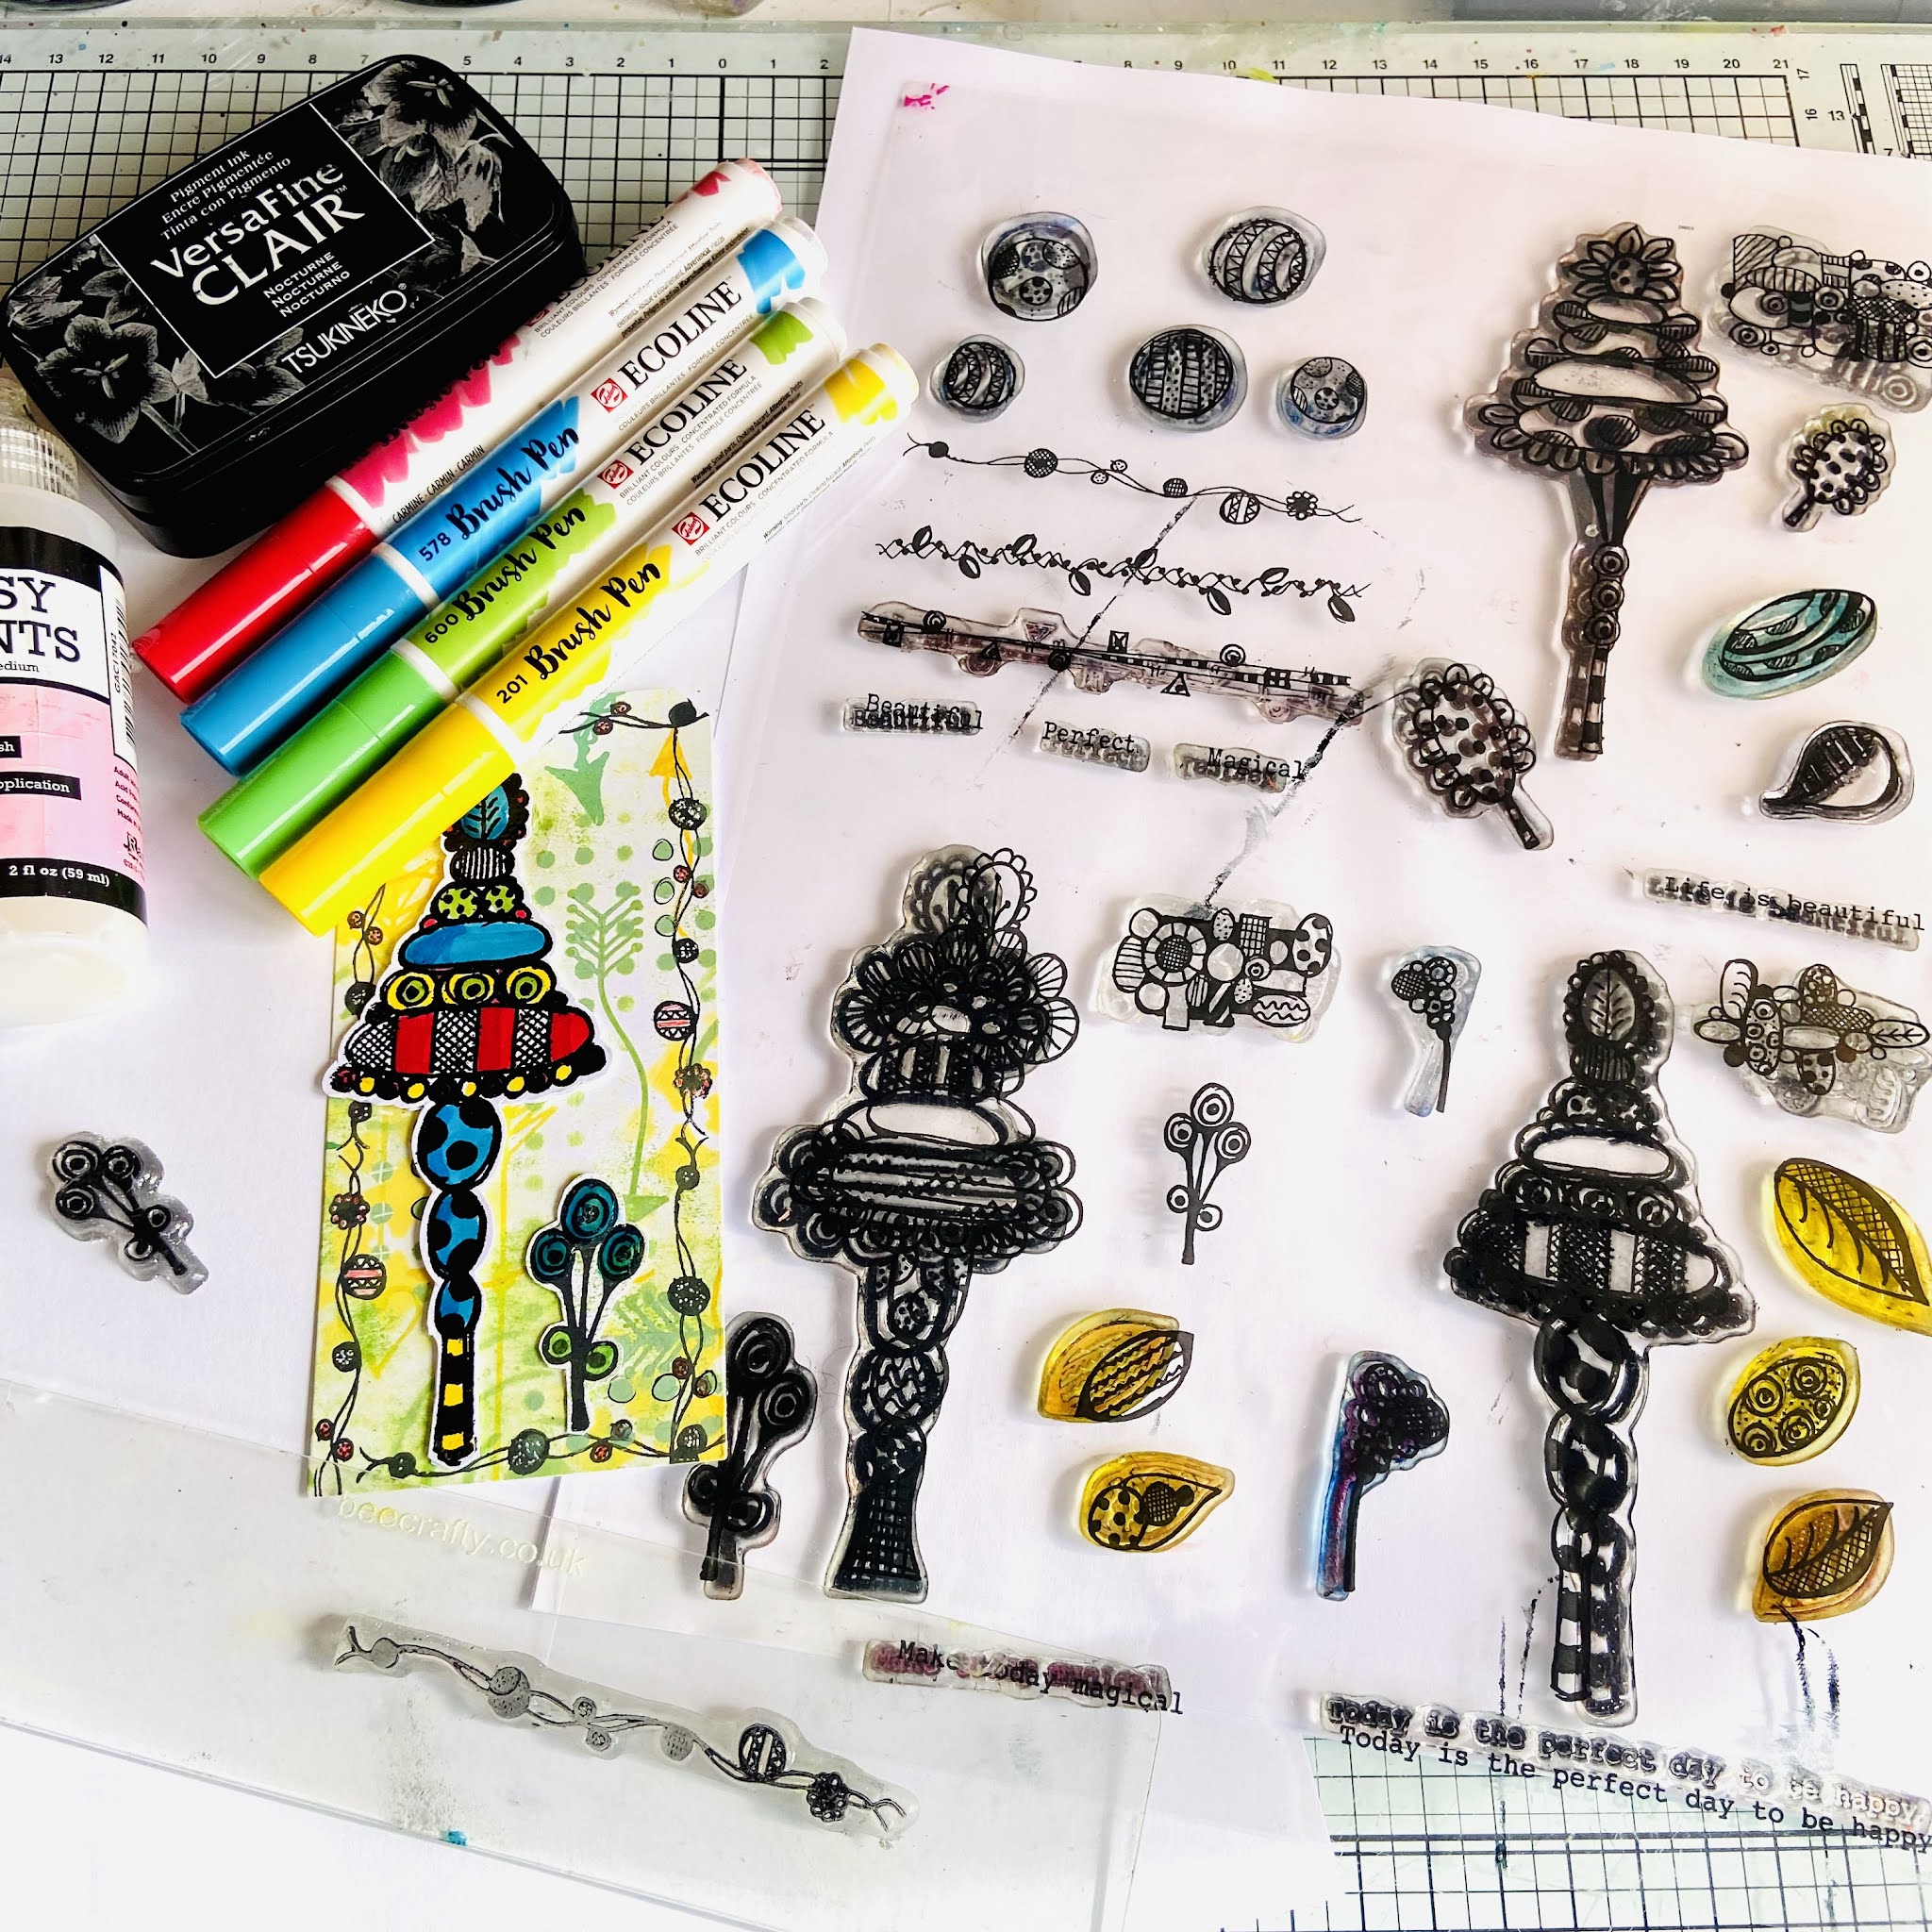
Stamps: ART stamps by Jane Royston - Cone Flowers - Balls & Borders, Beautiful Life, Happy Day, Magical Day

Journaling Girls Arrows

Ecoline Brush Pens Blender, Light Yellow 201, Carmine 318, Sky Blue 578, Green 600, Turquoise Green 661, Pastel Green 666.

Glossy Accents 

Micron Pens .. Black & Red


https://www.beecrafty.net/


I decided to use the tags to make a little book…. 

Start with a piece of card measuring 28cm X 13.5cm. Score at 7cm, 14cm & 21cm.. Use a bone folder to crease each score line… 


Stamp each of the large Cone Flowers in Versafine Clair Nocturne & heat emboss.. colour with Ecoline Brush Pens & fusssy cut… 


For the front tag I stamped the sentiment in Versafine Clair Nocturne onto a spare piece of background paper. Then added some dots & dashes with Micron pens. I stamped the arrow heart in Versafine & coloured in with Carmine, added some squiggly lines around the edges… and Glossy Accents on the hearts… 


For Tag 2 I stamped the star arrow in Versafine Clair Nocturne & some of the “blocks” across the bottom, added some colour with Ecoline Brush Pens & Glossy Accents… 


I stamped the quirky dotty flowers on tag 3, then extended the stems with a Micron pen, coloured with Ecoline Brush Pens & added a sentiment..  


I used the ball boarder around Tag 4, using Versafine Clair Nocturne. Then stamped & cut out the swirl flowers & again coloured with Ecoline Brush Pens & added Glossy Accents… 


For the last tag I added the word Magical to the Cone Flower & used one of the circles around the edges, finishing with more Glossy Accents.. 


I glued each tag to a page & cut across the top corners… 


Thank you for stopping by…  Ann xxx


Monday, September 27, 2021

Sally DT - Dragonfly dreams Journal Spread

 Hi there! I've been enjoying myself in my journal again. I thought I would show you how this page came about. 

I started off by tearing some strips of tissue from my soak up sheets that I put in place when I use sprays on things. These have been sprayed with distress oxide and gloss sprays.
I then stuck some of the strips into my Dylusions journal with matte medium and left to dry
Next I sprayed a little distress oxide ink in the white spaces and again left to dry
I added some stencilling using the circle dinkables and blending brushes. There was enough residual ink on my brushes without reinking them.

I stamped the ledger stamp in Peacock Feathers distress oxide ink randomly around the page.
I stamped the smaller coffee rings in frayed burlap distress oxide ink then left it to dry.
I used memento Espresso Truffle ink to stamp the Elder flowers and the numbers from the coffee stains set.  
Next I stamped the dragonfly onto a scrap of watercolour paper in versafine clair ink.
I coloured it using ecoline pens, the wings using pastel blue, rose, violet and yellow, then I coloured the body with a turquoise green. I cut out the dragonfly, cutting off legs and antennae.
I used the memento ink to stamp the dragonfly direct to the journal page where I wanted it to go and left it to dry.
Finally, I used matte medium to adhere the dragonfly and the sentiment (from the Dina Wakely collage papers) into place.
Here is another look at the finished page. 

I used:
Memento Espresso Truffle ink
Tissue paper
Thanks for looking and Happy Crafting! 

Saturday, September 25, 2021

Jane DT - Distress Background Journaling Girl Card

 Hello!

This week in my Facebook live I was using distress inks to create backgrounds for cards, so I decided to carry on with the theme...


1) First I used my blending brush with Kitsch Flamingo and Squeezed Lemonade on a piece of mixed media card...


2) Using the same two colours plus Carved Pumpkin I added some stenciling with one of the d'inkables from set 10 and also the circles, one layer at a time...


3) Next I used the same inkpads to add some stamping from the Journaling Girls Sam set.  Once I had added the coloured ink I also added some stamping with the black Hero Arts ink pad...


4) After that  I stamped the girl from the set, cut out and coloured with Ecoline markers...


5) Finally the card was put together with a black layer...


Here are links to the products used:


Thank you for looking and happy crafting!
Jane xx


Wednesday, September 22, 2021

Create One Background… by DT Ann

 Create One Background… 

Part One

By DT Ann 


This week I’ve created a background that can be used in many ways… you could use it for cards , tags, making boxes, mini journals… I decided to do this in two parts, this week is making the background… see what I make with it next week!! 


Distress Oxides: Mowed Lawn, Squeezed Lemonade, Mustard Seed

Versafine Clair: Green Oasis & Cheerful 

D’Inkables: Circle Lattice (set1) Sunset (set3) Regular Dots (set 2)

Stamps: Journaling Girls Arrows

Dies : Tags #1


https://www.beecrafty.net/


Start with an A4 piece of paper, brayer two colours of Distress Oxides across it… ( I used Mowed Lawn & Squeezed Lemonade) … 


Add some Mowed Lawn through the Sunset D’Inkable… 


Then some Squeezed Lemonade through the Circle Lattice & Mowed Lawn Regular Dots D’Inkable… 


Stamp the ‘circular’ arrow from the Journaling Girls in Versafine Clair Green Oasis 


Add more arrows using Mowed Lawn & Mustard Seed Distress Oxides 


Add more arrows using Cheerful Versafine Clair ink… 


You’ve created a background, you can cut the A4 sheet up & use how you want to… 


I cut 5 tags out of mine, using the large tag die, there’s some spare bits which may come in handy, hang on to those! See how I used them next week…. 


But you could cut 2 tags, a 5x5 square to add to a card & have enough left over for a DL card… 


Next week I’ll show you how I finished my tags off, until then happy crafting… 


Thank you for stopping by… Ann xxx


Monday, September 20, 2021

DT Sally - A pot for my blending brushes

Hi There! I have been meaning to make a pot for my blending brushes, so, as the theme on the Bee Crafty Facebook challenge is to make something for yourself, I decided to have a go. 

Here is what I did:


I used a can from some pineapple slices that had a ring pull, so to make it safe, I squeezed the top edge with pliers to remove the sharp edge.


I measured the depth of the can and cut a piece of 180gsm Kraft card to fit with a small overlap (8.5cm x 29cm)

I used spots of shimmer paint to cover the card in vertical stripes, blending the colours together at the edges.
Once this was dry I wiped it with an anti static cloth, then stamped a selection of flowers in versamark, before heat embossing with fine detail white powder.

I then stamped a selection of the arrows, question marks and exclamation marks using black archival in the spaces.

I added a few highlights and a scribbled border using both gelly roll and posca white pens.
To attach the card to the can, I used double sided tape to attach it to the tin. I then used both tape and glue to secure the end of the band. 

I used:
A can from some pineapple slices
1 A4 sheet of 180gsm kraft card
Versamark ink

Here are a couple of views of the pot from different sides, which really don't do justice to the shimmery paints! 
I do hope you will have a go and share in the facebook group before the end of the month. Don't forget to enter your projects on the September challenge album too! 
Our lovely Bev and Sam are on the Craft Store with oodles of amazing bargains in a Bee Crafty Happy Hour at 1pm tomorrow! Don't miss it! 
Thanks for looking! 
Related Posts Plugin for WordPress, Blogger...