Monday, September 09, 2019

Lorre-Anne DT - For You

Hi everyone, for my Bee Crafty DT blog post this week I'm sharing a card I have made using the beautiful Violinist from the Steampunk Stories range.  My Gran played the Violin and every time I see this stamp I think of her.


Materials
What to do
  • Cut brown card slightly smaller than the card blank, and white slightly smaller again.
  • Put some of each Oxide on to a blending mat, spritz with water and drag the white card through it.  Dry with a heat tool.
  • Stamp the Fur Elise using Ground Expresso in the centre of the card.  Blend some Gathered Twigs around the edges and mat to the brown card.  Fix to the card blank.
  • Stamp the Violinist using Picked Raspberry and Gathered Twigs on to a spare piece of white card.  Carefully cut out, and blend the ink using a water brush.  Affix to the card with glue.
  • Stamp the sentiment using Ground Expresso, cut out and blend some Gathered Twigs around the edges before matting to a piece of brown card.  Attach to the card with foam pads.
That's it for this week everyone, I'll be back soon with another card.

Hugs, Lorre-Anne x


Saturday, September 07, 2019

Jane DT - 'Live For Now' Autumnal Card

Hello!
 
As we move towards Autumn I decided to make this card to share with you today on the Buzzy Goings on at Bee Crafty blog...


* I started by using some distress oxide ink pads (fossilized amber, wild honey, dried marigold, fired brick, vintage photo) to build up layers of ink for my backgrounds.
 
* Next I used some of the same inks to add some stamping using the Stitch Borders.
 
* To create some extra spots of light I stencilled using buff coloured paint through the circles d'inkable.
 
* Onto the same coloured background I stamped the smaller maple leaf 3 times using Versafine ink in sepia then coated the lines with clear embossing powder which was heated.  Once I had cut them out they were added to the panel using glue gel.
 
* Finally I stamped a couple of the sentiments from the Small Words set onto the same background then cut out and added them to the card...


The products used were:

* Beautanicals - Maple Leaf Set
* Art Stamps - Stitch Borders
* Wordage - Small Words
* D'Inkable - Circles
* Distress Oxide Ink Pads

The Maple Leaf stamp set is currently at a sale price as part of the Wednesday Wow over on the website, along with some other products, so is well worth taking a look at!

Thank you for looking and happy crafting!

Jane xx

Thursday, September 05, 2019

Karen DT- Every hour is a dream

Hi crafters xx

I'm on the Buzzy Goings On At Bee Crafty Blog today with my make using the brilliant Skyline Inkables. I love the versatility of these and they can be used for any occasion

Products used :
Skyline Inkables 
Every hour is a Dream sentiment
Birds On A Wire 
Distress Oxides
Versafine


Having created a background using Distress Oxides, I then inked through various Skyline Inkables in coordinating and graduating Oxides
I added highlights with a white gel pen
The Birds On A Wire and sentiment, were stamped in black onyx versafine
This was then matted onto black card before adhering to card blank

A simple but beautiful card that would look completely different in other colour combinations

Thankyou for stopping by and I'll be back again soon

Crafty hugs xx

Wednesday, September 04, 2019

Caz Harwood - sparkle butterfly card


PRODUCTS USED:

Ledger measure stamp set 

Butterfly/dragonfly art stamp set 

Small words wordage stamps 

Texture disc from set 1

Distress oxides/ink

Versafine onyx black ink

7x7 card blank 

Brayer

Gelly roll clear sparkle pen


HOW TO MAKE:
Brayer on some twisted citron oxide straight to the card blank

And the same with vintage photo distress ink

Then stamp the ledger measure stamps in Versamark onyx black side by side

Add some dots from the texture disc stencils set 1 in peacock feathers oxide

Stamp out the butterfly from the stamp set over the card front at random and also onto a sheet of card (to be fussy cut)

Colour and fussy cut the butterflies - also stamp out the small word sentiments and cut them out too

Add some clear sparkle to the coloured butterflies - I used my gelly roll pen. 
Glue the butterflies over the top of the stamped images and stick sentiment down. 

You're done! 

Hope you like 
❤️
Thanks for looking. 


Monday, September 02, 2019

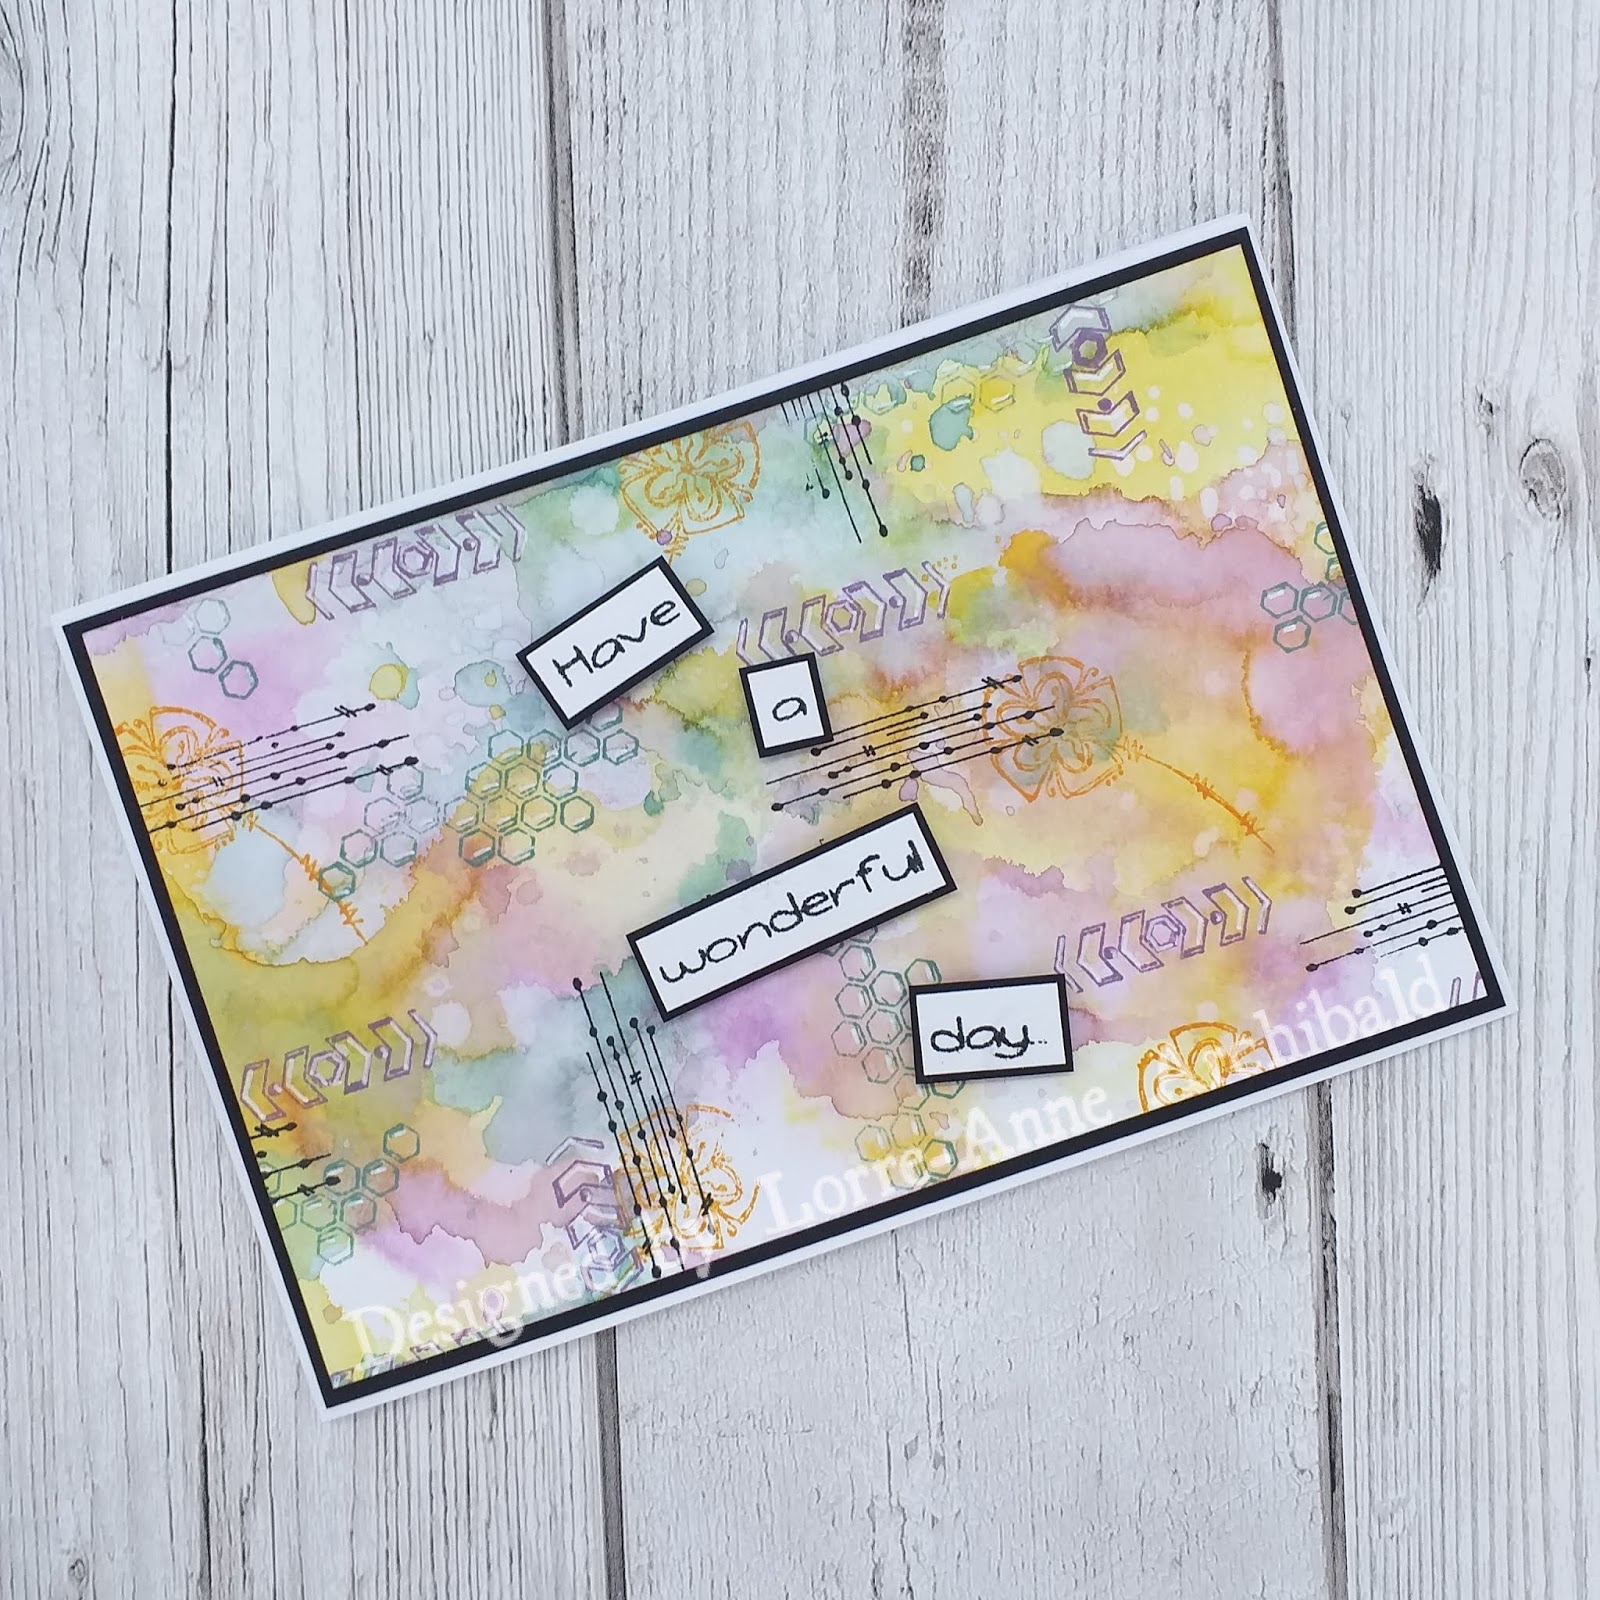
Lorre-Anne DT - Have a wonderful day

Hi everyone I'm up on the Bee Crafty blog today sharing my latest DT project.  I've got the Doodle Art stamps out again.


Materials
What to do
  • Cut black card slightly smaller thank the card blank, and white slightly smaller again.
  • Put some of each Oxide on to a blending mat and spritz with water.  Drag the piece of white card through it and dry with a heat tool.
  • Stamp the flowers with Spiced Marmalade, the chevrons with Seedless Preserves and the honeycomb with Cracked Pistachio.
  • Stamp the lines using Versafine ink and mat this card to the black card.  Glue to the card blank.
  • Stamp the sentiment using Versafine ink and chop into pieces.  Mat to black card and affix to the card blank with foam pads.
  • Add some highlights with the white pen.
That's it for this week, I'll be back next Monday with a new project.

Hugs, Lorre-Anne x

Saturday, August 31, 2019

Jane DT - 'Vintage Floral' MDF Tag

Hello!

Today on the Buzzy Goings on at Bee Crafty blog I am sharing a large MDF tag that I have added lots of mixed media layers and texture to...


First I primed the surface with white gesso before adding some crackle paint that I tinted with burnt umber to create a lighter shade of brown.  Once this had dried I added watered down burnt umber to the tag, allowing it to drip in areas...


I then used crackle paste with some sepia pigment powder mixed in and put it through the Mandala 4 inkable.  Once this had dried over night I rubbed some gold gilding wax over the top...


To create a bit more detail in the background I used the Script XL stamp with clear ink and gold embossing powder...


I wanted to create a really built up tag with lots of different textures and materials, so I first added a piece of cambric which I coloured with some burnt umber acrylic paint.  For another layer I took a length of black thread and placed it on top of the cambric.  Next I used some pieces of music and book paper which I had coated with resin and stapled them together...


So far the colours had all been very vintage in tone and I wanted my next layer to be more colourful and act as the main focal point.  I stamped out the Beautanicals Large Poppy, Large rose and Large Sunflower using sepia Versafine and coated the lines with clear powder.  After cutting them out I coloured them using watercolour paints...


As a contrast and to add some extra dimension I painted some of the MDF cogs and keys in burnt umber then added gilding wax.  I stuck these to the tag then added a metal dragonfly from the Steampunk and Junk pieces.  The colours were all fading into the background too much for my liking so I added some dry brushing using green gold and titan buff acrylic paint, then when I was happy added some gold acrylic splatters...


Finally I raided my bead stash and added a few clusters of beads, then chose the sentiment which I stamped out and cut into sections before adding to the tag...


Here are the products that I used:

* Beautanicals - Large Poppy; Large Rose; Large Sunflower
* Backdrops - Script XL
* Wordage - Life and Rain (Large)
* Inkables - Mandala 4
* MDF - Large Tag
* MDF - Cogs
* MDF - Keys
* Steampunk and Junk - Dragonfly

I really enjoyed creating this piece and thank you for looking!

Happy crafting,

Jane xx

Thursday, August 29, 2019

Karen DT - Laugh Loud

Good morning crafters xx

It's Thursday which means I'm on the
Bee Crafty blog today xx

I've been playing with the stunning Time Measure stamp set xx

Also used:
Everyday sentiment 2 set
Dinkables
Texture, circles and film strip set
Kuretake clean colour pens
Distress Oxides
Versafine


To begin I stamped the fabulous Time Measure stamp in black onyx Versafine.
I used my Kuretake clean colour pens to colour in the 2 butterflies, within the design
I stamped some of the texture circles randomly in Distress Oxides
I also blended Distress Oxides through the Honeycomb, and Dots and Lines Dinkables.
The sentiment was stamped in black onyx versafine and a black wiggly frame was drawn around the edge of the card.
I adhered the card to the front of the card blank to complete my make.

Thankyou for popping by and I'll be back again soon.

Crafty hugs xx


Wednesday, August 28, 2019

Caz Harwood - Live in the here and now tag


PRODUCTS USED:

Doodle art flower stamp set

Doodle art bird stamp set

Ticker tape 2 set

Ink'able triangle stripes

Acrylic paints
Gel plate
Versafine onyx black
Black soot distress ink
Cherry pink stazon

HOW TO MAKE:

I made a selection of prints using my gel plate.
For this tag I used the neon print in the top right corner.

Cut out a tag, then stencilled on some stripes using the Ink'able and black soot distress.

Then I stamped the doodle sunflower onto separate card - coloured and fussy cut it.

I added some decorative stamps to the background from the doodle bird set...and stamped the flower where I wanted to place the fussy cut one.

Stuck down the pieces and added a ticker tape sentiment from set 2. 

Hope you like! 
♥️
Thanks for looking. 

Monday, August 26, 2019

Lorre-Anne DT - Be Yourself!

Hi everyone, for my Bee Crafty DT post this week I've been using the amazing Octopod.. I'd created this inky background a while ago and as I was flicking through my stamps I thought it would work brilliantly with the Octopod.


Materials
What to do
  • Cut black card slightly smaller than the card blank, and white card slightly smaller again.
  • Create the background by spritzing each Dylusion colour over the square of white card, spritzing over these inks with water and then drying with a heat tool.
  • Stamp some bubbles and seaweed over the background using Mermaid Lagoon and Mowed Lawn Oxides and then mat this to black card and attach to card blank.
  • Stamp the Octopod using Versafine ink on spare white card, add some colour with the Crayon and carefully cut out.  Spritz with the Mica spray and then affix to the card with foam pads.
  • Stamp the sentiment on white card using Versafine ink, chop in to 2 pieces and mat to black card.  Attach to card with foam pads.
  • Add some highlights using the white gel pen.
That's it for this week, I'll be back soon with a new project to share.

Hugs, Lorre-Anne x


Saturday, August 24, 2019

Jane DT - 'Shimmering Shells'

Hello!

Today on the Buzzy Goings on at Bee Crafty blog I am sharing some small projects that I created using an under the sea theme. 

I have also made a video of how one of them was made which you can watch here...

https://youtu.be/WJ-zhvKVkXI


* I started by using some distress oxide inkpads to create a watery effect background by placing some ink on my mat then adding water - Broken China and Peacock Feathers
* Next I used Salty Ocean distress oxide to add some stamping using the positive soapy bubbles stamp
* After using my anti static bag I put clear texture paste through the circles d'inkable and then sprinkled a white glitter embossing powder over the top.  As this is heated up it also bubbles the paste which is the effect that I wanted
* Using black archival ink I stamped out two different sizes of shell and after cutting them out painted them using some metallic watercolours.  I then used Dylusions paint pens to add in extra details
* These were then stuck down using glue gel
* Finally I chose sentiments from Ticker Tape 2 which were stamped in black then cut out with scissors


Here are the products I used:

* Art Stamps - Conch Shell (regular)
* Art Stamps - Conch Shell (XL)
* Backdrop Stamps - Soapy Bubbles Positive
* Wordage Stamps - Ticker Tape 2
* D'Inkables - Circles
* Distress Oxide Inkpads
* Dylusions Paint Pens

Thank you for looking and happy crafting!

Jane xx
Related Posts Plugin for WordPress, Blogger...