Monday, June 14, 2021

Sally DT - Never Stop looking up Journal page

 Hi there! Over the last month I have bought a few new goodies so it was time to try them out! Here is a journal page in my 8x8 dylusions journal using several of them. 

I used:
Gold gilding wax
Versamark ink
Gold Liquid pearls
A small piece of black card

Here's what I did:

I applied some texture paste through the mandala stencil to the page and left it to dry.
Next I sprayed it with the Dina Wakely gloss sprays, then left it to dry very thoroughly.

I applied gilding wax to the mandala area before setting the journal aside.

I stamped the la Luna and the moon stamps in versamark onto the collage paper and heat embossed with gold powder.
I cut these out and applied them to the page with gel medium.
I used archival ink to stamp some borders and add a few extra details. Some white pen helped to make them stand out a little.
I stamped and embossed the sentiment onto the black card and cut it out.
I added it to the page with the gel medium, and added a few dots of liquid pearls on the circles and at the corners.
This was the first page in my new journal, although it isn't at the front. I want to get used to working on a bigger page before I attempt that. I hope I've inspired you to use some of your stash to make a journal page. 
Do come and share your journal pages or tags over on the Bee Crafty facebook group for this month's challenge.
Thanks for looking! 

Saturday, June 12, 2021

Jane DT - Embossed Resist Butterfly Card

 Hello!

This week I am sharing a quick to make card...


1) I stamped two of the butterflies using embossing ink and heat embossed with white superfine powder.

2) Using a blending brush I added distress inks across the right side of the card.  I used worn lipstick, mustard seed and salvaged patina.

3) To create extra texture I splashed some water droplets across the ink and lifted it with a piece of kitchen roll.

4) The sentiment was stamped onto black card and embossed with white powder before putting the card altogether, adding a black card layer to lift the colours.


Here are links to the products used:


Thank you for looking and happy crafting!

Jane xx


Friday, June 11, 2021

Slim-line dragonfly cardboard DT Ann

 Slim-line Dragonfly Card

By DT Ann 


There seems to be a trend for slim-line cards just now, needing some inspiration I looked in my Bee Crafty stash & decided to use some of the papers Bev designed… 


I used:

Bee Crafty Papers

Stamps: Dragonflies/ Coffee Stains/ Backgrounds , Textures & Boarders/ Small Words

Dies: Dragonfly 

Distress Oxide : Salty Ocean 

Versamark Ink

Distress Embossing Glaze: Speckled Egg

White Pen

White card


https://www.beecrafty.net/


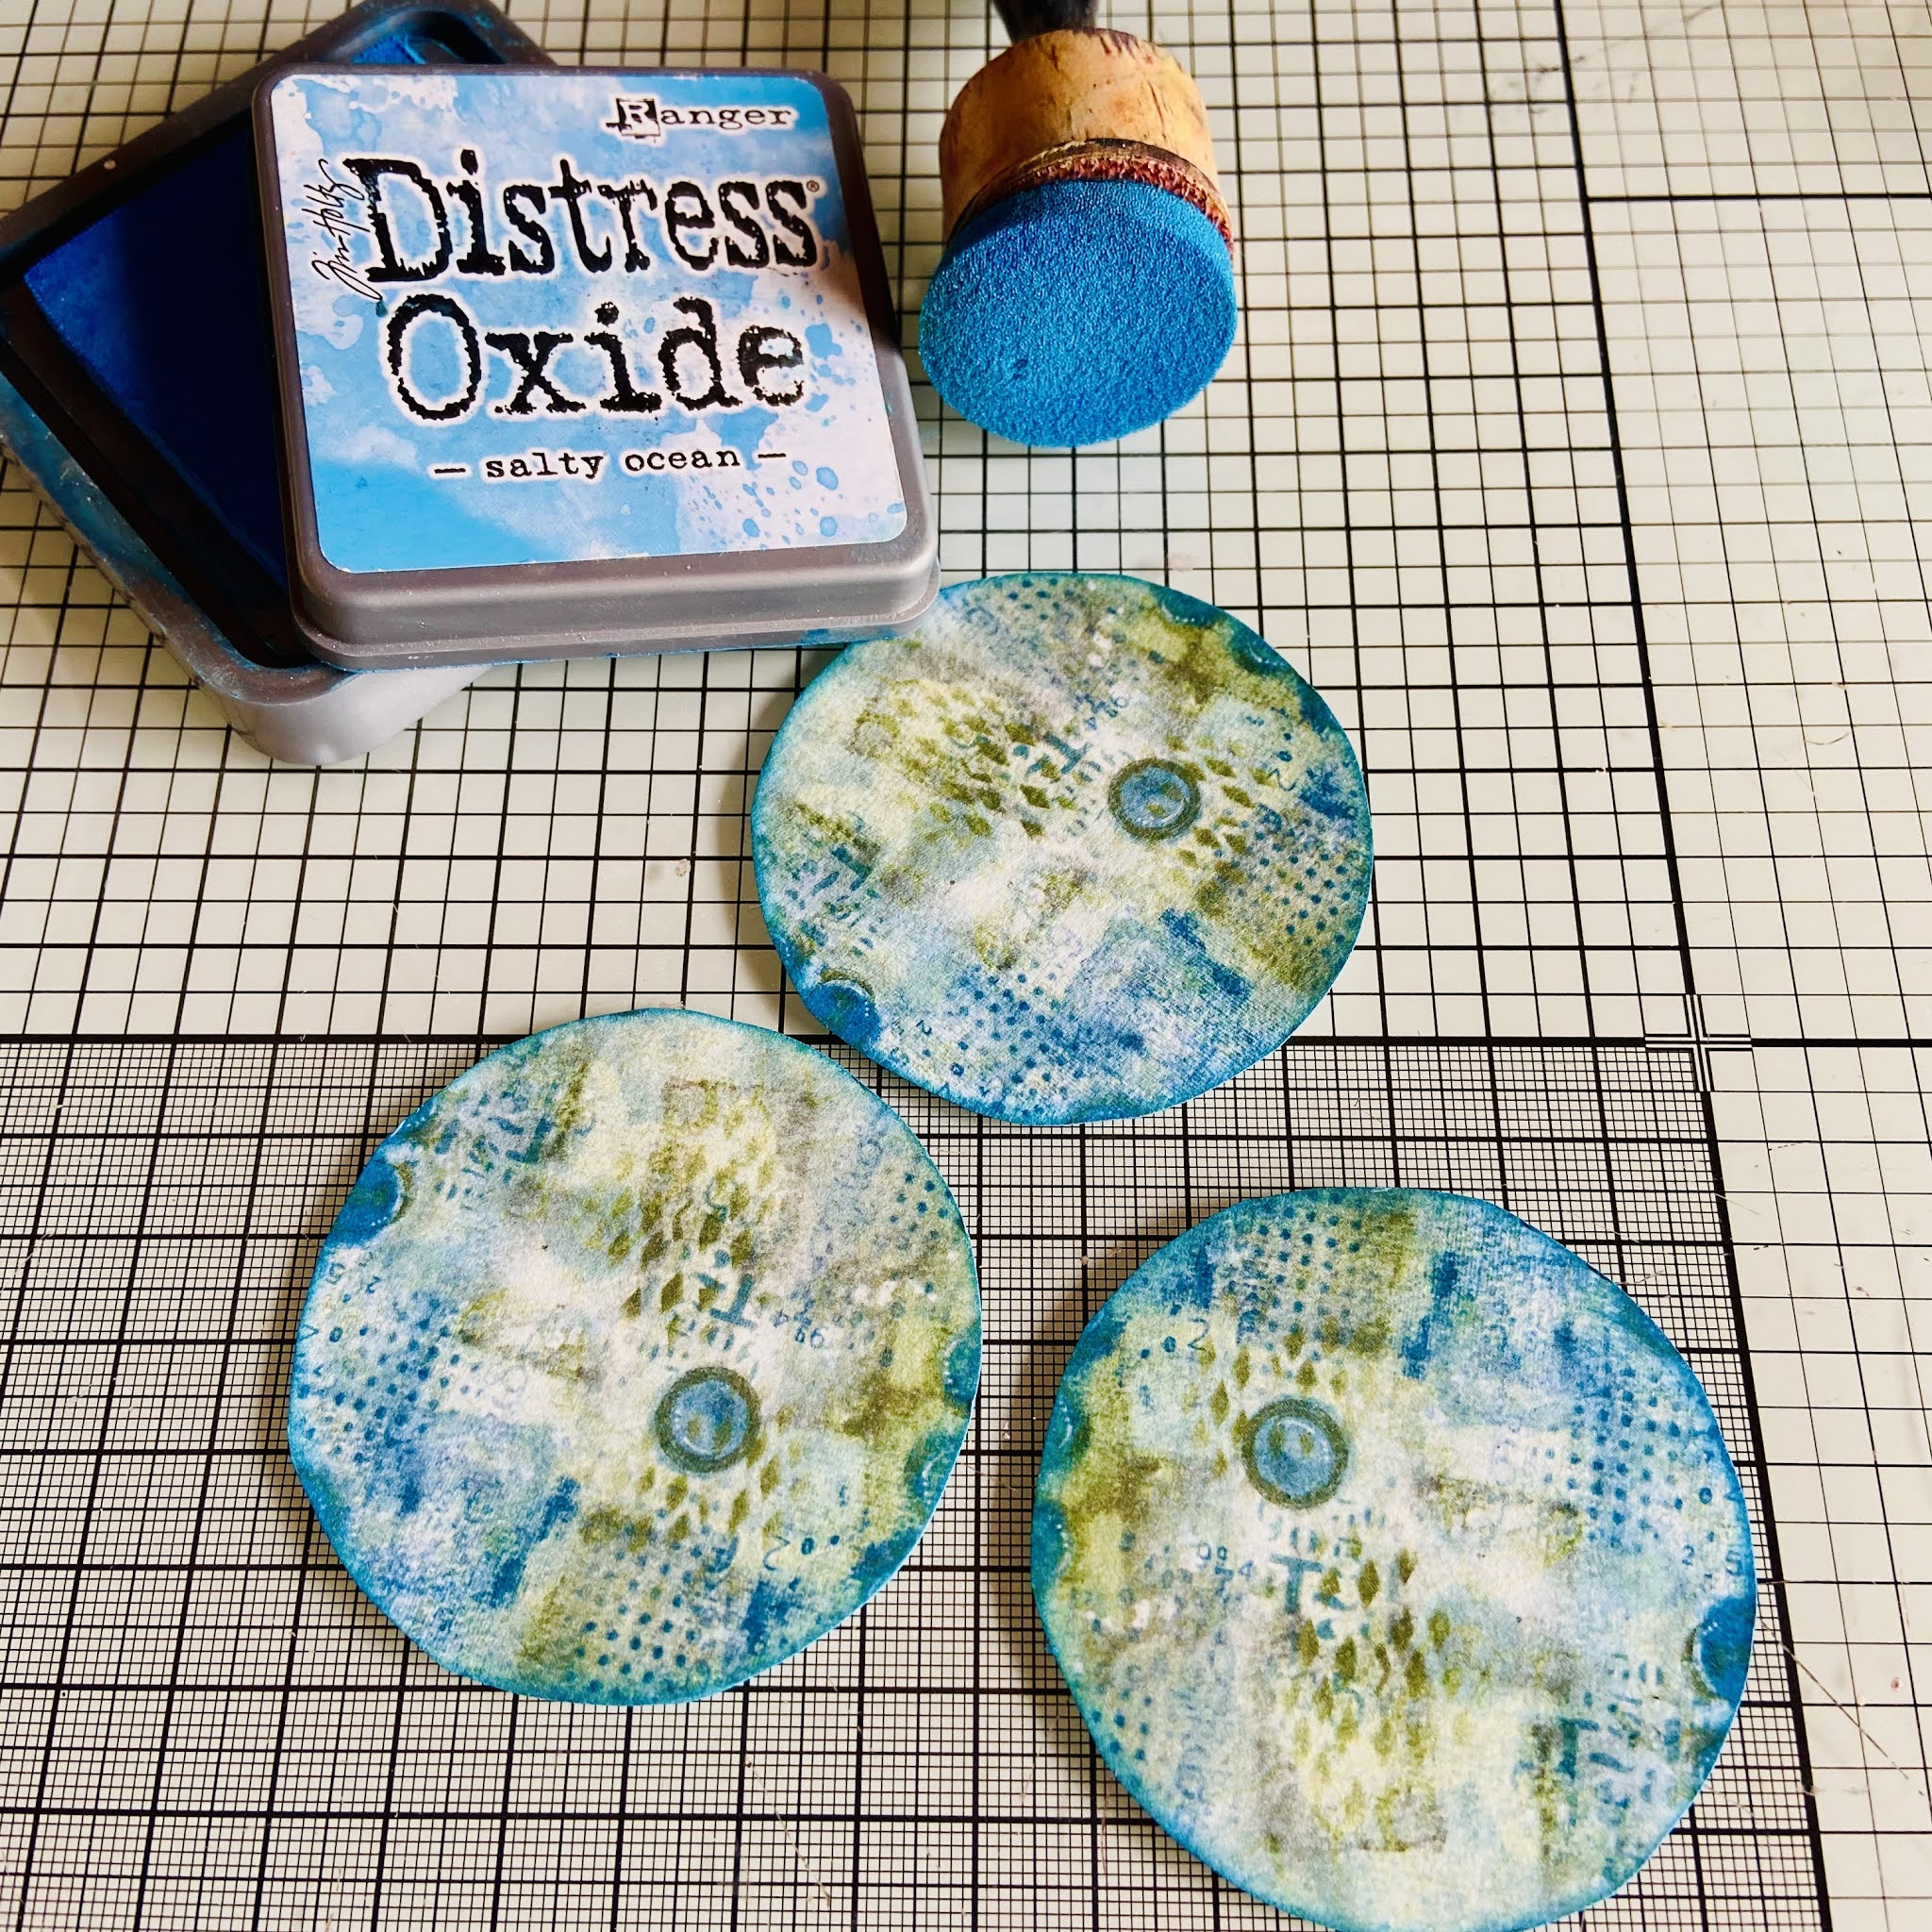
Cut a piece of card 8”x 6” & score down the centre to form an 8” x 3” card…. Cut out the three circles from the Bee Crafty papers ... 


Ink the edges with Salty Ocean Distress Oxide Ink.. 


Add some extra background details using the Coffee Stain Stamp set & the numbers from the Dragonflies set… 


On a clean piece of card stamp the medium dragonfly 3 times in Versamark ink and cover with Distress Embossing Glaze ( Speckled Egg), remove excess & heat emboss. 


When cooled die cut each one. Put some Salty Ocean onto a glass or blending mat, then use a water brush (or water & a brush) to colour the main body of the dragonfly… 


Use the top dotty lines stamp vertically on the slim line card front, to form two lines from opposite corners…  (see photo ⬇️)


Glue the circles to the card front & add the dragonflies… 


 Add some doodles with a white pen & a sentiment from the Small Words set … 


Thank you for stopping by … Ann xxx


Tuesday, June 08, 2021

 Today we are joining with other crafters to offer Ocean themed inspiration and some crafty discounts to celebrate #worldoceansday

You will find the ocean themed Bee Crafty Products here for 50% OFF
https://www.beecrafty.net/world-oceans-day.irc

But don't forget to check out the official World Oceans Day website to find out more about today
https://unworldoceansday.org/

*All orders over £20 today will receive a FREE Bee Crafty Art Stamps XL Conch Shell Stamp Set*

So the DT have sent me some of their favourite ocean themed makes to share with you


I hope you have a great day
xx Bev xx

Please Remember To Check out these other awesome crafty retailers to checkout their World Oceans Day event

Pretty Gets Gritty
https://prettygetsgritty.co.uk/

Louise Sims
https://www.youtube.com/channel/UCkgy6qSOz-oO24IeQ9HRdFQ

Dolly Dimples
https://www.dollydimplescrafts.co.uk/under-the-sea-stamps

JMC Designs
https://www.youtube.com/channel/UCjKLRO9YNyXuqTHR4FnAzVQ

CleverPrints with Emma Blake
https://www.cleverprints.co.uk/


Monday, June 07, 2021

Sally DT - Do what you love card


Last week I treated myself to some more Dina Wakely Gloss sprays and decided to have a play with them for my blog post this week. 

Here is what I used to make my card:

15cm square card blank

14cm square of mixed media card

Dina Wakely gloss sprays in Heather, Mineral, Lime and Eggplant

Faces - Whatever Works stamp set

Inkable Easy frame circle

Inkable big one - Bakewell

Small Words stamp set

Archival ink in Cobalt and Majestic Violet

blending brush

Versamark ink 

White embossing powder

Dark blue scrap of card

First I sprayed the mixed media card with the 3 paler gloss sprays and left to dry.

Next I stamped the face onto the sprayed card with the blue Archival ink. Make sure you use a juicy inkpad for this and don't leave it on the sprayed surface for too long or it will stick. I also stamped the other eye, lining up the eyebrows.

Once the ink was dry I placed the Bakewell inkable and inny circle mask over the face before spraying with the Egg plant gloss spray. I put the Bakewell on the right hand side, leaving an area on the left of the sprayed card not stencilled.

After removing the stencil/masks and putting them into a bowl of water, I used the tubes from the bottles to splatter the colours across the sprayed card.

I used the same part of the bottle to draw some solid lines of the spray where the edge of the big one stopped.
once this was dry I placed the circle back over the face and used a blending brush to add a little extra shading in the purple archival ink around the edge of the circle and the edge of the card panel.
finally I mounted it onto a blank white card and added a sentiment (white embossed onto a scrap of navy blue card)
I can see I am going to have so much fun with the sprays as well as the stamps! 
Thanks for looking! 

Saturday, June 05, 2021

Jane DT - 'Love You To The Moon & Back'

 Hello!

This week I have created a card using lots of layers for the background and the beautiful La Luna stamp collection...

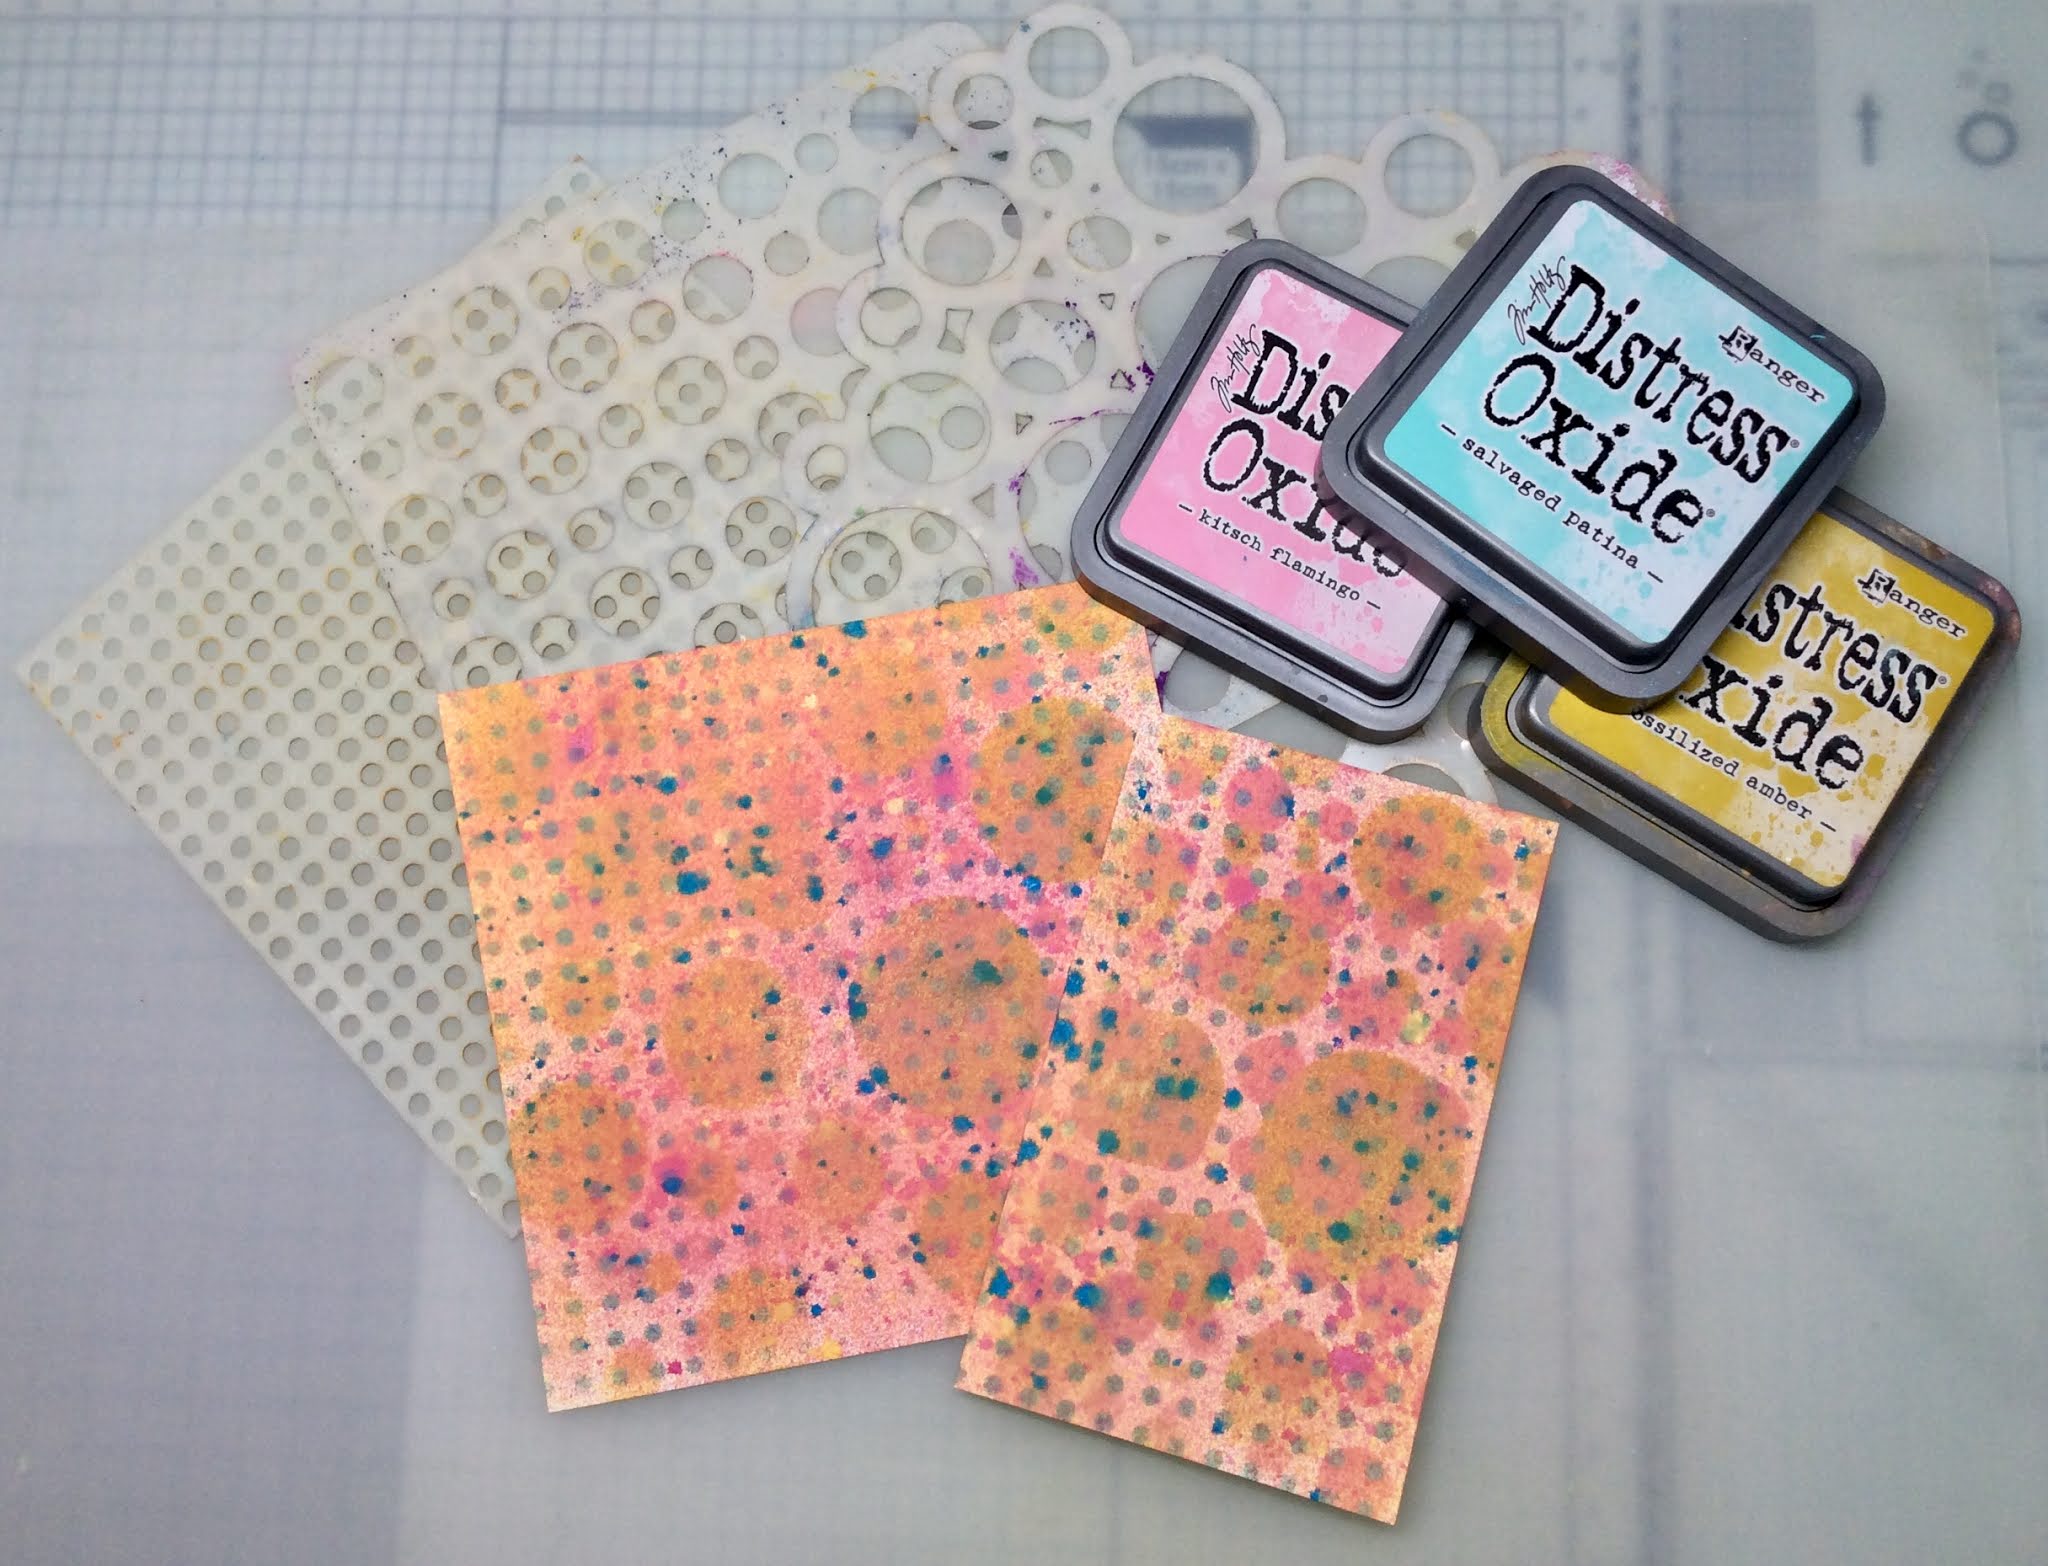
1) I started by applying 3 different colours of distress oxide spray (squeezed lemonade, picked raspberry & mermaid lagoon), spritzing and splattering.  I made sure that I dried between layers...

2) Next I added stenciling using the distress oxide inkpads (fossilised amber, salvaged patina & kitsch flamingo), and applied them through three stencils with various sizes of circles...


3) After this I added stamping using the La Luna stamp set and different colours of archival ink.  I then coloured some of the circles with a scribble stick and added some white paint pen dots...


4) To create even more layers I then stamped some of the textured stars using white and black ink...


5) Finally I used the extra piece of card that I had also coloured at the start to stamp out the moon and a sentiment using black versafine clair which I heat embossed with clear powder.  Then the pieces were all matted onto black card and mounted together on a card blank...


Here are links to the products used:


Thank you for looking and happy crafting!

Jane xx


Related Posts Plugin for WordPress, Blogger...