Monday, August 16, 2021

Sally DT - Getting inky with Inkables

 Hi there! My new prize ribbon Distress oxide and distress ink arrived on Saturday so I thought I would try it out. There were other goodies in my parcel too, but I will show you those at a later date. 

I began by brushing Salvaged Patina Distress Oxide ink through Mandala 4 Inkable onto a 6 x 6" white card.

Next I took the circles D'inkable and brushed Prize Ribbon Distress Oxide ink through it top left and bottom right.
I added Cracked Pistachio Distress Oxide through the Bakewell Big One Inkable bottom left.
Next I stamped Sky Terrace in the Prize Ribbon Distress Oxide ink onto a scrap of white card and die cut it.
I used foam pads to stick it to the front of the card and added the sentiment in Prize Ribbon Oxide ink. Here is the finished card again
Here are links to the products I used:

This was a very simple card and ticks all the boxes for our challenge on the Bee Crafty Facebook Group this month where the Theme is to use Stamps and Inkables. 
Bev and Sam are off to The Craft Store for a Happy Hour this Thursday (19th August) featuring the Doodle Art houses at 11am. Make sure you tune in to grab those bargains! 

Happy Crafting! 

Saturday, August 14, 2021

Jane DT - Faux Bleached Butterfly Card

 Hello!

This week I have created a card using a faux bleaching technique...


1) First I stamped the doodle art butterfly onto watercolour cardstock using black archival ink.

2) Then I used salvaged patina and mustard seed distress inks, blending them all across the card with a blending brush.

3) Next I used a paintbrush and water to wet the butterfly areas and lifted some of the colour off with kitchen towel.

4) When I was happy with the result I splashed some of the water across the rest of the card to create some distressed spots.

5) Finally I stamped one of the everyday sentiments onto white vellum and wrapped it around the card before matting onto black and then the card base.


Here are the products used:

* Archival Inkpads

Thank you for looking and happy crafting!

Jane xx

Friday, August 13, 2021

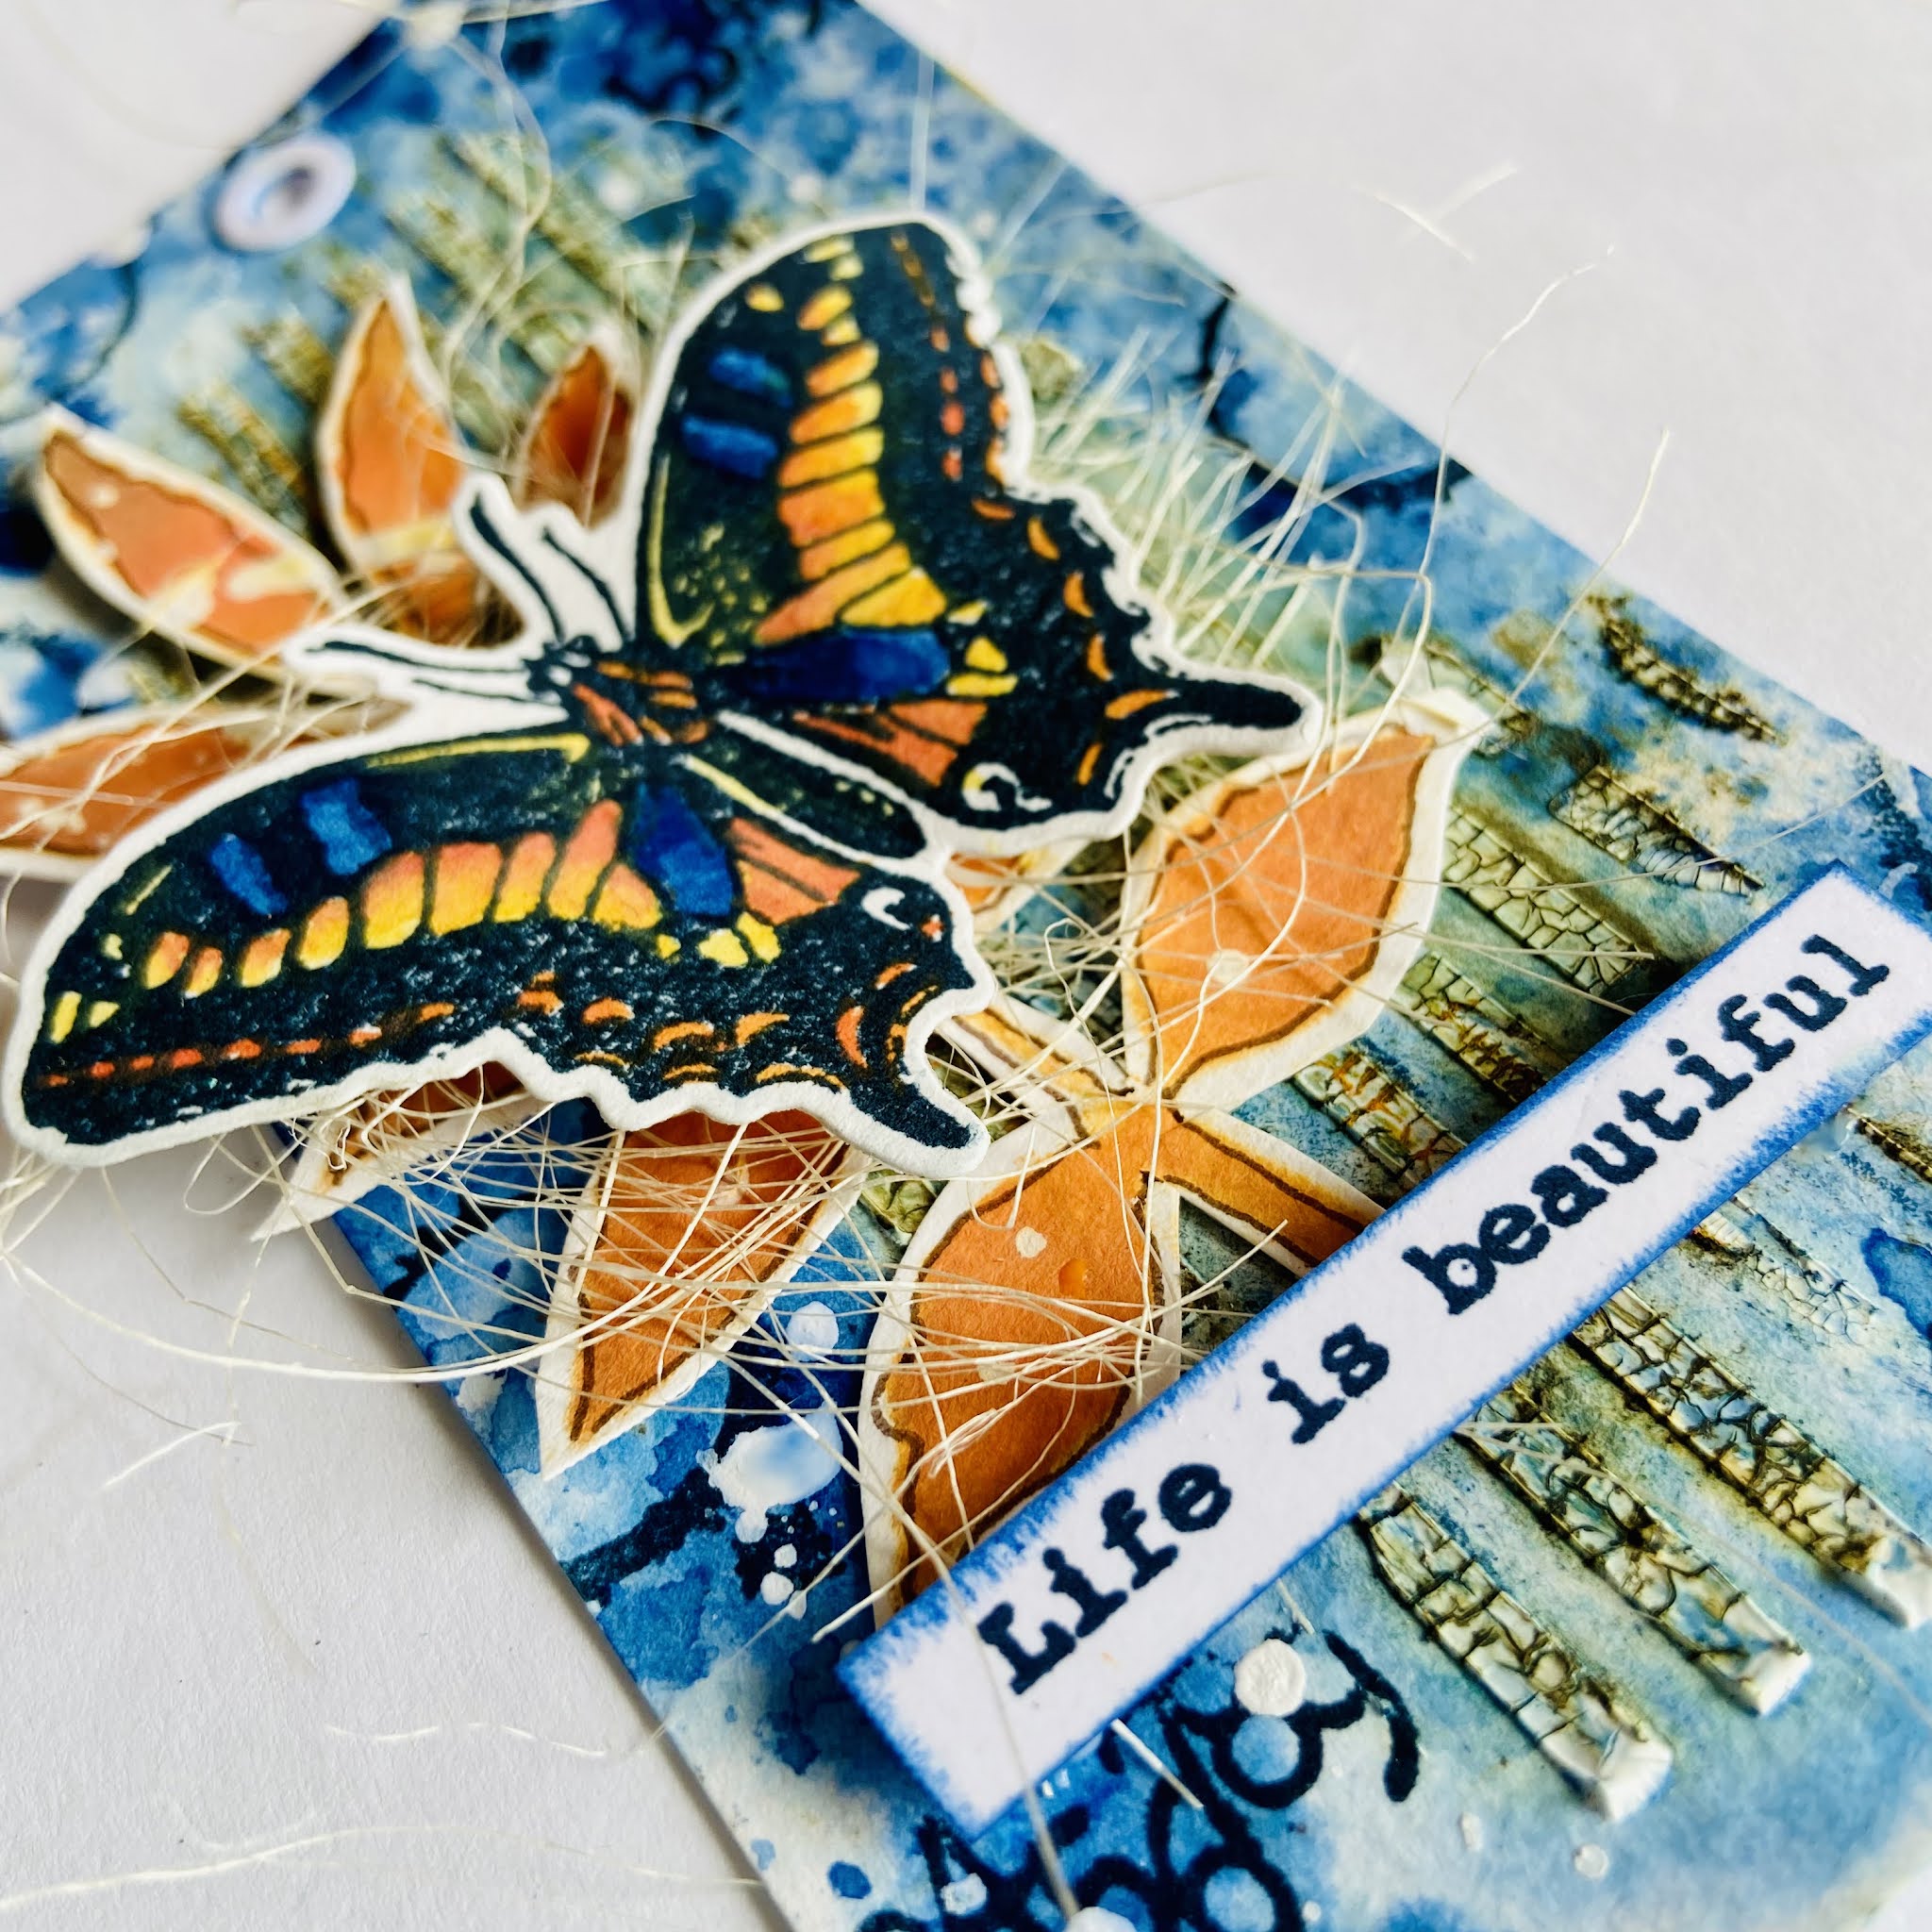
Life is Beautiful Tag by DT Ann

 Life is Beautiful 

By DT Ann 


Had a little break as life was getting hectic & creative time was put on the back seat along with Mrs Mojo!!! 

Feeling more organised & refreshed I’m back in my crafty space… many thanks to the lovely girls at Bee Crafty for understanding ♥️


For the tag I used: 

Dies:Tag & Banner - Birds & Butterflies reg

Stamps: Coffee Stains & Beautiful Life 

(from Janes Cone Flowers)

Birds & Butterflies reg

Inkables: Triangle Stripes & Leafy Branch

Distress Oxides: Crackling Campfire/ Spiced Marmalade / Walnut Stain 

Distress Ink : Prize Ribbon 

Versafine Clair Twilight 

Distress Texture Paste Crackle 

Scribble Sticks: brown & dark blue (set1)

Fineliner Pen in brown 

Posca Pen White

https://www.beecrafty.net/


Put some Prize Ribbon ink onto a craft mat & spritz with water, dry then repeat a few times… dry & die cut using the large tag. 


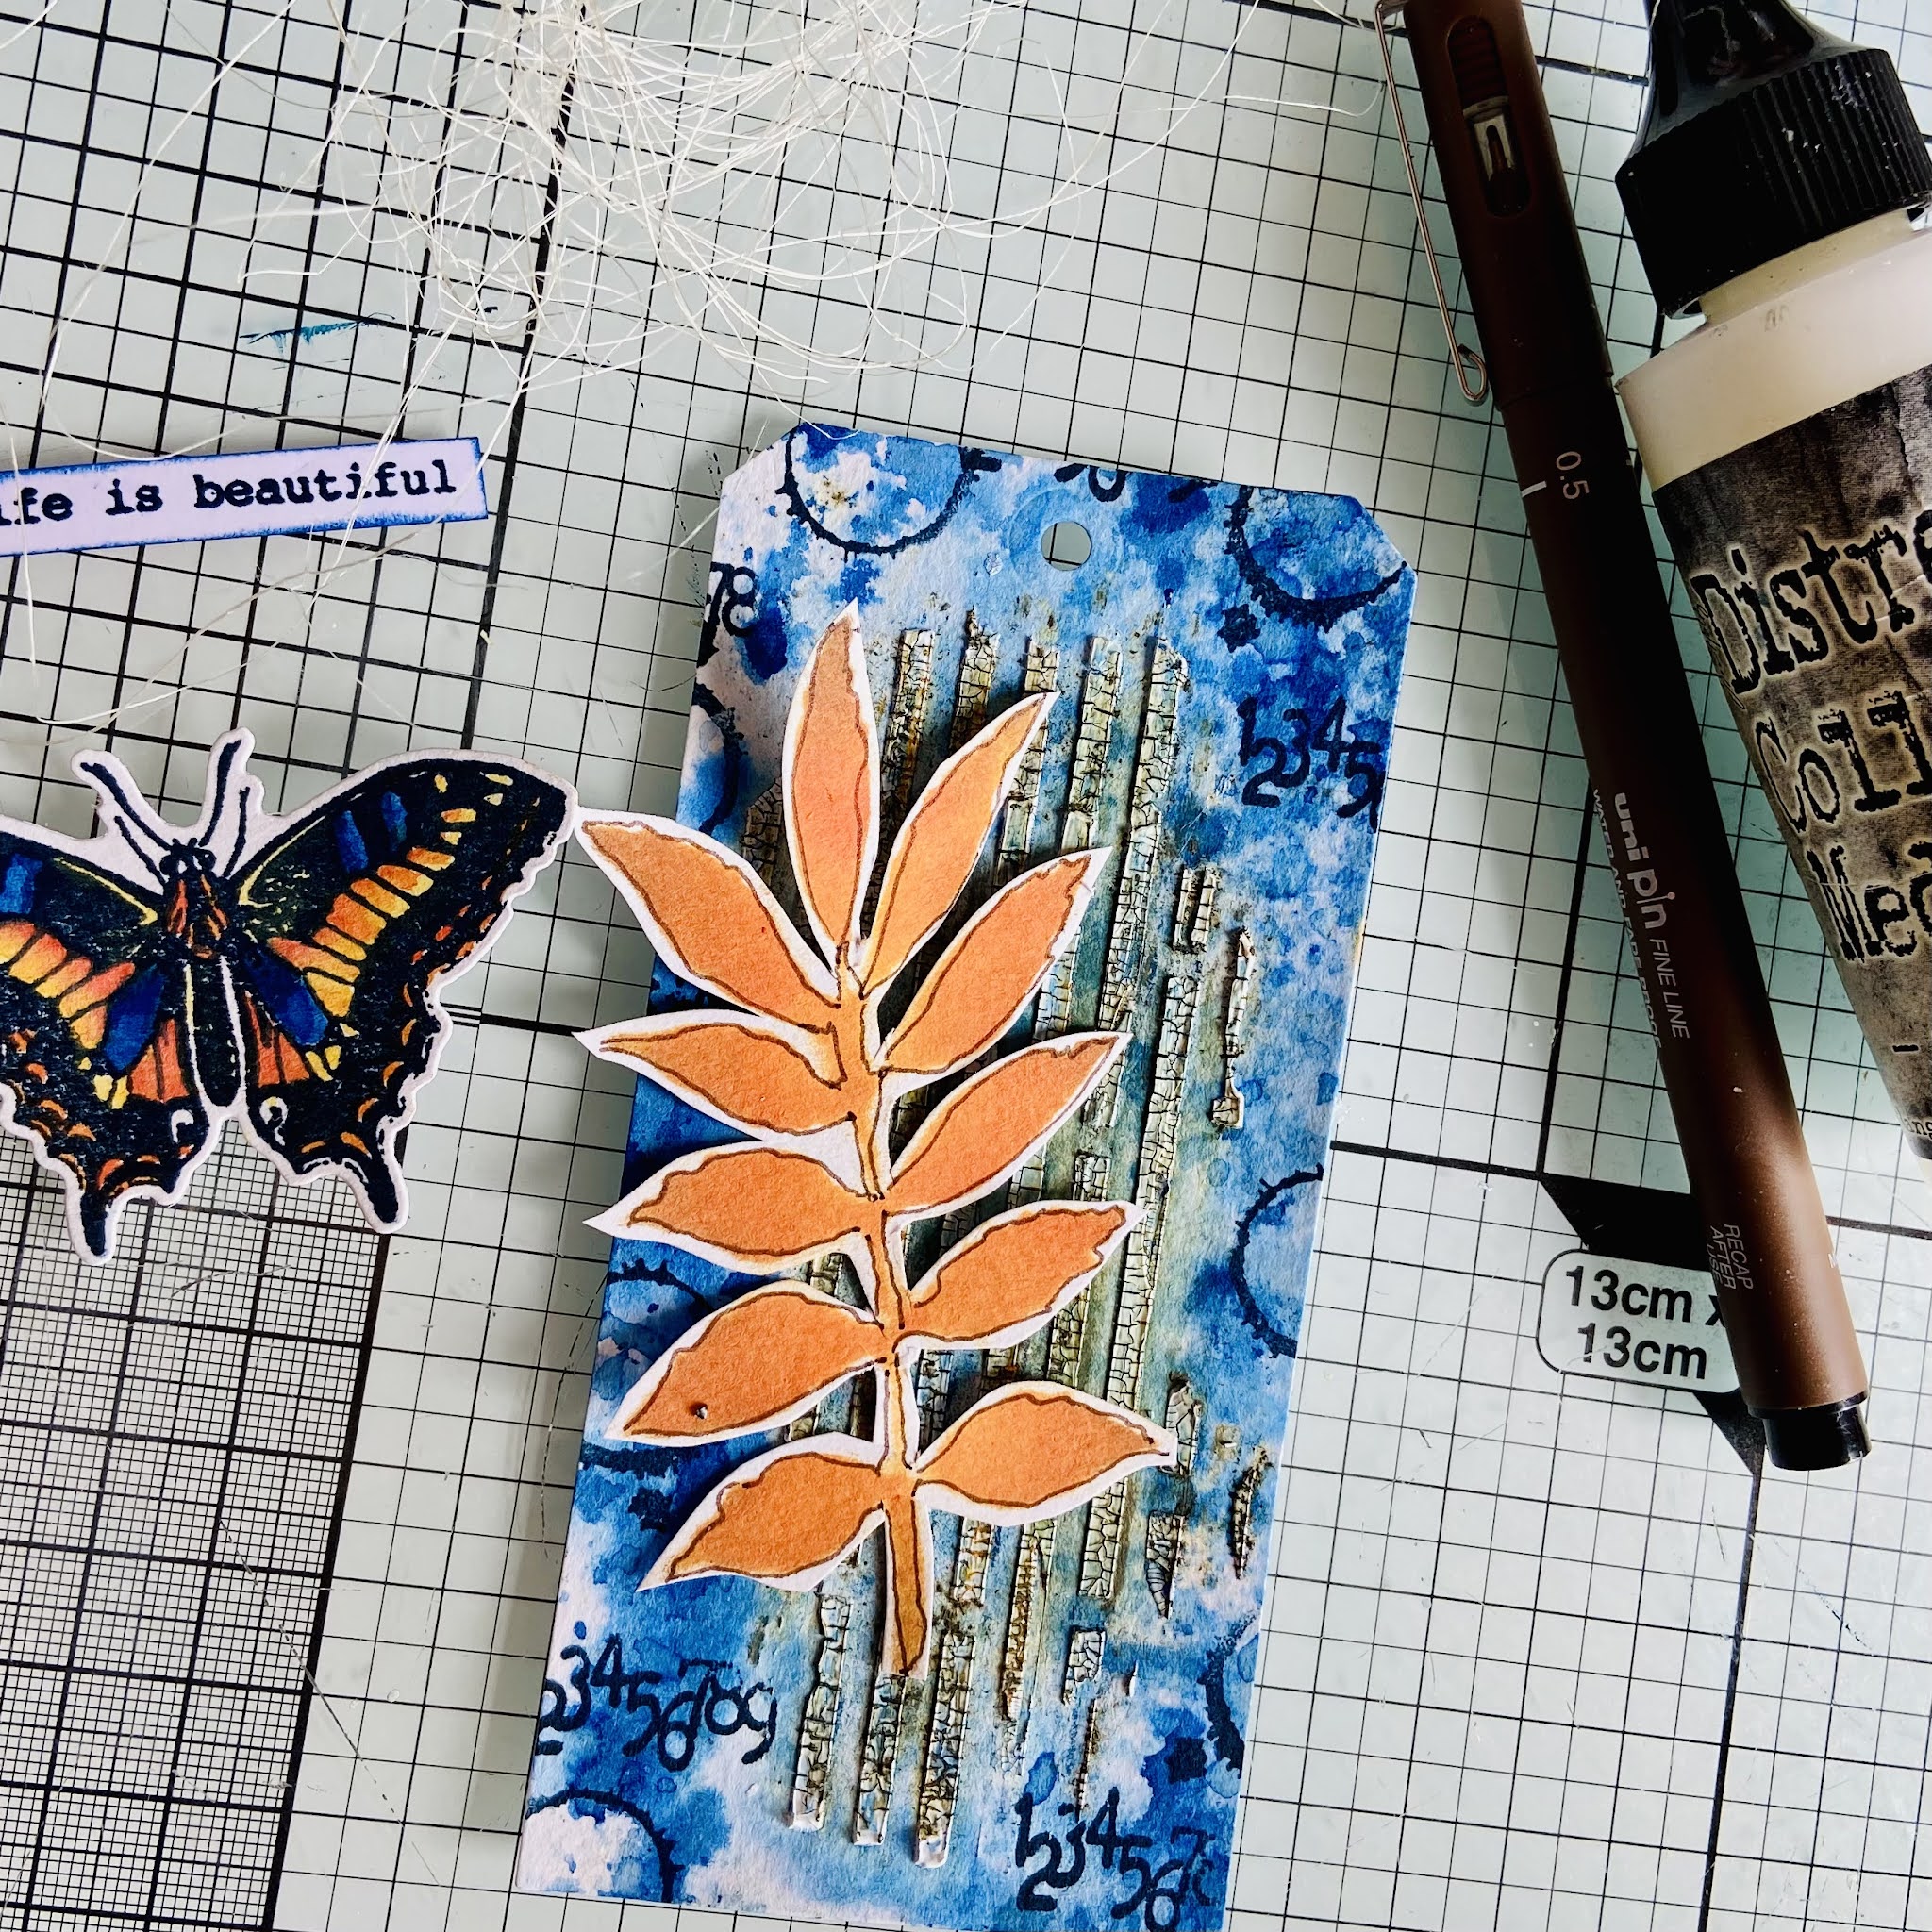
Spread some Distress Texture Paste through the stripe Inkable, dry & pop to one side.. 


Stamp a butterfly in Versafine Clair & dry, then paint using the Distress Oxides.. 


On a separate piece of paper use the Oxides through the Leaf D’Inkable, cut out & sketch the outline with a brown Fineliner. 


When the texture paste is dry gently rub brown & blue Scribble Sticks across the raised area & spritz.. it does reactivate the background ink so go lightly!! 


Dry the tag, add some stamping I used the small coffee stain & numbers from the set. Stamp a sentiment in Versafine Clair.. 


Glue everything on to your tag, I added some sisal between the leaf & butterfly & some white Posca Pen splats… 


All done… 


Thank you for stopping by… Ann xxx


Monday, August 09, 2021

Sally DT - Being Happy Butterfly Art Journal spread

Hi There! I had lots of inky painty fun with this journal spread in my Dylusions Journal (mini) over the weekend. Here is a step by step to show what I did. 

 
I had some spray left in a couple of my mini misters that I wanted to use for something else, so I sprayed them onto a page in my journal and let them run across the pages. 

I wanted to cover up the ink from other pages that had seeped in at the page crease, so I painted lots of stripes with a fine paint brush and Dina Wakely acrylic paints in ocean, turquoise and lime. 
Next I used the dotty border stamp with versafine clair ink in warm breeze around the edges. 
I used distress oxide inks in salvaged patina, salty ocean and peacock feathers to stamp the coffee stains randomly across the pages
I also added a few bits of the ledger stamp randomly around the page without an acrylic block
Next I took the small butterfly inkable and brushed distress oxide ink in blueprint sketch around the edges, then set it aside.
I stamped three butterflies and a sentiment in Versafine Clair twilight ink onto Dina Wakely Collage paper,
then stuck them to the page using matte medium
I also added some white and sparkly highlights with a gelly roll clear stardust pen and a posca pen. A few gold sequins finished it off.
Here are close ups of each page


Here are links to the products I used:
Dylusions Journal
Dina Wakely heavy body acrylic paint in Lime, Ocean and Turquoise
Distress oxide inks in Peacock Feathers, Salty Ocean, Salvaged Patina and Blueprint Sketch
 Butterfly stamps - a bargain in the end of line section
Sequins
The Butterfly inkable is available as part of a set on the Craft Store website (Shop by Brand and look for Bee Crafty)

I really enjoyed creating this in all my favourite colours!  The Bee Crafty Stamps facebook group has a challenge for August of  'Show us your stamping and use Inkables'. We would love to see your entries using Bee Crafty products. 
Thanks for looking! 

Saturday, August 07, 2021

Jane DT - 'Without Darkness' Art Journal Spread

 Hello!

This week on the Bee Crafty blog I thought I would create an art journal spread in a tag book that I created in one of my Bee Crafty Facebook lives a while ago.  The tags have all already been spritzed using distress oxide sprays, and the pages I used today had Speckled Egg, Mermaid Lagoon and Seedless Preserves on them...


1) I started by creating a moon using white gesso through the circle easy frame.  As it was over the oxide spray some of the colour bled through which is the look that I wanted rather than a solid colour...


2) Next I added some more stenciling using the Cosmic inkable and Seedless Preserves distress oxide inkpad...


3) Then I used some of the stamps from the La Luna stamp set with archival inks in the distress colours Mermaid Lagoon, Faded Jeans and Dusty Concord...


4) I wanted to highlight some of the areas so added in some white gelly roll pen...


5) After that I wanted a bit of stamping that contrasted more so used some of the stamps from the Stars Textures set with black archival ink.  I also added some dots with a black fine liner pen to make it look like the stars were dangling...


6) Finally I stamped one of the sentiments from Moons and Stars Sentiments onto black card and heat embossed with white powder...


Here are links to the products used:


Thank you for looking and happy crafting!
Jane xx

Monday, August 02, 2021

Sally DT - Journaling Girl makeover

Hi There! Last time Bev and Sam were on the Craft Store, Adam was talking about creating fabric dresses for the journaling girls, so I decided to have a go. 

I began by stamping Sam on to a piece of ironed calico with Archival ink.

Next I used a combination of Inktense blocks and Dina Wakely scribble sticks to colour her skin and hair.

I found some lovely variegated embroidery thread in yellow and brown that was perfect for hair and used long stitch. I also added a row of pale pink seed beads at the base of her bun. 
Next I took a 6cm square of  fabric (This was a dyed silk handkerchief) and placed it over the top half of the stamped image. I lined it up with the sleeves then stitched across the shoulders and neck with a small running stitch. 

Once this was secured in place I pulled the top edge of the fabric down and added some more small stitches around the edge of the bodice to secure the fabric, tuck in the raw edges and add some shape.

I took a rectangle of fabric approximately 16x12cm . I attached the centre point to the waistline using a small running stitch. 
I then pulled the top of the fabric down and added a row of the seed beads to the waistline. I arranged the skirt and added a few more seed beads to keep it in place. I also added a sequin and a seed bead to the bodice.
I used one of the small stamps from the Sam set to add a background using archival inks.
Next I added some interfacing behind the project to make it more sturdy - It doesn't need to be the iron-on variety, just a piece of fabric, felt, thin wadding or batting. This was secured in place by adding a border of lace around the edges. I used my sewing machine for this but it could have easily been hand stitched. I also added a strip of ribbon down each side, which I secured using sequins and seed beads.
I sprayed an mdf butterfly hanger (This is a sneaky peek which should be available soon!) with Dina Wakely gloss sprays in Fuchsia and White and added a couple of loops of ribbon.
I gave her some earrings to match...
then finally I attached the panel to the hanger with a couple of stitches at each side. 
Here are links to the products used:

I also used scraps of ribbon and lace, Embroidery thread, seed beads, Sequins, a softly draping fabric for the dress (you could pick something up in a charity shop to cut up), Calico and interfacing/wadding/ batting.
The important thing with a little project like this is it doesn't need to be super neat. The edges can be left raw and the stitches don't need to be tiny neat ones. Some people call it slow stitching, and it is as much about the mindfulness of using a needle and thread as the finished product. A bit of ironing of the calico at the beginning and end will help it to look good. it also doesn't need to be expensive. You could make something like this from clothing that is past it's best or charity shop bargains.
I hope you like my project today.
Thanks for looking! 
Related Posts Plugin for WordPress, Blogger...