Monday, July 09, 2018

Lorre-Anne DT - Brushos Butterfly

Hi bloggers, for this weeks Bee Crafty DT project I've got my Brushos out again... if you've never had a play with Brushos they are coloured powders that are activated by the addition of water.  I love sprinkling the powders on to card, spritzing with water and watching them burst into colour.  


Materials
What to do
  • Cut some black card slightly smaller than the card blank, and some white card slightly smaller again.
  • Take the white card and sprinkle some of the Brushos over it, spritz with water and dry using a heat tool.
  • Stamp the butterfly using Onyx Black Versafine ink in the centre of the card.
  • Stamp the greetings using Versafine ink
  • Mat the white card on to the black card, and glue both to the card blank.
  • Finish by adding some Stickles to the wings of the butterfly.
That's it for this week, I hope you liked my card, and I will be back soon to share another with you.

Hugs, Lorre-Anne x

Saturday, July 07, 2018

Jane DT - Wolf Tag

Hello!

I hope it is lovely where you are at the moment! The weather here is a total contrast to the snowy project I am sharing on the Buzzy Goings on at Bee Crafty blog today...


I wanted to create a really textured background to my tag to give it a snowy, icy feel, but then needed to have the wolf be able to stand out so I decided to use acetate. 

I started the background by preparing the MDF tag with gesso then painted it with crackle paint.  Once this had dried I added blue spray inks then used the d'inkable snowflakes with silver paint.  This was followed by adding silver sparkle paste through the snowflake 2 inkable across the left side of the tag. 

I then cut a piece of heat resistant acetate that would make a dome around the front of the tag then stamped the wolf using clear versamark ink.  This was then heat embossed using silver powder.  At this point the wolf was quite hard to see properly when against the background so I stippled white gesso onto the back of the acetate so that the wolf stood out...


The words and moon from the same set were stamped and heat embossed in silver powder and mounted onto silver card before adding to the tag.  The final touch was to add some ribbon...


The products I used were:

* MDF Tag
* Art Stamps - Scenery Animals Set Wolf
* D'inkable - Snowflakes
* Inkable - Snowflake 2

Thank you for looking and happy crafting!

Jane xx

Friday, July 06, 2018

Emily DT - Christmas in July!


Hi everyone,

I hope you managed to catch the Hochanda show last week with some gorgeous new stamps. I wanted to share my samples from the show with you.

Here are the samples I made...


I adore these stamps, and love the cards I made. Even though I am not very good at colouring in, I managed to find ways to use the stamps which didn't involve substantial colouring!

See you next week!

Emily x

Thursday, July 05, 2018

Karen DT - Winter Animals samples for Hochanda

Good morning crafters
Hope you're all enjoying a lovely week xx

It's my turn over on the
Buzzy Goings On At Bee Crafty Blog and I'm very excited to be sharing my samples for the fabulous new Winter Scenery Animals that were released earlier this week. I really hope you got yours..they are utterly gorgeous,  versatile and unique. They make stunning Christmas makes as well as being suitable for any other occasion
I got to work with my absolute favourite animal ..the Wolf 😘😘 and also the stunning Owl.

Also used:
Snowflake Inkable
Snowflakes - Feathery
Snowflake Flurry
Everyday Circle Christmas sentiments
Silhouette Trees - Tree with BirdsDeciduous,  Perennial
Distress Oxides
Sparkle pens
Versafine
Dyna Paints
Acetate


Distress Oxides 
Snowfall Acetate
Tree with birds 


Shaker card 
Sparkle pens 
Distress Oxides 
Snowflake Flurry 


Sparkle pens
Snowflake Flurry  


Distress Oxides
Perennial Tree  


Dyna Acrylic Paint 
Versafine 
Gilding Wax 
Snowflake Inkable 


Distress Oxides
Snowflake Inkable  


Distress Oxides 
Snowflake Flurry 


Sparkle pens
Snowflake Inkable  


Sparkle pens 
Tree with Birds
Deciduous Tree


I hope you love these stamps, and other Christmas Yuletide products, as much as I do. They make unique, stunning Christmas cards as well as being suitable for any other occasion 

Many thanks for popping by 

Crafty hugs xx 

Monday, July 02, 2018

Lorre-Anne DT - Christmas Hochanda samples

Hi everyone, it's Monday so I'm up on the Bee Crafty blog today, and I'm sharing the samples I have made for Bev's shows on Hochanda today at 12 noon and 4pm... and it's Christmas!!!  Now as some of you may already know, I absolutely love Christmas, it's definitely my favourite time of year so I've been in my element making these samples.  The new stamps Bee Crafty have brought out are simply stunning and I'll definitely be making lots more cards using them.

Materials


Dylusions sprays (Vibrant Turquoise), Gold gilding wax, Ocean Blue Lustre Luxe, White Gesso, Structure Paste, Cracking Paste & Primer.


Close up showing the Winter Fox


Close up showing the Winter stag


Distress Oxides (Candied Apple, Fired Brick)  Versafine, Star Dust Stickles


Distress Oxides (Faded Jeans, Seedless Preserves)  Black Soot Distress Ink, Versafine


Distress Oxides (Evergreen Bough, Walnut Stain)


Distress Oxides (Faded Jeans, Hickory Smoke)  Pumice Stone Distress Crayon, Versafine


Distress Oxides (Fossilized Amber, Carved Pumpkin, Vintage Photo)


Ost.Blue Brushos, Distress Oxides (Faded Jeans), Versafine, Kuretake Zig pens, Pumice Stone Distress Crayon

I hope you liked my makes using these fab stamps, I'll be back next week to share another DT project with you all.  

Hugs, Lorre-Anne x

Friday, June 29, 2018

Emily DT - Never Regret

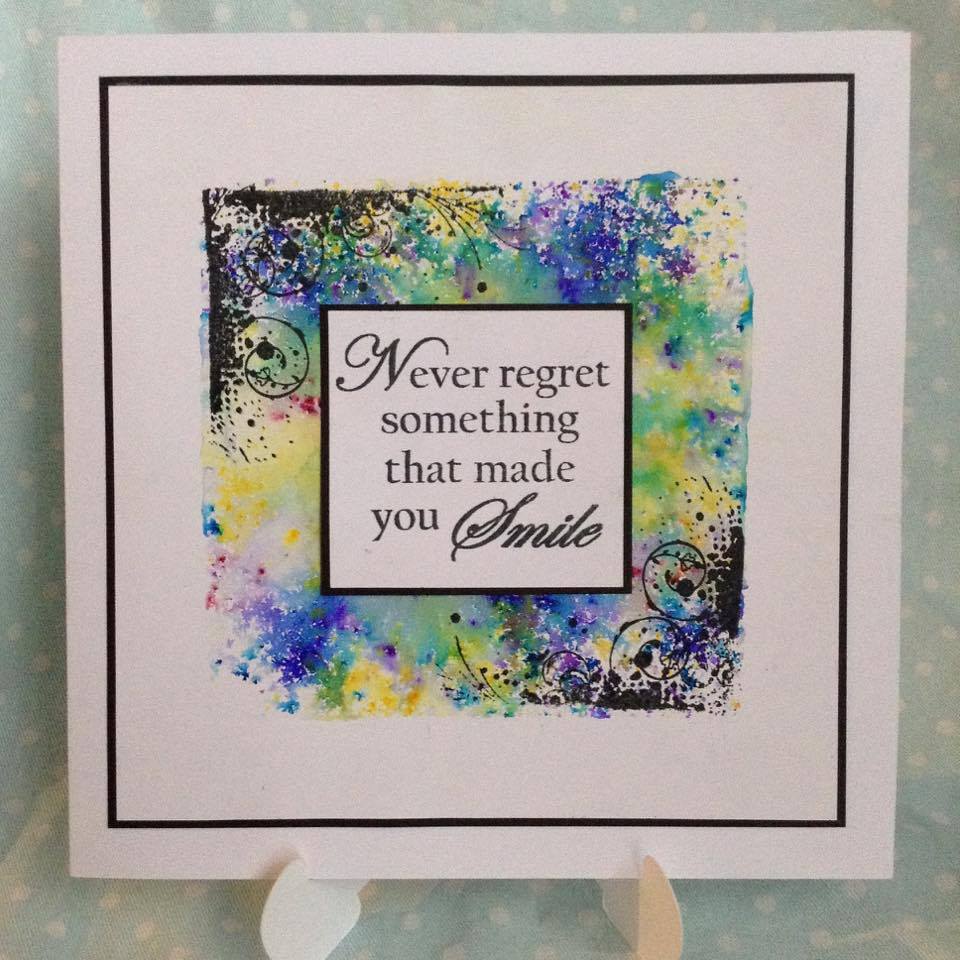
Hi everyone, my turn again on the Bee Crafty blog today. I have taken a look back at one of my earliest blogs I did for inspiration. This card is from a couple of years ago and is a firm favourite. 

I use this technique a lot. Here is the card I have chosen...


I used the easy frame square and Brusho paints to colour the background. When it was dry I added some texture in the corners with one of the Bee Crafty Splatter Swirl frame stamps.


I made a little topper with one of my favourite ever Bee Crafty Wordage stamps, 'Never Regret'. I mounted it onto black and then onto the card topper.


This technique is so effective, and you get a different outcome every time because of the Brushos.

You could also try this with spray inks for a different finish.

See you next week!

Emily x

Thursday, June 28, 2018

Karen DT - Wonderful in every way

Morning crafters xx

As it's Thursday,  it's my turn over on the
Buzzy Goings On At Bee Crafty Blog 

Today I'm showcasing the very beautiful
Carnation large flower stamp. I've teamed it up with the gorgeous Swallow ..a gorgeous combination I think x

Also used
Everyday Sentiments 1
Bark - Positive
Sparkle pens
Kuretake clean colour pens


For this sample I took the pens straight to the stamp, applying the ink using the side of my pens, so as not to ruin the hairs
I spritzed with water before stamping the images
Using a water brush, I moved some of the ink around, whilst still wet, to give a watercolour effect
The sentiment was stamped in Vintage Photo DO

I hope you enjoyed today's post and I'll be back next Thursday with another Bee Crafty make 

Crafty hugs xx

Monday, June 25, 2018

Lorre-Anne DT - Family

Hi bloggers, it's my turn to share another Bee Crafty DT project with you all, and I'm playing with another one of my new stamps that I bought last year.... I absolutely adore this image.  This is a huge stamp, and she makes quite an impression! 


Materials
What to do
  • Cut 3 pieces of white card slightly smaller than the card blank, and each one slightly smaller than the previous.
  • Take the smallest square and blend some Seedless Preserves and Peeled Paint over it, blend some Peeled Paint through the Dinkables template, and randomly stamp sections of the Crackle Paint using Seedless Preserves.  
  • Stamp Rosie using Black Soot Oxide, and also the sentiment.  Finish by lightly blending some Black Soot all around the edges of the square of card.
  • Take the next size square of card and blend Seedless Preserves around the edges, and take the last square of card and blend Peeled paint around the edges.
  • Mat and layer up all the squares, and glue to the card blank.
That's my project complete for this week everyone, and I'll be back soon to share another with you all.  
Hugs, Lorre-Anne x

Saturday, June 23, 2018

Jane DT - Under the Sea

Hello!

Last week Sam brought the fab new Under the Sea stamps to HOCHANDA so today on the Buzzy Goings on at Bee Crafty blog I am sharing some of the samples that I made.  Each is very different in the style and techniques used but they all use the stamps and MDF that Bee Crafty create.

The first one is using the largest of circle art boards...


I used the circle and feather d'inkables to create some under the sea details with texture paste.  Sand paste was used along with art balls at the bottom part to create a sea bed impression.  Spray inks provided the colour then gilding wax to enhance the texture.  The regular sized seahorse was stamped onto heat resistant acetate and embossed with gold powder, then I used a gold paint pen to colour in on the back.  Seaweed was stamped, coloured and cut out to add to the bottom and the bubble stamp used on the board.  The words are from the Creativity Words set and the finishing touch was to add some beads to the sea bed.

The second board is one of the free standing tag shaped art boards...


I wanted to use the seahorse again but this time straight onto a board and with a very different coloured background.  As I wanted bright colours I used Dylusions paints and then added detail with some of the d'inkables in the same colours.  The seahorse and bubbles were stamped directly on with black ink and then the word stamped onto card and added with a hint of distress ink on the edges.

Last but not least I also created a tag that isn't free standing, I added my own holes using a crop a dile...


As soon as I saw the octopod I wanted to create an industrial/steampunk type look with him.  The  tag was prepared using the metal alpha d'inkable, texture paste and also some sand paste for a rusty texture.  I created the colour using a pitted metal/rust technique that Andy Skinner teaches and then used my paints to add more rust and patina effects around the edges.  The octopod was stamped onto heat resistant acetate and then coloured on the back with alcohol markers.  I stamped out the eye for a second time onto card before cutting out and colouring.  Some glossy accents were added to make the eye shiny as well.  Finishing touches were some sea weed and the words and rusty wire for a hanger.

Here are some links to the products used...

* MDF
* Art Stamps - Seahorse Set Regular
* Art Stamps - Octopod Set XL
* Wordage - Creativity Words Large
* D'inkables
* Dylusions Paints

Thank you for looking and happy crafting,

Jane xx

Friday, June 22, 2018

Emily DT - Quick Birthday Card

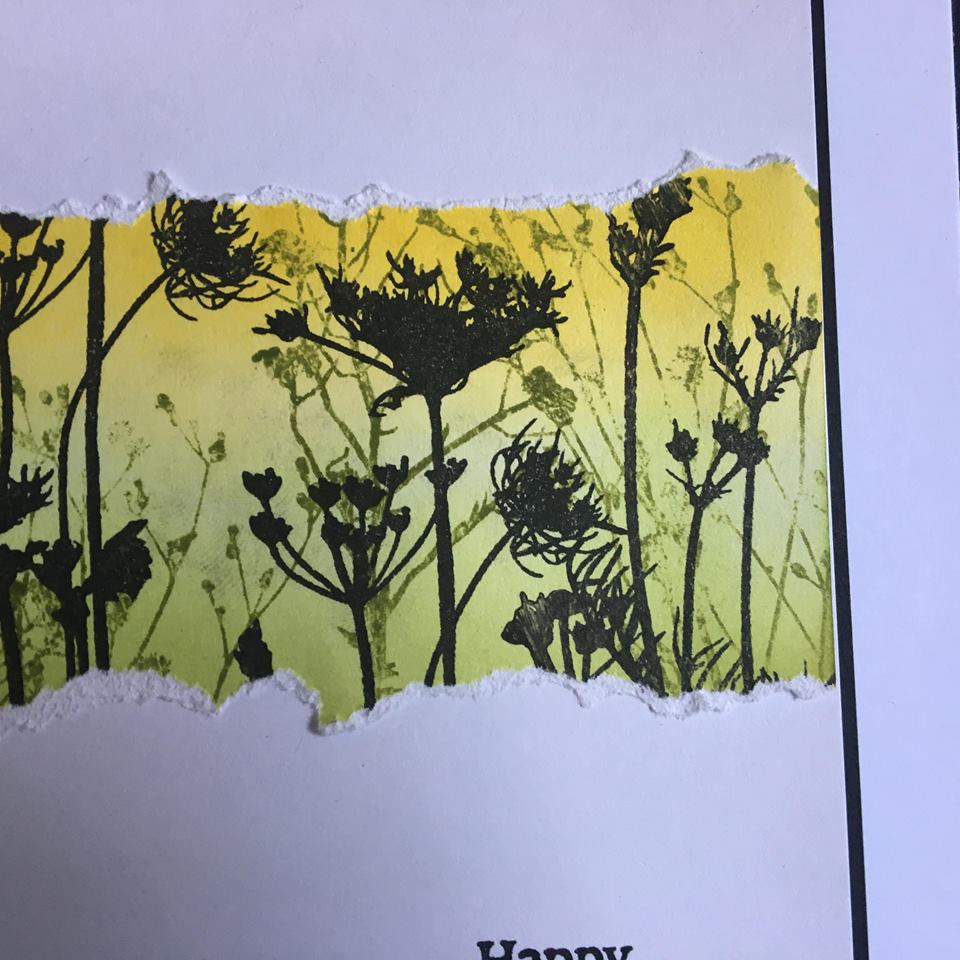
Hi everyone, I needed a last minute birthday card this week so I turned to my Bee Crafty stamps and a technique I use a lot.

Here is the card I ended up making...


I started by cutting a square of white card and a strip of card the same width. I coloured the strip of card with Distress Inks in shades of yellow and green. I stamped a mixture of the wildflower stamps in green and black, randomly across the whole piece of card.


Once I was happy with it, I tore the top and bottom edges off and stuck it on to the square. I then stamped the Happy Birthday from the everyday sentiments in the bottom corner.


I finished off the card by mounting it onto black and then onto a card blank.

I am really happy with how it turned out and I hope you like it too!!

Emily x
Related Posts Plugin for WordPress, Blogger...