Friday, December 08, 2023

Lynne Guest CT - A quick break from Christmas cards!

We may all be in Christmas mode now (I'm still frantically trying to get my Christmas cards finished!) but there are some poor souls who have the misfortune to have their birthdays this month, and they need cards too! So here's a trio of clean and simple cards that don't take long to make, but ensure that those December folks don't feel forgotten.


For the first one I masked off four squares on a 6"x6" base card using the 45mm wide Stamp & Stencil tape, so I could mask over the edges of the card. I coloured each square by brushing over two co-ordinating colours of Distress Oxide inks, then lightly spraying it with water, blotting it immediately after spraying, to give some texture. Next the Doodleart Dandedaisy, the tiny bee from the Doodleart Bee stamp set, and a sentiment were stamped with Versafine Clair ink. I completed the card with a hand doodled border using a Pigma Micron fineliner pen. 

My second card was even quicker and easier! 

I masked and coloured the squares in the same way as on the first card, this time on a DL card base, stamped the three larger birds from the Sketchy Birds #1 stamp set, and the sentiment, which is from the Small Words set.

The third card is on similar lines - this time I used the 4" Hexagon Easy Frame stencil to make the background for the gorgeous Doodleart Bee, stamped the honeycomb pattern a couple of times as shown, and finished with a sentiment. 


All very simple, but quite effective, I think. No fiddly cutting out or colouring in! I went for the nature theme, but any topic would work with the method. Three cards made in about half an hour! And I have to say I'm quite proud that I managed to produce something with white space!

Right, back to the Christmas card production line!

Thanks for looking.


Here are the links to the products I used:

Doodleart Dandedaisy stamp set

Sketchy Birds #1 stamp set

Doodleart Bee stamp set

Hexagon Easy Frame 4" Inkable

Small Words stamp set
Distress Oxide Inks

Versafine Clair Ink (Nocturne)

Stamp & Stencil tape 45mm x 20m x

Wednesday, December 06, 2023

Sally CT - A tag for a big jar of cookies


Hi There! I am making a few tags to add to my jars of cookies that I will be making nearer Christmas, so thought I would do a step by step tutorial. 

I began by blending distress oxide ink in Lumberjack Plaid and Wild Honey on to a large tag.
Next I also blended a little Rustic Wilderness and also added a little water and splattered it on to the tag before setting aside to dry.
On a piece of dark green card, I stamped and heat embossed the Doodle Art Christmas tree before cutting it out.
Using white ink and a tag inkable I added some stencilling. 

I also stamped a few patches of script  using Rustic Wilderness ink. 
On a separate piece of card I stamped the sentiment and embossed in gold before matting and layering onto a scrap of the dark green card.

Finally I added the tree and the sentiment to the background along with a ribbon.
I used:
a Size 10 tag
Distress oxide inks in Lumberjack Plaid. Wild Honey and Rustic Wilderness
White ink
Versamark embossing ink 

Thanks for looking! 

Sunday, December 03, 2023

Alison CT - Using up those small pieces of Catalyst Media Papers

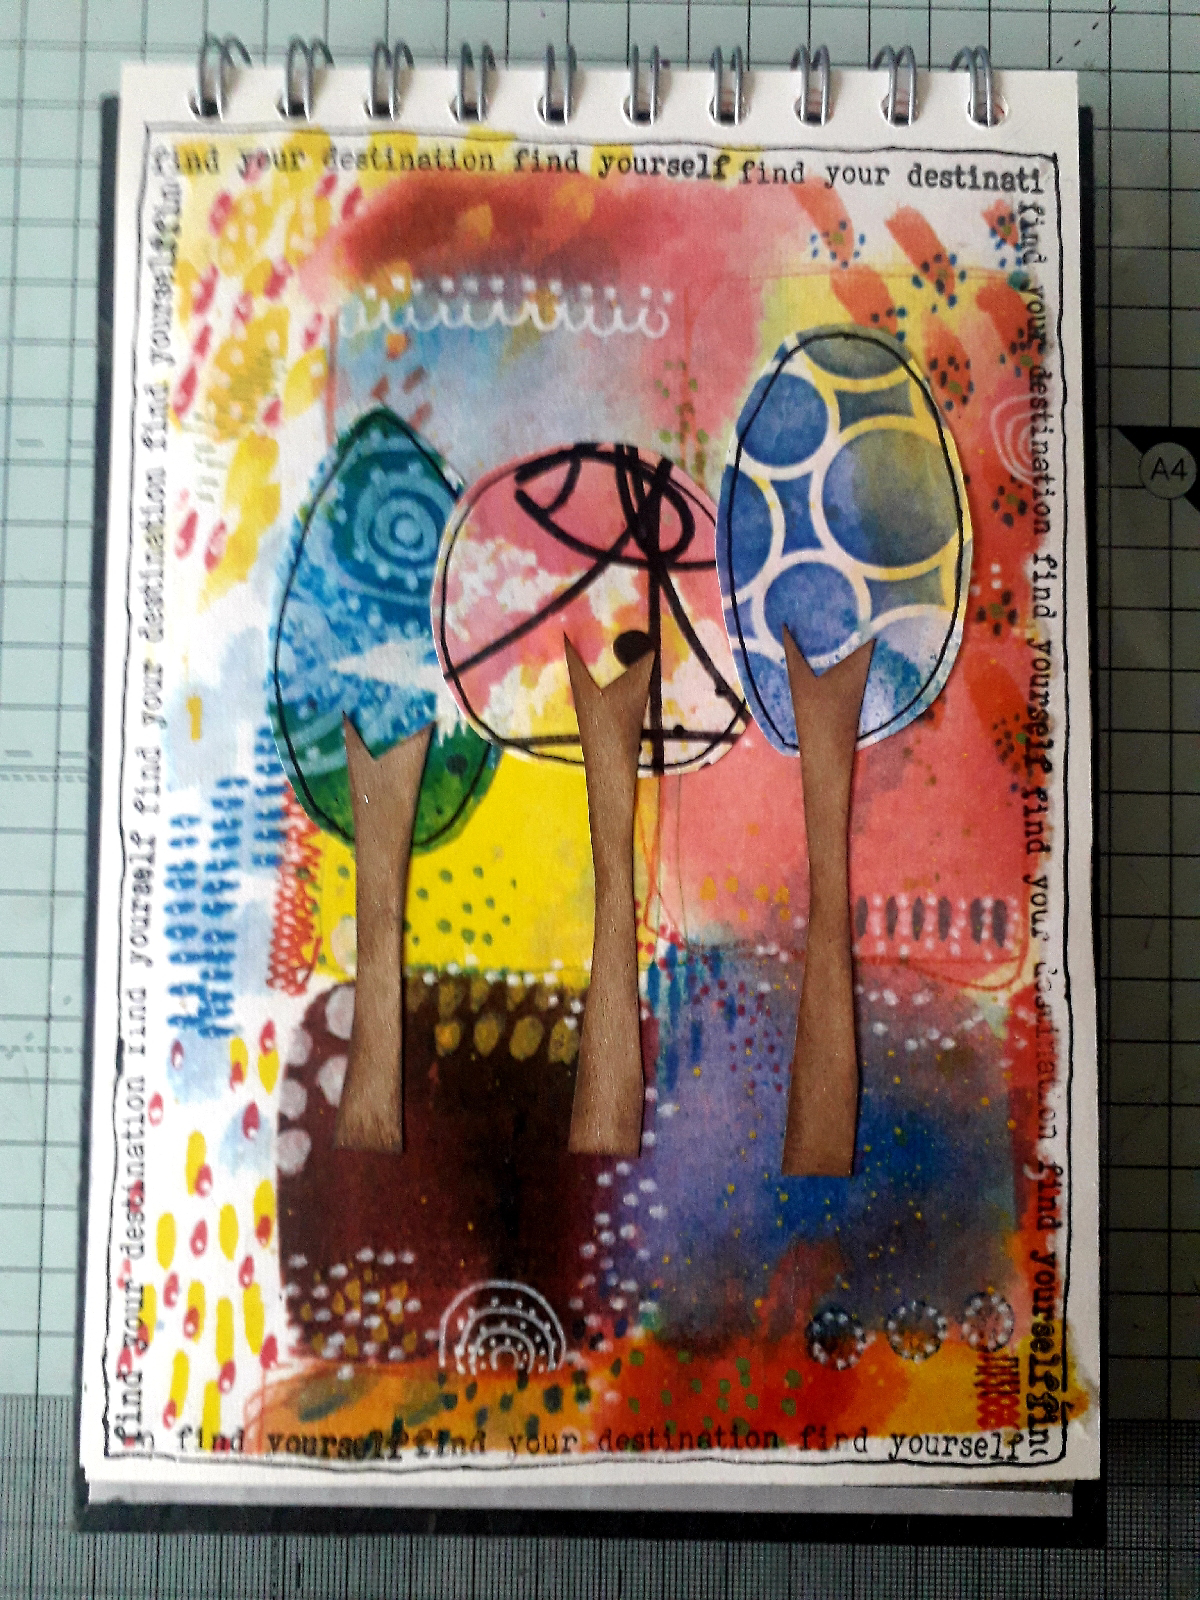
Hi today I'm sharing an art journal page created using up some of those smaller pieces of catalyst media papers.
I have used my A5 Pink Pig journal for this page, so I began by tearing a piece of catalyst paper to just smaller than the page. I then used distress collage medium to adhere it to the page.

Next I used one of the longer small words sentiment stamps, with versafine clair nocturne, to stamp a border all the way around the edge of the catalyst paper.

Then I used a black posca pen to draw a freehand border just outside the words.

Next I used three of my small pieces of catalyst papers, choose papers that will stand out against your background piece, to cut out three tree top shapes. Again I used my black posca pen to add a black line just in from the edge.
Using an off cut of craft card, I cut three different size tree trunks. I edged these with ground espresso distress oxide. Glue to the front of the tree tops.
Using the pieces left over from cutting the tree tops, stamp a selection of the two smallest leaves from the Doodle Art Sunflower stamp set, then cut out.
I used distress collage medium to glue the trees to the page.
Then I added the leaves, so that they looked like they were falling from the trees.
Finally I chose a sentiment from the Autumn sticker pack. I cut them down so they were smaller, then glued them to the page using collage medium.

Products used:
Craft Card
Distress Oxide - Ground Espresso 
Doodle Art Stamps - Sunflower
Wordage Stamps - Small Words
Black Posca Pen

Thank you so much for taking a look. 
Alison 

Friday, December 01, 2023

Lynne Guest CT - Merry Christmas Tree

 Hello everyone,

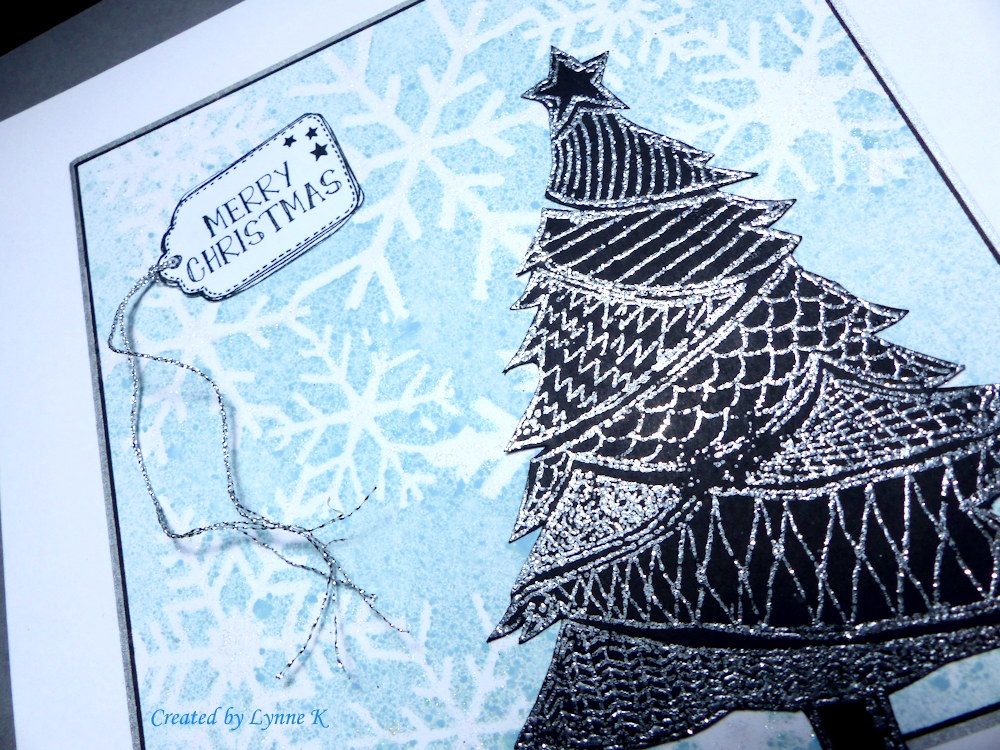
I had another post all ready to go for my third Guest CT spot, when I realised that it is only a few weeks until Christmas, and I have made hardly any Christmas cards yet! Panic mode set in, and I decided I had better try and come up with something nice and quick and easy! And this was the result!


I began by placing the Inkables Snowflake Mask over a 7"x7" base card. I taped the mask to the card with Bee Crafty Stamp & Stencil Tape (22mm wide), making sure that the tape just covered the edges of the card, as in the next photo. 

I sprayed the card with Speckled Egg Distress Oxide spray and blotted off the excess with a sheet of kitchen roll before removing the tape.


Then I painted the snowflakes with DecoArt Glamour Dust, which is a thin medium infused with ultra fine glitter which you apply with a paintbrush. I'm not normally a fan of too much bling, but the Glamour Dust dries clear and leaves a beautifully subtle shimmer. It reminds me of the sparkle when the sun shines on fresh snow on a clear day. Unfortunately, Bev & Sam don't stock it, but I'm hoping to persuade them to! It's really hard to get a good photo of the shimmer, but I think you can just make it out in the next one if you zoom in. 


While the background was drying (which actually doesn't take long at all) I stamped the fabulous new Doodle Art Christmas Tree on a scrap of black card and embossed it in silver. I then took the Merry Christmas sentiment from the Doodle Art Robin stamp set and stamped each word separately with the Christmas underneath the Merry. I was then able to stamp the tag from the Robin set over the sentiment, as shown in the next photo. I cut out both the Christmas tree and the tag, made a hole in the tag with a pokey tool and attached some silver thread.

Almost done! I outlined the snowflake panel first with a black marker (No. 8 Pigma Micron fineliner) followed by a silver Sharpie pen. 


Then all that remained was to stick the tree and tag over the background. Done! A (relatively!) quick and easy card, which took me less than half an hour to make. Hopefully I will manage to get a few more made before the big day!


Anyway, I hope you like it, and thanks for looking!


Here are the links to the products I used:

Inkables Snowflake Mask

Bee Crafty Stamp & Stencil tape 22mm x 25m

Distress Oxide Spray

Doodle Art Christmas Tree stamp set

Doodle Art Robin stamp set

Pigma Micron 08 Fineliner pen


Sunday, November 26, 2023

Alison CT - Sassy

Hi everyone, today I'm sharing an art journal page, inspired by Bev, in a notebook using a few inkables and the Journaling Girl Sassy.
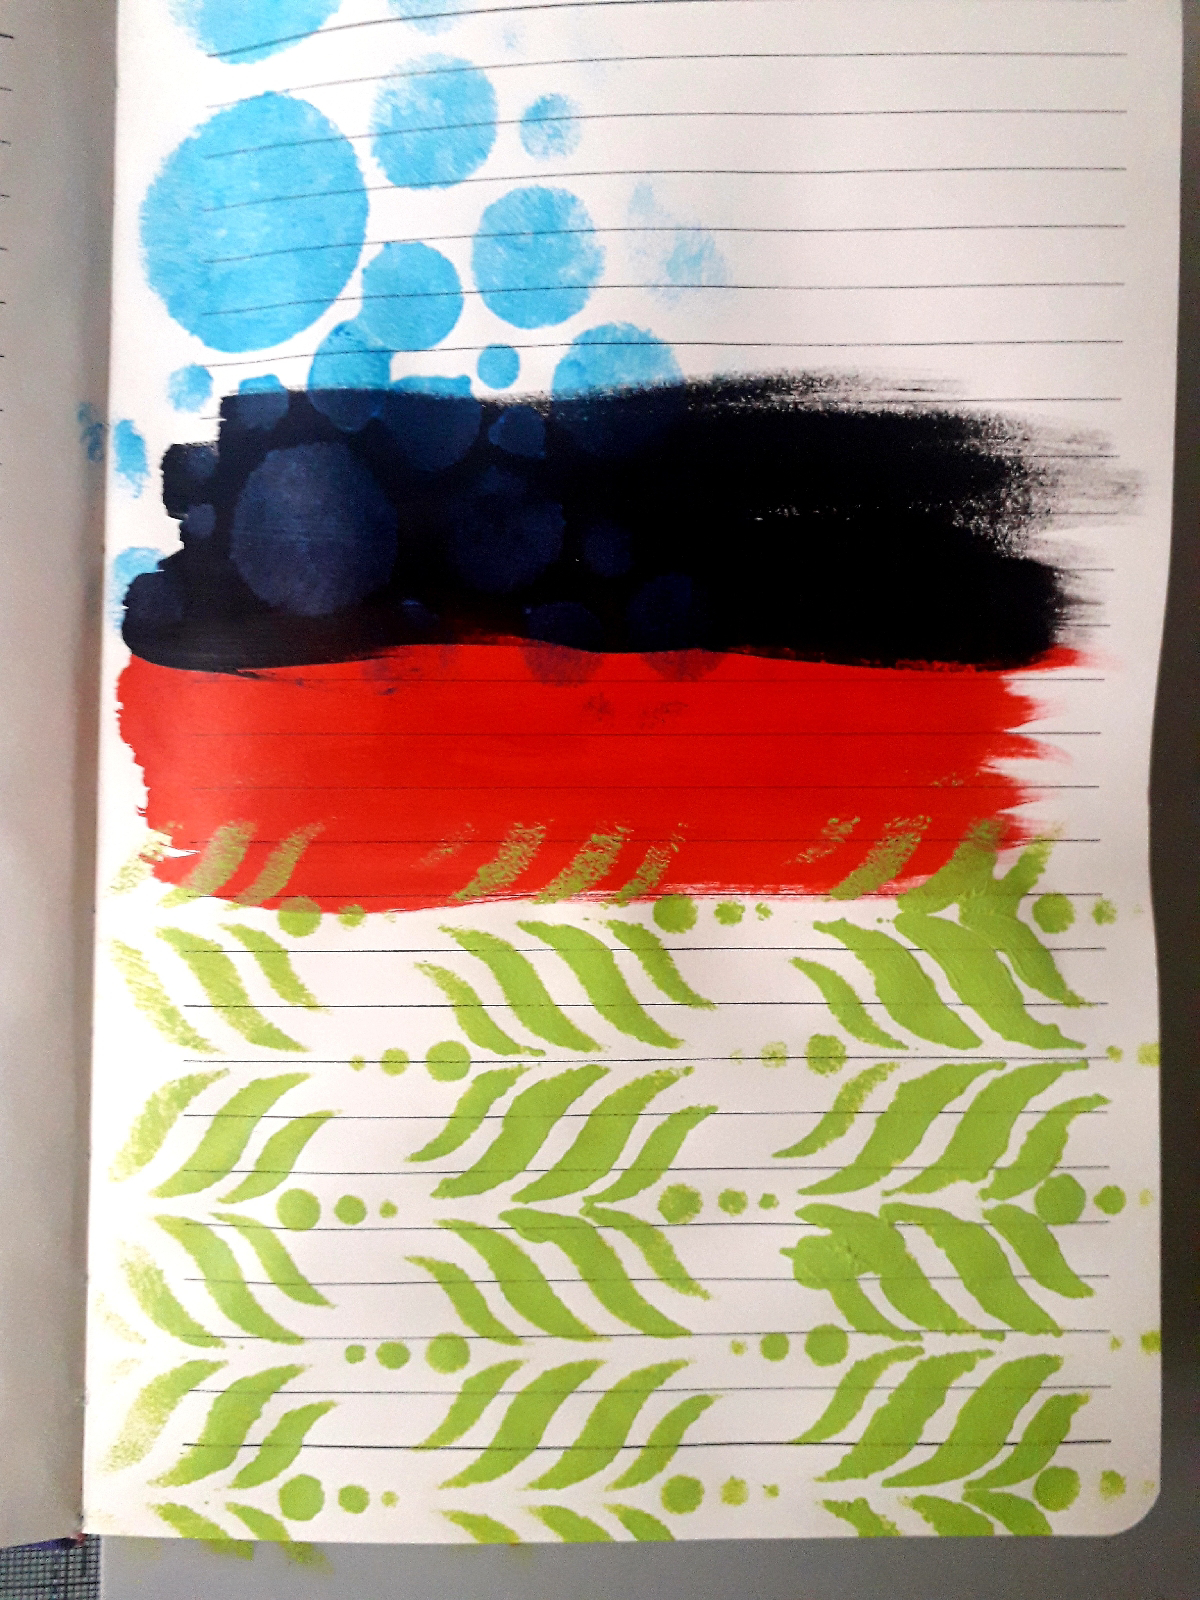
To begin I dry brushed a strip of red and black dylusions paint across the notebook page. I left this to dry fully.
Next, I sponged blue dylusions paint through the circles big one to the top left of the page. Again I left this to fully dry.
Then I sponged green dylusions paint through the Bakewell big one on to the bottom of the page. I left this to fully dry.

Next, I added areas of mustard seed distress oxide through the dot and line texture disc.
On a seperate piece of cream card, I drew through the 4 inch star easy frame and then cut it out. I then used a black sharpie to draw an outline just in from the edge and then I drew lines across it.
I glued the star to the left of the page, on the red and black paint. I glued it so that the lines on the star were perpendicular to the lines on the page.
On the same cream card I stamped Sassy using Versafine Clair Nocturne ink. I coloured her with my Ecoline pens and a damp paintbrush. When she was dry I cut her out and glued her to the page, so that she overlapped the star.

On the same cream card, I stamped my chosen sentiment. I cut it out and edged with a black pen, before gluing it to the page. 
Finally I added a scribbled black border to the page using a micron pen.
Products used:
Dylusions paint - postbix red, island parrot, blue hawaiian, black marble
Inkable big ones - circles 1, bakewell 
Art stamps - journaling girl Sassy (discontinued) other journaling girls are available at this link - journaling girls
Ecoline pens - light rose, beige, light yellow, apricot
Wordage stamps - small words 1
Distress oxide - mustard seed
Cream card
Notebook

Thank you for taking a look.
Alison

Friday, November 24, 2023

Lynne Guest CT - DIY Washi Tape

Hi everyone, here's my second Guest CT post!


I like the effect of using washi tape on my cards, but not that the design/colours of the project have to be matched to the purchased tape, rather than the other way round. The answer is to make my own, and the Bee Crafty Stamping Tape is the perfect substrate for doing so! Here are the main supplies I used for my card.

I began by laying a strip of the stamping tape across my non stick craft sheet and brushing on various colours of Distress Oxide inks through a stencil from the Dinkables Set 11. (I took the photo before adding the green ink!)

I then made a second strip, this time using the same ink colours but stamping the leaves from the Journaling Essentials 2 stamp set.

My intention was to fill the aperture of the Maple Easy Frame (6”) with strips of the washi tape, so the next step was to cut a piece of orange card to the size of the stencil, draw around the aperture lightly in pencil and cut it out. I cut the leaf stem slightly wider than its actual size , ie. outside the pencil line, as it is very fine and I wanted a bit more of the washi tape to show through.

I stuck sections of the washi tape on to a piece of scrap card, alternating the two patterns and making sure to cover an area larger than the maple aperture to give room for adjustment when placing it over the tape.


Once I was happy with the placement of the aperture panel I adhered it to the washi background (using Distress Collage Medium) and cut away the excess white card.

My base card was 7” by 7” and I stamped a border around the edges of it using the small leaf from the Journaling Essentials 2 set and Bundled Sage Distress Oxide ink. I also darkened the edges slightly by brushing them with Rustic Wilderness ink but without reinking the brush I’d used to ink up the washi tape, as I didn’t want them too dark, just enough to define them.


I trimmed about half a centimetre from each edge of my maple panel to allow more of the base card border to show and then embossed around the panel using a Distress Embossing Dabber and gold embossing powder.

Then it was simply a matter of sticking the panel to the base card and adding the sentiment, which is from the Wordage set Ticker Tape 3. I stamped it with Vintage Photo Distress Oxide ink and cut out each line separately, before arranging them on the panel. And here’s the finished card!


To give you an example of another way to use the Stamping Tape, here’s one I made using the wider version of the tape, showcasing it as a decorative panel across the card. In this case, as well as stencilling it as before, I also overstencilled it in a darker colour for added interest.

I hope I have inspired you to have a go at making your own washi tape! If you decide to try it, please share your creations in the Bee Crafty Facebook Group!

Thanks for looking!


Here are the links to the products I used:

Bee Crafty Stamp & Stencil Tape 22mm x 25m

Bee Crafty Non Stick Craft Sheet 15" x 18"

Rustic Wilderness & Crackling Campfire Distress Oxide Inks

Spiced Marmalade, Bundled Sage & Vintage Photo Distress Oxide Inks


Dinkables Set 11

Inkables Easy Frame - Maple 6"


Journaling Essentials 2 Stamp Set

Related Posts Plugin for WordPress, Blogger...