Showing posts with label All Hallows. Show all posts

Tuesday, September 12, 2017

Marleen DT - Rainbow scull

Hey bloggers
and welcome to my blog.

Today is my turn to share a bit of inspiration for

Todays card was actually my daughters idea.. Long story short, I was stuck for an idea for my digital design team, and my girl suggested making a rainbow.. The background I used today was my first play and just didnt 
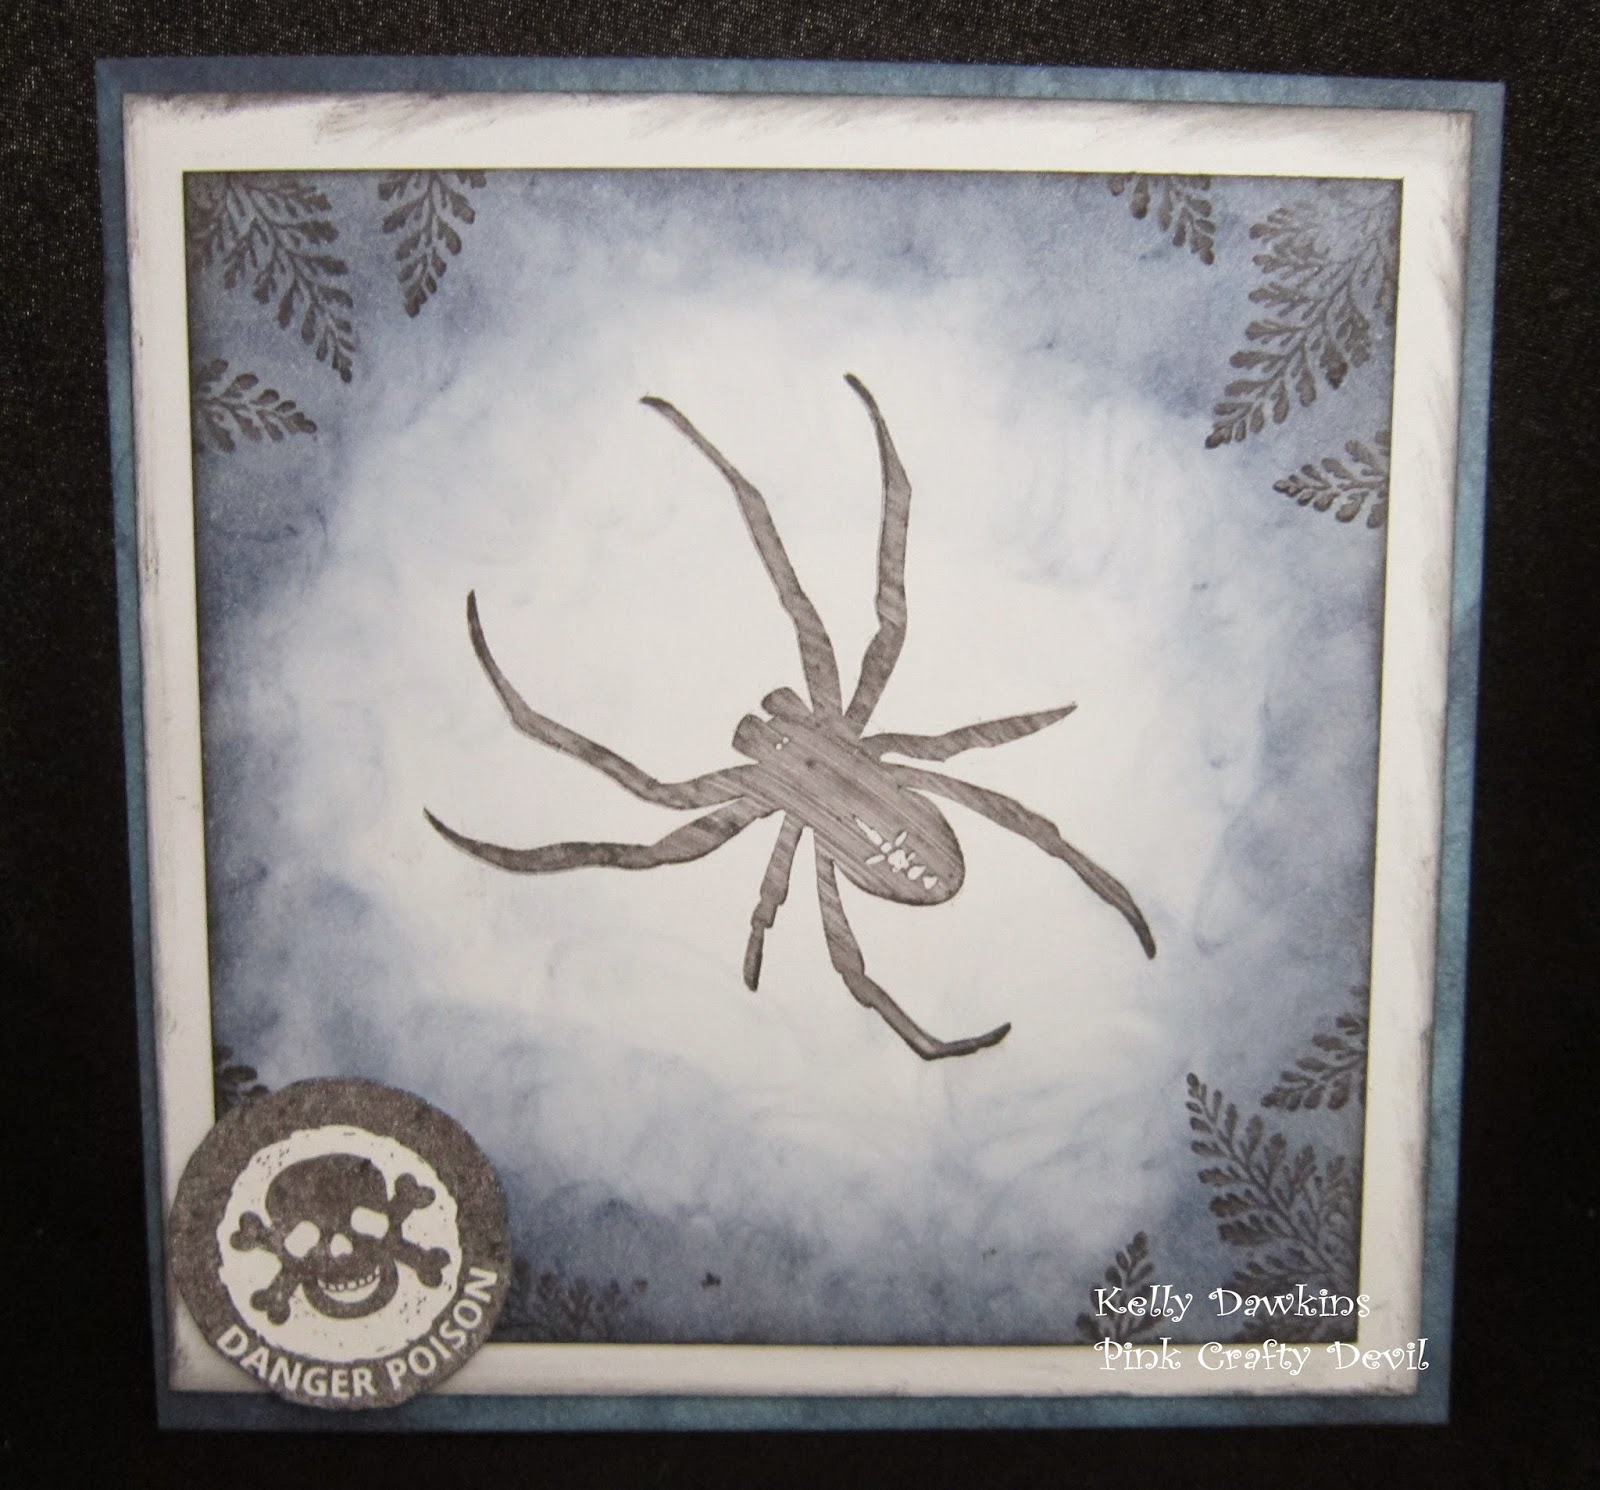
look for the intended card, but I then teamed it with my tophat scull stamp and bingo, we had a winner.. I also used one of the cog stamps. Find them all in the STORE.
Its a very simple card, but guess that is what I do best lol
I used distress inks but I guess you can use what ever inks you want.
I used the following colours:
Fired Brick, Spiced Marmalade, Mustard seed, twisted citron and mermaid lagoon.

I started in the middle with the yellow, and then worked my way out on either side letting the colours overlap a little bit.
I then stamped my scull stamp and heat embossed in black. I also made a mask of the scull on post-it notes while I had the stamp out.

I then masked of the scull and stamped my cogs around it. I didnt heat emboss the cogs as I didnt want them as bright as my scull.

And that is it really. A very simple card, but very colourful.
Thank you for popping by and for any comments left behind.
Dont forget to come visit me on FaceBook, Twitter, Instagram, Pinterest, Youtube or my FB page.
 Happy Crafting

Wednesday, September 06, 2017

Marleen DT - Hochanda Samples

Hey Bloggers..

Just a quick post today to share my samples from the recent BeeCrafty show on Hochanda. 
All of us on the Design Team have such different styles and I love how we all make such different bits even though we have the same goodies. The other girls are so talented and after watching the shows, I now have so many ideas I want to try out..

Anyway here are all my samples. 


 These 2 cards are some of my favorite in my bunch. I struggle making CAS (clean and simple) cards, but I think I pulled it off this time. They are 1 layer on craft card. Owl stamped and masked off. Then a bit of distress oxide and music stamp stamped over before a few water splashes. I finished with my sentiment up in the corner.

This one is actualy a postcard. I signed a wee greeting on the back.
Its just stamping and smothered in distress ink. And finished with a bit of crackle glossy accent
 
I LOOOVE this card, if you will forgive me to say so about my own creation. Its simply just a lot of masking and stamping, A few paint splashes but the whole project has a spray of silver shimmer over it. Its sooo class, if i do say so myself lol

I love this one too. But its more the colours I think and the fact I love making backgrounds with sentiment stamps. Its oxides but only just stamped. My owl is stamped and coloured and fuzzy cut and stuck on top.

This one was another quick make. Its the brick stencil with distress ink and then the scull stamped over and then the splash stamps in the same red colour (I think it was fired brick).

 This one, forgive me I dont even remeber what I used for the background coouring. I think it was distress crayons but could have been oxides.. Either way, I stamped the scull background repeatedly over it. I love the scull background stamp but I must admit I struggled to come up with ideas for it. Anyway, i stamped my tophat scull and the little poison sentiments, fuzzy cut and layered up.

 This one is once again distress ink and my scull stamped over and heat embossed with white embossing powder. I did the same with my sentiment. The details on this one is water stamping. I simply sprayed a bit of water on my mat and tapped my stamp into the water and stamped on to the card.

 These 2 was mearly a play trying to use the background scull in the best way to show it off. I wasnt sure if I was even gonna show them off, but i thought, someone else might love the stamp like me but find it hard to use. So I guess this is a very simple idea.

 This one was also just me playing. Its just oxides on the blending foam and then stamping over. the swirlies are from the scull background stamp.

And thats all I made for the show. Hope I managed to give you some inspiration in how to use these amazing stamps. You can find them all in the STORE.

 Thank you for popping by and for any comments left behind.
Dont forget to come visit me on FaceBook, Twitter, Instagram, Pinterest, Youtube or my FB page.
 Happy Crafting


Monday, October 31, 2016

Kerrie DT - All Hallow's Tag - Spookylicious

HAPPY HALLOWEEN!!! 
 and Welcome to my Monday Post for Bee Crafty

I love Halloween so much and will be spending the evening with my two youngest children and my Hubby making Jack-o-Lantern's and watching Hocus Pocus!! 

I hope you all enjoy your Halloween - Stay Safe! 

Today I am sharing with you a Halloween Tag I have made using some of the Gorgeous 'All Hallows' stamps and the 'Spellbound Abi' stamp which I love


I stamped the 'All Hallows -Spiderweb' stamp over the large tag using light grey ink and then inked the edges using 'Spiced Marmalade' distress ink and then 'Black Soot' distress ink just at the edge.

I cut a piece of black pearlescent cardstock to a few mm smaller than the tag, rounded the corners with a puch and glued to the front of the tag. I found an offcut of Halloween craft paper in my box and trimmed this to fit the side of the black card.

I stamped the 'All Hallows - Spooky Scene' onto white card using black ink, I fussy cut the tombstones and bats then inked over using 'Peeled Paint' distress ink. I attached the scene across the bottom of the tag using a hotglue gun and saved the bats for later.

I stamped 'Spellbound Abi' onto white card and coloured her using my pencils in colours to match the tag so far. I then stamped the edges using the 'All Hallows - Spiderweb' using black ink, I then lightly inked the edges using spiced marmalade, peeled paint and black soot distress inks. I matted the image onto black cardstock and fixed to the tag using foam tape. I then attached the bats from earlier using my hotglue gun.

To finish I added the sentiment using the 'Spookylicious' word from the 'Spellbound Abbie' stamp set

I hope you like my post today, I really enjoyed making the Tag it was a lot of fun

Please visit again soon to see the Gorgeous Projects by the Bee Crafty Design Team 

Krafty Hugs xx

Check out Kerrie's Blog to see more of her work

Wednesday, October 21, 2015

Marleen DT - Halloween tag

Hey blogger friends..

A little post today for

Today Ive used a few of the Halloween stamps from the  STORE.I used "Happy Halloween" & "Halloween"


I had so much fun making this little tag.
I started with a plain manila tag but covered it in clear crackle varnish.Once that was dry I added a coat of red paint and left that to dry. Once all dry i stamped my circle "Happy halloween" stamp strait on top. That too needed time to dry. In the mean time I made my sentiment which is made from parts of the "Halloween" stamp. Simply just stamped on cheap card stock and smothered in distress inks and cut to size. I finished with a glitter spider and a piece of black lace.

And that is all from me for today.
Thanks for popping by and for any comments left behind.


Monday, September 21, 2015

Kerrie DT - Spookylicious Abi Grace

Hiya and Welcome to my Monday Post for Bee Crafty

Wowser these weeks are flying by so fast and Autumn is in full swing so out came my Halloween Stamps and papers 

I had a lot of fun making this card using the Gorgeous 'Spellbound Abi' stamp set, Ive added lots of layers and extra stamps 'Spooklicious' from the Spellbound Abi set, 'Spiderweb' & 'Spooky Scene' from the All Hallows collecion and the BEAUtanicals 'Large Branch


I coloured Spellbound Abi using my fave Alcohol Markers after stamping her using a pale grey inkpa to give the no lines look which I love. 

I stamped the Spooky Scene, Large Branch and Spooylicious onto a gorgeous Halloween Backing Paper from my stash to create the background of my card. I then added a few offcuts from my scrap box which I matted using silver mirror board off cuts (using offcuts for smaller layers is great as you then dont have to cut into new sheets and you save a lot of wasting)

The music score I cut from another seet of Halloween Backing Paper from the same pad as before - I love this paper pad and will be making a few more Halloween makes from it this year 

To finish up my card I have used lots of matt & layering, Diecuts, lots of distress inks for edges and I layered the elements using foam tape and jaunty angles 

Thank you so much for visiting the Bee Crafty Blog today, come back soon for more Gorgeous Makes by the Amazingly Talented Design Team I am always in Awe of the stunning creations they make 

Krafty Hugs xx

Wednesday, October 29, 2014

Marleen DT - All hallows

Hi blogger friends

Once again my turn to share a bit of inspiration..

My last halloween project for this year I think and once again, Ive had a play with
You can find these and all the other fantastic stamps in the STORE..

Here is what Ive made for this week: 


 THe back ground on this card is made using the "scull" stamp with white embossing powder.
Its matted and layered onto purple card stock.
My centre image has been done the same way, only while the white embossing powder was still warm, I springled some silver embossing powder over it. It can vaugely be seen on the last image.
My sentiment has been stamped on purple card stock and also done with white embossing powder before cutting it out.
The rest was simply matting and layering.

And that is all for today from me.
Thank you for popping by and for any comments left behind.


Wednesday, October 22, 2014

Marleen DT - Halloween

Good morning blogger friends..

Its my turn to share a bit of inspiration.
For today Ive been playing with all my halloween stamps..
The stamps Ive used are called:

You can find these and all the other fantastic stamps in the STORE..


For this card I matted and layered my back ground before stamping my 3 stamps onto a lightly hammered cardstock with versamark and and coating with black embossing powder.
Once powder was melted and cooled, I cut out my images and used distress inks to colour them
After that it was a simple matter of layering the images up and finish with the bow and a few black gems..

Hope you like. I love the way this one came out :-)
Many thanks for popping by and for any comments left behind.

Monday, October 20, 2014

Spooky Scrapbooking

Good Morning Crafty People;

Today I thought I would share with you a Halloween Scrapbook Layout. I tried to take pictures at each step so bare with me.  All of the stamps I used were from the new All Hallows Range


Step 1
I selected a plain black background and cut it down to 8 X 8 inches


 Step 2.
I used a white card stock and randomly stamped the spider using a black momento ink pad, once I was happy I cut it down to 7.75 x 7.75 inches.


Step 3 and Step 4
I picked an orange background I didn't want it so bright but this was all I had so I had to come up with an idea. I cut this down to 7.25 x 7.25 inches
So I Decided to take the Fern stamp and the black ink pad and randomly stamp the fern around the edges of the card stock I then used the Black Soot distress ink pad and some cut and dry foam to ink the edges, some of the ink got on my finger and left random dots but I didn't try and correct these as I thought it gave a bit more of a "spooky distress" look to it.

I used my explore to cut the border out, I cut it to the size of the card and left it to size. I added white pen around the "tombs" to give it some detail

Step 5. 
Next I created my photo mat layer. 
I used the black card and cut it 6.73 x 4.73 inches
I used a white card stock and stamped the "Poison" stamp I used a dark purple and then edged it with an orange ink I then cut this to 6.5 x 4.5  inches
Once my photo has been taken I will print this at 6 x4 inches


Step 6
I stamped my title and cut it down so it was nearly the correct size, I added orange ink around the edges on this

Step7
I then gathered up all my elements to check that they all worked together and that I was happy with it.
I adhered all these together


Completion
All being well this is what you should come out with, I added the title using foam tape, but only removed one piece leaving the bottom open so I can added my photo then remove the backing and fully stick it down.

To give it some final detail I added stitching around the "Spider" background and some additional detail to the "tombs"


I hope you have enjoyed this and I would love to see some of your Halloween Scrapbook Layouts.
Crafty Hugs
Kelly
xxx

Wednesday, October 15, 2014

Marleen DT - All Hallows

Hello blogger friends..

Wednesday again and its my turn to share a bit of inspiration..

For today Ive been playing with one of my halloween stamps.
The stamp Ive used is called:

You can find this and all the other fantastic stamps in the STORE..


I have a secret to tell you all.. This card was made using a tecnique i saw our very own Bev, the boss lady, demonstrate on the new online tv challenge
"British Craft Network"

I caught one of Bev's first shows and just HAD to have a try at this.
It involved making a mask with a simpe piece of paper and then use lots of distress inks.
After I had done that i sprayed my card stock with loads of water to really make the inks smudge.
I finished with the little dots made with a distress marker and a few gems.

Hope you like. I love the way this one came out :-)
Many thanks for popping by and for any comments left behind.

Monday, October 06, 2014

Scary Spider

Good Morning Everyone

Well today I am sharing a card for you that I really don't like simply because it has a great big SPIDER on the front and I have a huge fear of spiders - but when I stamped it out I took great pleasure in pushing it down hard onto the card stock ha ha ha
 

So I started with a light blue back ground which I inked with a dark blue distress ink 

I matted a white layer and inked it with black soot and wasn't overally careful about it as I wanted it to be all spooky

The next layer started with a white card blank, which I stamped the spider on to (shudders) I used a black ink pad for this, I then used the same dark blue distress ink and inked all around the creating darker on the edges and lighter towards the spider. 

I used a fern stamp and stamped it into the corners I stamped them three times in each corner.

To finish I added the "danger poison" stamp to the corner.


Well I hope you like him and I apologise if anyone is super scared now from the spider 

See you next week

Crafty Hugs
Kelly
xxx

Monday, September 22, 2014

Spooky Goings On

Good Morning Guys,

I thought today I would share a card I made using the "All Hallows" range to try and give you some inspiration ready for Halloween, eek it won't be long now. 


So today I started with a white spring card design  I matted the front with a white piece of card stock that was inked with orange ink and then edged with black soot, the next layer is a black piece of card stock and I stamped the "Danger Poison" stamp in the orange ink and created a background. It doesn't stand out fantastically but it does look pretty cool when you see it. I stamped the sentiment "Happy Halloween" onto a white card stock and inked it again with the orange ink and edged with the black soot ink, I very very lightly went over the sentiment to take away the harsh white. 

To finish the front part I added Liquid pearls in a bronze colour in various place and a piece of black velvet ribbon which I tied into a bow. 

 The title


This is a close up of the bottom section of the card, it is a black layer matted onto the white card blank, with a white piece of card stock that I inked with an orange ink pad and very lightly edged it with black soot, I used the "Danger Poison" stamp to create the background, this was stamped in black ink. 

I added liquid pearls to this section as well.


I hope you like it and I hope it gives you some inspiration ready for your Halloween cards. 

Thanks for stopping in and don't forget a different member of the design team showcases a creation every day on the blog and we have our Facebook group that you can share your creations with us.


Crafty Hugs
Kelly
xxx

Monday, September 08, 2014

Happy Halloween - Gift Card

Good Morning Crafty People,

How are we all today?

I am here sharing with you a quick Halloween card that I have made from the new range ALL HALLOWS.

Okay so we are not in October yet and Halloween seems so far away, but it will be here soon enough. 

My card today doubles up with a gift as well. 

I started with a standard a6 card blank. I used a white piece of card stock cut it down by a 1/4 inch and then used a orange ink pad to ink the edges to create an orange layer, the orange I had seemed to bright for a Halloween card, so I used Black Soot and lightly inked over the edge with the black soot to make it a bit darker. 

The next layer is again a white piece of card stock and I inked it using a dark purple ink bad, I used the black ink to stamp the "Danger Poison" stamp to create the background, one this had been done I again inked the edges with black soot to give it a slightly darker feel. 

I used two pieces of black velvet ribbon and crossed them over - to be honest I didn't pay that much attention to this as I wanted it to be slightly odd angles. 

The next layer is again a white card stock I stamped the Sentiment "Happy Halloween"
 I inked around it with the orange ink and then again ran around the edges with the black soot. I mounted this layer onto foam tap to give some dimension to the card.


Next I decided to create a gift card pocket on the inside. I used the same ink as the front and the same sentiment stamp as the front. I glued down the two sides and the bottom leaving the top open so money/gift card/treat could be popped into the pocket to give to the recipient. - The purple tag is just in there to give you the idea that it is a pocket.


This is a side view of the card, showing the depth of the front, and a peek of the inside. 


That is it for me for today, I really hope you like it, and don't forget to pop back tomorrow to see what Sue has on over for you, we would love to see your creations so please don't forget to pop on over to our Facebook group, or leave a comment in the comment box with a link to your project :) 

Crafty Hugs
Kelly
xxxx
 
Related Posts Plugin for WordPress, Blogger...