Showing posts with label feathers. Show all posts

Tuesday, November 22, 2016

Wake Up

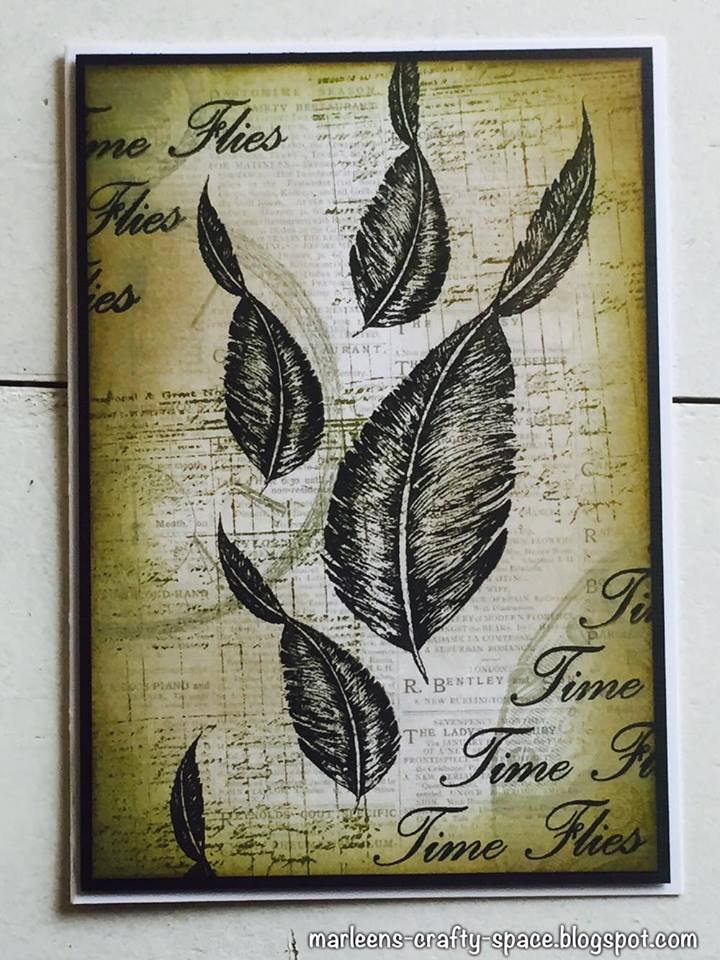
Morning, Today I wanted to share one of the samples I made for the Bee Crafty show on Hochanda. This was from the show when Bev brought us the wonderful Steam Punk Paper pads. The beautiful Feather stamps were also a feature of the show.

For this card I decided to use Kraft card for a different look and feel. I started by stamping one of the feathers letting them overlap, using a mask I had cut from copier paper. The colours I have used here are Shaded Lilac, Pine Needles, Festive Berries, Squeezed Lemonade and Spiced Marmalade Distress Inks.

On another piece of Kraft card I stamped the 'Wake Up' stamp with Gathered Twigs Distress ink. This is a really fun sentiment that suits lots of occasions, I think it's especially good for teenagers.

To create the background I stamped the smaller Swirly Feather using Gathered Twigs Distress ink, allowing some to fall off the page.

I blended around my sentiment, background and main piece with Brushed Corduroy Distress ink to soften the edges.

Next I cut a piece of hessian approximately the same width as the background and frayed the edges quite heavily.

I layered my background onto brown Centura Pearl card and secured the hessian in place using Cosmic Shimmer glue.

Using some of the longer lengths of hessian thread, I wrapped them around my main piece and secured at the back with tape. I then layered this onto the same brown card.

I used another hessian thread to thread through a wooden button to act as an embellishment. Then layered my sentiment onto the same brown card.

To finish the card, I assembled, I secured the main piece to my background using foam tape to raise it, then 3D glue gel to add the sentiment, lastly I added the button, again with 3D glue gel.

I hope you like the finished card today and the step by step I have shared with you. Thank you ever so much for joining me. Take care and happy Crafting.xx 

Wednesday, November 09, 2016

Im late, Im late for a very important date...

Hey bloggers..

Totally messed up today.. I was supposed to have my blog post this morning, only to forget all about it. Never even crossed my mind..
But before I pop to bed I still want to post my weekly post for

This week Ive pulled out my feathers again and did a tecnique I saw on youtube.
Its a simple masking tecnique, done loads of times but I had never seen it done with a sentiment so decided to have a try.


Both of these cards has been made by first stamping the feather and ink well on to my card stock in black ink. I then stamped a second feather and second ink well on a piece of scrap card and cut them out.
I overlayed both on my card (I used a tiny piece of double sided tape to hold them in place). I then took my mini memento pads and lined up the colours till I got like a rainbow effect of colours. I stamped the middle colour of the "Time Flies" stamp first and then spread out from there to get it even looking.
Once I had all the greetings stamped I removed the masks and voila.. 

On the top card I did as described above but after I was done I decided to jazz it up a bit. I added the green strips of glitter card and decided to cut a new feather and ink well to add on foam to raise them.

And that is it from me for today. Appologies to those who follow my blog and the BeeCrafty blog for the late post.
Many thanks for popping by and for any comments left behind.
And dont forget to come visit me on FaceBook, Twitter, Instagram, Pinterest, Youtube or my FB page.
 Happy Crafting

Wednesday, October 26, 2016

Marleen DT

Hello dear bloggers 
and welcome..

Once again my turn to share a bit of inspiration for

I have another sample made with the fabuuuless stamps featured on Hochanda last week.
I used the "Art stamp sets, Ledger, nips and Ink"
Find it in the STORE with all the other amazing goodies..

This one is made on linnen card stock.
The background is smothered in different blues distressinks. I left it to FULLY dry before stamping the ledger with versamark and heat embossed with white embossing powder.
I took a dotted stencil and left on the background and sprayed a bit of water through. I removede the stencil and blotted the water up with a piece of kitchen towel. It removes a bit of the ink and leave like a ghost impressing.
I then cut my panel, stamped my feather with versamark and heat embossed also with white embossing powder. Once cooled I smothered the piece in the lighted blue distress ink I had before adding the same stencil as on the background and added a bit of a darker blue distress ink through.

I mounted both pieces of card on to black cardstock and layered onto my card blank.
I finished the card by stamping the nips on to a piece of black scrap card. I stamped with versamark and heat embossed with white embossing powder. I cut them out and added them to the card.

Should you wish to see my other samples from the last Hochanda show, also made with these stamps, just press HERE...

And that is it from me for today. I hope you like my creation.
Many thanks for popping by and for any comments left behind.
And dont forget to come visit me on FaceBook, Twitter, Instagram, Pinterest, Youtube or my FB page.
 Happy Crafting

Wednesday, October 19, 2016

Marleen DT - Hochanda samples

Hello bloggers..

Well today I will really just re-cap the samples I had on the BeeCrafty show on Hochanda this past monday. It was 3 amazing shows.
Not only did our Bev recreate 1 of my projects, no she did 3.. Such a buzz.. Thank you Bev x

For this show we all used the feather collection stamps, the art boards and the BRAND NEW paper packs. I got the background ones and had not seen the xxx till the show.. got they are both yummy.
My favorite one is the background one and im guessing the girls sent that one to me, as they know I LOVE scrapbooking and these background are just perfect for that as well as cards, mixed media, canvases ect ect.. So yep.. I jumped right in and made a LO (LayOut).

I got the 8x8 pack. Such a great size even for scrapbooking. I have some ideas using these papers for a second LO but it will be built on a 12x12 plain background ;-)
On this LO I added more interest on the background but stamping different elements from the stamps. The loops you see around the edges, is from the "hope & faith" loop stamp. I just only added ink to a little bit of the stamp. I also used just the words from the same stamp above the pic, just inking the word. The clock and cogs are cut from a second paper and layers on and my feather, inkwell, nips and the wings are stamped on to a piece of the paper pack, heat embossed, cut out and layered on the the LO. I finished by stamping my greeting in black strait under the pic.
This one is made with the paper pack as well. Simply just 1 sheet cut to size fitting the card with a blck mat. I stamped the ledger stamp with peeled paint distress ink as well as distressing the egdes with the same ink. I then stamped my feathers with black Archival ink.
I took my "Time flies" stamp and cut it apart to get "time flies" bit on its own. Dont worry, you can assemble your stamp on the stamp block again and no one will ever know the stamp was cut ;-)
I aslo stamped my greetings in Archival.
 ah I love the colour on this one. This one came about as I wanted some more dimention on my cards. But there are strict rules on what goodies we are allowed to use on the samples for the TV show. You see, if we start using goodies that Hochanda dont sell, Hochanda could get in trouble. And also our job is to promote BeeCrafty. So rules are that we may use the goodies from BeeCrafty that Bev has had on recent shows. After getting the ok from the girls, I pulled out my BeeCrafty Inkables. FOr this one I used the small star "inny" to emboss into my card. I smothered the who card in "Picked Raspberry" distress ink before I outlined the stars with a white pen.
My wings, I stamped onto white cardstock and heat embossed with white glitter embosing powder, cut them out and finished them with a wee gem.
 \I really love this one. But yellow is my favorite colour so no surprise lol. I used the circle inkables to make my backgrouns and the rest is just stamping.
The nips are strait onto my card itself and the feather is raised on a black mat using foampads.
 Another yellow creation.Bev recreated this one. A bit more vintage looking this one I think.
Watercolour card stock. Water wash distress ink background. My wings are white embossing powder and I used the heart "inny" inkable to gently make the heart on the background.
I just gently swiped the colour out from the middle of the heart "inny"out to the egdes.
I finished with water splashes and black splashes using my splatter brush.
  A shaker card.. Something I've only just started making...
Background is distress ink puddles where I just dragged my card through and left to dry. I then stamped on my feather and slowly cut it out. I stuck accetate on the back of the feather hole.
I then added my black mat to my card blank so it was ready. I turned my feather piece over and added double sided foam tape all around the feather and the edges. Make sure there is NO gaps around the feather or your sequins will fall out. I put my sequins down on the black card and added the feather piece over. I finished with my greeting and hand drawn stitches.
 Bev recreated this one as well. Its a simple distress ink background where I just stamped the large wings with versamark and heat embossed with clear embossing powder.
I stamped the wing again and my greeting on a panel of vellum and heat embossed with gold embossing powder. Voila.. Very quick and easy.
 And last but not least... My art board.. I am still new to these and It came as a surprise to me that it has been my most successful project from this show. It has gotten so many compliments since posted and Bev recreated this as well.
I simply stuck some paper on is from the Background pack, added a few extra bits I cut from a second sheets. Smothered it in matching distress ink (These papers matche the distress ink palet SO well. think this one is victorian velvet but not 100% sure)  and stamped the nips and the ledger in the same colour. I stamped the feather and ink well and heat embossed with gold, cut them out and layered ontop. I finished with a bit of gold embossing powder around the edges and stamping my greeting in black Archival.

And that is it from me for today. I hope you like my creations.
Many thanks for popping by and for any comments left behind.
And dont forget to come visit me on FaceBook, Twitter, Instagram, Pinterest, Youtube or my FB page.
 Happy Crafting


Monday, October 17, 2016

Bee Crafty on Hochanda!

Hiya and welcome to my Monday post for Bee Crafty

Today our Bev is live on Hochanda at 10am, 1pm & 5pm with the gorgeous Feathers stamps sets and the New Steampunk papers which are all gorgeous

I made some lovely new samples for today's shows but due to wanting to get them sent on time I forgot to take any pictures Doh!!!!

So instead I am re-sharing some of my feather makes from last time

We all hope you will join Bev and enjoy some of her yummy inspiration

Thank you so much for visiting  today

Krafty Hugs xx
KERRIE

Tuesday, June 07, 2016

Life's Work

Morning, Today my card is made from the beautiful feather collection, drawn by Sam. A fantastic job, I am sure you will all agree.


I started of by dying/ageing some papers using cold strong tea. Hung to dry overnight.


Next I stamped the old invoice stamp onto the paper. I did the original stamp in brown ink, but felt that the Black Archival would suit this project better.


Next I masked off the end of the large straight feather as I wanted the nib to be at the end to make the pen. I stamped this with Versamark and embossed using black fine detail powder and heated using a heat gun. I had previously done the same with the nib only with gold fine detail powder. I cut this out and set aside.


Separately I stamped the ink bottle with black Archival and now had all the elements I wanted for the card, including 3 old invoices in black.


For the background, I took a sheet of tissue paper and built u a pattern using a mixture of stamps across the collection, along with the words Life & Memory, both from sentiments found in the Wordage section of Bee Crafty. Obviously you can change the words depending on the theme of your project. There are some really amazing sentiments on the website.I used a selection of inks to stamp the tissue: Black Archival,Walnut Stain, Brushed Corduroy and Blueprint Sketch Distress Ink. I wanted the colours to come from the background and therefore these colours are fairly muted.


To provide the background colour, I took a sheet of A4 watercolour card and saturated it under the tap. The took Violet, Emerald Green and Cobalt Blue Brushos and added them here and there with the end of a mini screwdriver. I let the colours spread naturally before taking a straw and blowing to get some trails.


I wanted an 8'' square for my finished project, which gave me ample left over to stamp my sentiment.


I cut the sentiment to size, cut a mat for it approximately 5 mm larger and blended Chipped Sapphire Distress Ink around the edges.


I covered the watercolour card with PVA let down 50/50 with water. Scrunched my tissue paper, unravelled it and stuck it down, keeping creases and folds to add texture to the card. Leave this aside until completely dry before trimming the excess or you wont get a nice sharp edge.


Having played around with the composition, I decided something else was needed so I stamped the same straight feather onto shrink plastic, coloured with a red pencil and heated until completely shrunk. I also coloured my Quill pen with a selection of alcohol markers.


I layered my sentiment with cosmic shimmer, I arranged the old invoices and also secured them with cosmic shimmer glue. I shaped the ink bottle and used 3D glue get to secure, I then stuck the shrunk feather so it was sitting in the ink bottle.Finally I added the sentiment and large quill feather pen with 3D glue gel.


I really hope you have enjoyed my post today and hope that you will join me again next week. xx

Wednesday, June 01, 2016

Marleen DT - More Feathers

Hello Bloggers

Once again wednesday and once again my turn to post for 

Ive had another play with the May release stamps, The wings.
My set was the "Feather Dreamer" but dont forget, all the stamps can be bought individual as well as in sets, over in the STORE.


This card is made with white embossing powder on my feathers and the background is made with distress ink. I saw this kind of colouring done in a magazine and just loved the look.
My sentiments are stamped with black Archival ink and I used the tip of my smaller feather to make the feather on the sentiment..
That is all from me for today.
Many thanks for popping by and for any comments left behind.
And dont forget to come visit me on FaceBook, Twitter, Instagram, Pinterest or my FB page.
 Happy Crafting

Tuesday, May 31, 2016

War-bonnet Wilderness

Today, I am sharing another card that I made using the new range of stamps from Bee Crafty. They were launched on Friday 20th May, if you missed Bev's shows they are still available on Hochanda's website, via the TV schedule, using the catch up feature. Please be quick as they're stored for 7 days.


I started off with a sheet of A4 velvet card. I didn't know exactly the size of my finished project, but I was hoping for approximately 7-8''. First I drew a simple hat in pencil and then fashioned it into the base of an Indian War Bonnet. When I had rubbed out all of the excess pencil lines, I went over the required shape with a waterproof black fine liner pen. Then I masked off with Pebeo Drawing Gum.


I worked out which part of the large wing I would need to complete the head dress and applied washi tape to mask off the unwanted part of the stamp, then inked up using Versamark, removed the tape, lined up the stamp with the hat base. I used black fine detailed embossing powder to emboss the feathers.


I then took the small straight feather from the same set to be the hanging side feathers of the head dress. Then took the medium curled feather and masked off the base with washi tape as I only wanted to use the tip. Using black versamark I positioned them about 5-10 mm away from the wing. I added black dots between the head dress and the feathers and joined them together with a very fine line using a black fine liner. I wanted the feeling of movement so they appeared free to move in the breeze. I then applied drawing gum to the whole image.


I cut my project down to size and drew two deckled lines around the edge at 5 and 10 mm with my black fine liner.


I stamped the sentiment I had chosen from the collection. Then added the landscape using Antique Linen,Tea Dye and Frayed Burlap. I added some Brushed Corduroy in the mountain range. I then placed my mask for the Sun/Moon, For the sky I used mainly Shaded Lilac, then from the outside blended in some stormy Sky and finally a little Faded Jeans just around the edges blending into the rest.


To create the Tippee's, I cut a triangle from copier paper and ripped a slim strip also to lay across the base. I blended Frayed Burlap inside the triangle. I drew the base, posts and door flap with my black fine liner. I removed the Drawing Gum and coloured the head dress with a selection of Alcohol markers.I then coloured the inside deckled frame with my black marker.


Finally I mounted the card onto a black card base leaving approximately 5 mm around the card.


Thank you so much for taking the time to read my step by step contribution. I hope you like the card I have made using these beautiful stamps from Bee Crafty. Take care and hope to see you the same time and place next week. xx
Related Posts Plugin for WordPress, Blogger...