Showing posts with label Inkables Template. Show all posts

Sunday, February 14, 2021

Lou Sims - Easy doodling using Inkables Masks & Stencils

 Happy Sunday everyone. It's Lou Sims and I'm super, super chuffed today to share one of my doodle projects on "THE" Bee Crafty Blog.

I've used a selection of Inkables masks & stencils to create at least 80% of my doodle design ...


MY DOODLE PROJECT

Bee Crafty Inkable stencils & masks are fabulous ways to create backgrounds and/or designs which I can then freehand doodle inside. Why do I choose them? For me it's because they come in to 2 different sizes which means I can either layer designs up size-wise or I have the ability to create smaller or bigger backgrounds.

My design for this doodle started with a circle in the bottom right and gradually grew from there. Designs have been linked with either free hand doodles or another stencil/mask design. I have used a Sakura black micron pen - 01 in size - to start to mark the outlines.

I am a great advocate in using stencils/masks etc  with doodle projects. They take away the possible fear factor especially if you are unsure where to begin or even what shape to use to start a doodle. 

After I have the majority of the design down, next comes the colour ...


I decided to use Ecolines to colour my project as they give quick coverage & their colours are super bold & bright. The colours blend together wonderfully whether you use water, the blender brush or alternatively, layering colour on top of each other.

As final finishing touches, I doodled inside the main circles using the wonderful Queen Bee Bullet Journal stencils. These gave the scallop edges, square hanging designs & also the smaller coloured elements.

As an "added extra", using a ruler and an 01 & 005 micron pen, I drew lines across the background, adding a few dots at either end.

As the final final finishing touch, out came the white pen to add a few highlights here & there, plus 

YOUTUBE VIDEO

This doodle was created during a Facebook Live and it is now uploaded to my YouTube channel. Click on the link below to see the whole process along with my ideas, hints & tips using Bee Crafty Inkables to help you begin doodling with confidence.


SUPPLIES

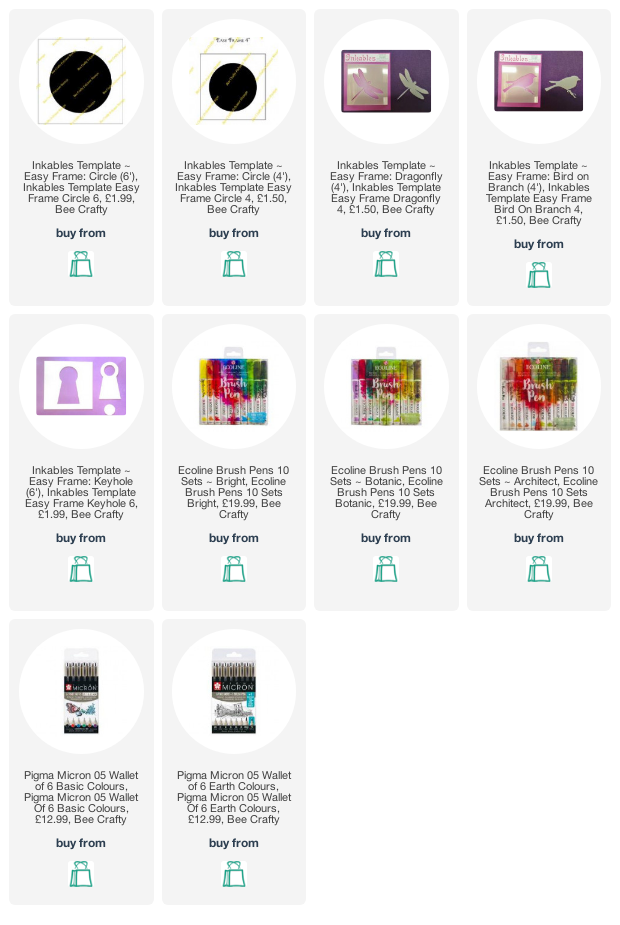
Below are the main supplies I used, all of which can be found in the Bee Crafty store.

I'm hoping that this post sparks you in to grabbing your Bee Crafty Inkables to create your own doodle designs. Don't forget to share your ideas as I love seeing what shapes &/or designs were your inspiration to doodle.

Many thanks to Bev & Sam for letting me "high jack" the blog today & hope to see you all again really soon.

Take care & be safe,

Lou 
xxx

Monday, January 16, 2017

Kerrie DT - Decision To Try... - Mixed Media Canvas

Hiya and Welcome to my Monday Post for Bee Crafty Stamps

Today I am sharing with you a recent make for one of the Hochanda Shows that I have not Blogged about before... my Mixed Media Canvas

The Bee Crafty Products I used on this project are...


First I covered the canvas with white gesso, Once dry, I trimmed a piece of old music from a piano book and glued this to the canvas and then painted over again using white gesso. I made sure that the gesso was applied thinly so that the music notes could still be seen. Next I painted over with a coat of Magnolia Chalky Paint and left to dry fully.

On a piece of thin corrugated card I drew around the inside and outside of  the 6" Square Inkables Template which I then cut out to create a frame, I covered this frame using music score paper and then I used filler to seal in the corrugated edges and painted over a coat of white gesso. Once dry I painted over the frame again using Mink Chalky Paint and left to dry fully.

Once both pieces were fully dry I used a strong white glue to stick the frame to the canvas at a jaunty angle. I then used filler through the 4" Heart Inkables Template to place hearts inside and outside of the frame and around the canvas. I used a heat gun to speed up the drying process so that I could then paint the Hearts using Damson Chalky Paint.

Next I stamped the Style Wire Border around the edges of the frame, and the Lines & Dots Texture onto the canvas. I then stamped the Decission To Try WORDage onto white cardstock, which I then cut the scetions of the sentiment out, backed them with dark gold mirror board and attached to the canvas inside the frame using a hot glue gun spreading the words out over the space. I picked out some paper flowers, wooden buttons and metal embellishments (one being a little Bee for Bee Crafty... just cause I can) I fixed them into opposite corners of the frame using a hot glue gun.

To seal and varnish the project I painted over everything using Mod Podge.

Thank You so much for visiting my Post today - Please visit again soon to see more from the Amazing Bee Crafty Design Team

Krafty Hugs xx

Monday, September 12, 2016

Dt Kerrie - Christmas in September - Chandelier

Hiya and welcome to my Monday Post for Bee Crafty

I really like the colours in this project I do so live non traditional Christmas colours

For this card I used the 6" Circle Inkables Template to first ink through the centre and then also around the edge of the piece of card stock I was using to create a circle and a frame but inked in shades of blue distress inks

I then stamped the Yuletide-Chandelier stamp into the centre of the inked circle using clear embossing ink, tipped some silver pearl embossing powder over and heated with my heat tool

I used some silver pearlescent cards rock for some matts and layers which I built up on the front of a 7x7 card blank. I added some little pearls to finish

Thank you so much for visiting my post today please visit the Bee Crafty Blog again soon to see more gorgeous makes from the talented design team

Kraft Hugs xx
KERRIE

Monday, August 29, 2016

DT Kerrie - Christmas Star

Hiya and Welcome to my Monday Post for Bee Crafty

Today I am sharing with you one of my Christmas makes using some of the gorgeous 'Yuletide' stamps that were on a recent show on Hochanda


I chose a 7x7inch cardblank and trimmed a piece of white cardstock to a few mm smaller using the cardblank and a pencil to mark the size and then trimmed using a guilotine. I also cut another piece of white cardstock to 6x6inch. 

On the large piece I stamped the larger 'Holly Border' from the 'Yuletide Set - Holly Swirl, Tree & Borders' around the edge first in clear embossing ink which I then heat embossed with clear embossing powder and a heat gun, then using Stormy Sky distress ink. Once dry I thnem inked over the edges using Tumbled Glass and Black Soot distress inks.

On the 6x6inch piece of white card I fixed the 6inch Inkables Template '6inch Star' using low-tack tape and inked through it using Tumbled Glass, Broken China and Stormy Sky distress inks starting with the lightest. I then stamped the 'Happy Christmas' Yuletide - Wordage stamp using black archival ink. I stamped ariund the edges using the smaller 'Holly Border' (from the Yuletide Set again) firstly using Tumbled Glass and then using Black Soot distress inks. I then ran a foam pad that had been used with Black Soot ink accross the edges.

I matted both pieces of white cardstock using Navy Blue pearlescent cardstock. I fixed the larger panel to the front of the 7x7 inch card blank using all purpose glue. I fixed the 6x6 panel to the card front using foam tape for depth. I finished the card with some flat back clear gems.

Thank You so much for visiting today - please come back to the Bee Crafty Blog again soon for more Gorgeous makes by the Amazing Design Team

Krafty Hugs xx

Tuesday, August 16, 2016

Christmas Baubles

Morning Everyone. A little bit of a sneak peak today, Bev is back on Hochanda on Thursday (18 August) with some really stunning stamps, the marvellous Inkables and some fabulous sentiments. I know everyone loves baubles and I just couldn't resist putting some scenes in to these. For this design, I used the small tree from the Christmas Tree set, along with the circular Inkables.

My finished card was going to be 8 x 8''. I placed the card on to my mat and from copier paper cut a square to leave a 1/2'' border around my design. I taped this down over my card and then placed the circle design in place.

Using another sheet of copier paper, I tore a strip to use to form the landscape, I also used some scrap to cover my work.

For the first bauble I used blues, Shaded Lilac Distress ink for the hills with just a suggestion of Blueprint Sketch. I then added a little Drawing Gum from Pebeo with a brush, this would be the moon. I then blended the sky using Shaded Lilac, Blueprint Sketch, Chipped Sapphire and Black Soot Distress Ink. I blended the colours together keeping the are where it joined the land lighter, to form a halo effect. Then using the small tree and the ripped copier paper I stamped trees using less and less of it towards the back to give the distance.

Then I took the inner circle from the Inkables to cover my first bauble. I also placed the outer in position to make my next bauble.

For the second bauble, I used the same technique. This time using Scattered Straw and Wild Honey for the land, then Scattered Straw, Wild Honey, Rusty Hinge and aged Mahogany for the sky.

I then repeated the process using greens, Mowed Lawn for the land and a little Iced Spruce. For the sky I used Mowed Lawn, Pine Needles and a very small amount of Black soot around the edges.

Next I added my sentiment and some additional plain baubles using the Inkable before removing the outer mask to leave my border.

To finish my card, I used a black fine liner pen to add the strings to the baubles, I also added a scribbled frame around the edge. Lastly I added some Gold Cosmic Shimmer PVA, where the string met the bauble. I then backed my piece onto a black base card.

I loved making this card and think it give a really crisp, clean look. I really hope you have enjoyed the step by step I have shared today as well as the finished card. Pleased dont forget to tune in on Thursday. The stamps are superb and Bev's shows are not to be missed. Take care and Happy Crafting.xx

Monday, June 20, 2016

DT Kerrie - Brusho's Tags - WORDage

Happy Monday to you all and welcome to my Post for Bee Crafty

What a Crazy Weekend with Father's Day I hope you all had a lovely time with your families. I did with my Wonderful Hubby and our Children and his Parents we all had a lovely roast dinner and a Movie Night

I had the first bit of spending money available for a while so I visited ordered some Brusho's from Bee Crafty I have never used these before and so I had to open them up and try them out, so I created some Tags with them 


I used Watercolour Card cut into Tag Shapes, sprayed them with a water spritz spray bottle and then sprinkled over some of the Brusho's after making holes in the lids for ease of use - I teamed these with some Distress Inks

For the Blue/Green tag once dry I inked some leaves through the 'Leaves - Inkables Template' using Black Soot distress ink then inked the edges using the same ink. I stames the 'Life & Rain (large) - WORDage' stamp in the corner using Black Archival Ink. I trimmed a piece of linen cardstock a few mm larger than the tag to create a matt, I then inked the egdes using 'Peacock Feathers' and 'Black Soot' distress inks then glued the tag to it

For the Red/Brown tag once dried I stamped the 'Friendship (large) - WORDage' stamp into the corner of the tag using Brown Archival Ink. I inked the edges of the tag using 'Vintage Photo' distress ink. I then trimmed a piece of linen cardstock a few mm larger than the tag to create a matt, I then inked the egdes using 'Scattered Straw' and 'Vintage Photo' distress inks and then glued the tag to it

I had best leave this post here and get back to Sample Making for the upcoming Hochanda Shows at the Weekend where Bev will be showing off some New Stamps....eeeeks so exciting

Thank You so much for visiting the Bee Crafty Blog today please do visit again soon to see more Gorgeous makes from the Amazing Design Team

Krafty Hugs xx

Monday, May 16, 2016

Kerrie DT - Love isnt Complicated

Hiya and Welcome to my Monday Post for Bee Crafty

Such Lovely Weather we have been having in my home town Harlow, Essex - But its really effecting my Hayfever so I have been hiding away indoors x

Today I am sharing a quick & simple make using just one sentiment, 2 stencils and lots of ink 


Bee Crafty Products used in this make...


Products used that are available from Bee Crafty...


I used low tack tape to attach the Circle Template to a piece of linen card stock I had trimmed down to fit the front of a 6x6 card blank. I think inked the background, lightest to darkest fromt he circle out to the edge using 'Picked Raspberry', 'Dusty Concord' and 'Black Soot' Distress Inks to create a dark purplely gothic looking background. I then Inked through the Dots Template using 'Black Soot' Distress Ink but only in the corners. I then stamped the Sentiment using Black Archival Ink

I fixed this inky panel to a matt of black cardstock and then atached to the card blank with the card turned to create a tent fold card instead of a traditional side opening card

Thank You so much for Visiting my Post Today - Please visit the Bee Crafty Blog again soon to see more Gorgeous makes from our Talented Design Team

Krafty Hugs xx

Monday, April 11, 2016

DT Kerrie - No Angry Way To Say 'Bubbles'

Hiya and welcome to my Monday Post for Bee Crafty 

I brought some more Stamps from the Bee Crafty Online Shop last week and just had to get inky with them as soon as I could - I also wanted to try something out of my comfortzone so I chose Blue inks I rarely use this much blue but I think I like it 

Products I used from Bee Crafty Online Shop


I am trying really hard to only buy things I am actually in need of and to try to use stash I already own so I dug through a box of A4 card packs and found a pack of nice stamping card I had forgotten about - ooooops - I trimmed a piece to a few mm smaller than my 6x6 card blank I then used low tack masking tape to hold the Inner-Circle Template from 'Easy Frame 6" Circle' Inkables Template Set in place from underneath while I inked over the circle edges using 'Tumbled Glass' Distress Ink. I then inked in from the edge of the card using 'Mermaid Lagoon' Distress Ink.

To create the bubbly look I inked through the 'Offset Dots' Inkables Template with the circle template still in place using 'Stormy Sky' Distress Ink. I then removed the circle template and inked through the 'Circles' Inkables Template using 'Stormy Sky' & 'Weathered Wood' Distress Inks.

I wanted to darken up the edges a little bit more so right on the edge I blended in using 'Weathered Wood' distress ink. I then stamped the 'Angry Bubbles' WORDage Stamp into the centre of the main circle using black ink.

I mounted this cardfront onto a black cardstock offcut that I had saved in my scrap box (to save cutting from a whole new piece of cardstock) - then mounted this onto my 6x6 card blank.

I added a few little clear sparkle flat back dew drops from my stash

Thank You so much for visiting my Post today please do visit again soon to see more amazing examples from the Uber Talented Design Team over at the Bee Crafty Blog

Krafty Hugs xx

Monday, February 08, 2016

Kerrie DT - FASHIONette Mary - Happy Birthday

Hiya and Welcome to my Monday Post for Bee Crafty

Another FASHIONette make from me today, this time it's MARY I adore these pretty/girly stamps they are so much fun to colour up using any medium but Fave of course are Alcohol Markers


Products I used that are available over at Bee Crafty's shop...


I used a masking technique for this project. I stamped Mary first onto super smooth cardstock using light grey ink and then again onto masking paper (large post-its could also be used). I cut round Mary on the masking paper and fixed over the stamped image on the super smooth cardstock so I could ink a circle over her but leaving her completely blank. I used Distress Ink pads and my Inkables Circle Easy Frame Template for this. 

Leaving the Mask in place I then Stamped the Splatter Swirl stamp around the sides in grey ink and then inked lightly over the edges using black ink. I also inked a few spotty areas using Seedless Preserves distress ink and a small circle pattern template.

I pulled back the Mask to reveal my still clean stamped image of Mary, who I then coloured using my Alchohol Markers. Where I had stamped her in light grey ink the lines are softer and almost disappear when using Markers over it (I love this effect) - I drew over her Eyelashes with a fine Black Drawing Pen to make them stand out.


I added some gems and a Sentiment to finish 

Thank You so much for Visiting my Post today. Please do visit the Bee Crafty Blog again soon for more Gorgeous Makes from the Brilliant Design Team 

Krafty Hugs xx

Monday, January 04, 2016

Kerrie DT - Happy New Year x x x

Hiya and Welcome back to my Monday Post for Bee Crafty

Wowser Christmas & New Years were Amazing and I feel very rested after a few weeks at home with my Family x x I hope you all had a lovely Festive Season and i wish you all well for an Amazinf New Year xx

For my Project today I have mixed it up a bit with one of the Newer Floral Stamp Sets and a Wordage Stamp I again chose the softer/warmer look that I love love love


I cut down a piece of watercolour cardstock. I inked through an Inkables Template using 4 shades of distress inks

I stamped and embossed the Floral Corner using versamark ink, gold embossing powder and my trusty white heat gun 

I made more flowers stamped and embossed onto vellum using darker gold and white embossing powders, which I then cut out, dry embossed the backs using a ball tool and a soft mat and layered up using a hot glue gun

To finish the card I inked the edges using Pumice Stone distress ink and added a matt of pearlescent Gold cardstock 


Thank You so much for visiting my Post today, please do visit again soon for more yummy makes from the amazing Design Team 

Krafty Hugs xx

Monday, November 09, 2015

DT Kerrie - Christmas Wordage 'Believe' - Bee Crafty

Hiya and Welcome to my Monday Post for Bee Crafty

I had a couple of weeks off due to being ill and half term with my 4 Kiddies taking me away from my Desk for far too long - but today I am back to where I love to be - in my Korner creating pretties

I have really gotten into making my Christmas Cards and most of those have been non-traditional colours - I love to mix it up a bit - this time I chose soft pink, brown and rich gold


The Bee Crafty products I have used are...

And - Distress Inks 'Spun Sugar', 'Tattered Rose' and 'Victorian Velvet' (all stocked on the Bee Crafty Webshop

I chose a 7x7 White Cardblank, and added some Matt & Layering using some pearlescent cardstock from my stash, the gold piece I used an embossing folder to create a swirly background.

With a small piece of Linen Cardstock I inked through the Star Template using Distress Inks 'Spun Sugar', 'Tattered Rose' and 'Victorian Velvet' to create the an ombre effect (lighter in the middle and darkening towards the edges) 

I stamped The 'Believe' accross the Star at a jaunty angle using brown ink, the 'Splatter Swirl' border around the edge of the Linen Cardstock and then stamped the 'Snowflakes' into opposite corners using the brown ink and 'Victorian Velvet' distress ink.

I ran my embossing ink over the edges of the Linen Cardstock and dipped these edges into gold embossing powder then heated with my 'Heat Gun' (available from Bee Crafty's Webshop) to melt the powder and create the smooth gold finish. I also used my Embossing Ink Pen to draw a shadow around the 'Believe' word then heat embossed this in Gold too.

I hope you like my card today. I really do like how it turned out.

Thank You for visiting my Post today - please do visit the Bee Crafty Blog again soon for more stunning makes from oour Talented Design Team

Krafty Hugs xx

Related Posts Plugin for WordPress, Blogger...