Saturday, October 30, 2021

Jane DT - 'Explore & Discover' A Lunar Themed Card

 Hello!

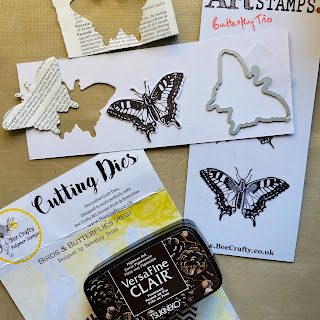
This week on the Bee Crafty Facebook page I did a Facebook live experimenting with some colour combinations to go with the new distress colour Villainous Potion.  As part of the live I created an ATC that had a space theme so I decided to use that as a topper for a bigger card...

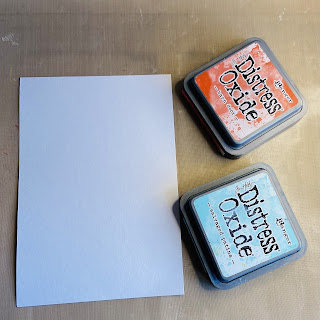
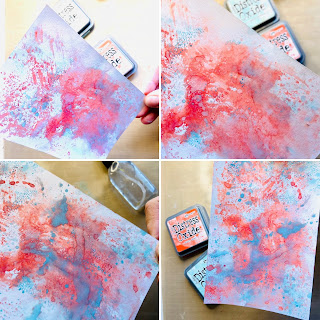
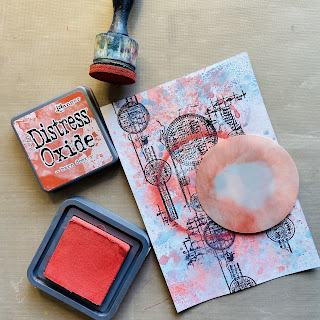
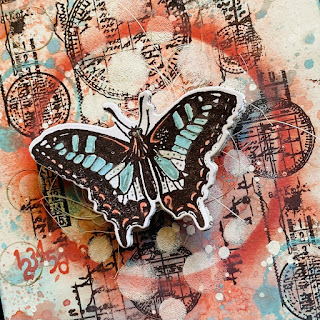
1) I cut a piece of mixed media card and used Villainous Potion and Peacock Feathers distress inks with a blending brush.  To create a more distressed look I splashed droplets of water across the card and lifted some of the ink with a piece of kitchen towel...

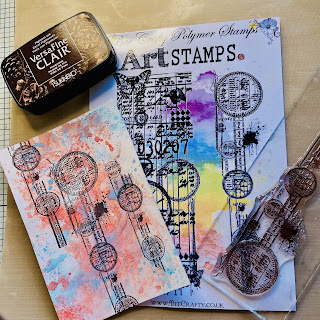
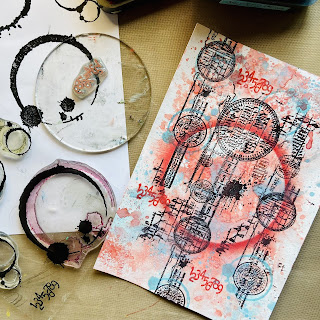
2) Next I stamped the largest star from the Star Textures set using Prize Ribbon distress ink...


3) Taking one of the smaller stars from the set I stamped using the Villainous Potion distress ink...


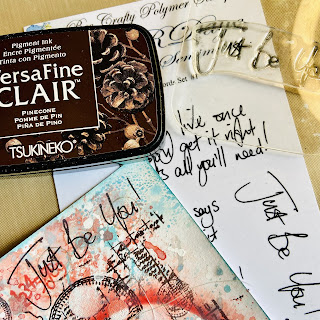
4) Making sure the ink layers were dry I then stamped the star cluster using embossing ink and heat embossed using superfine gold embossing powder...


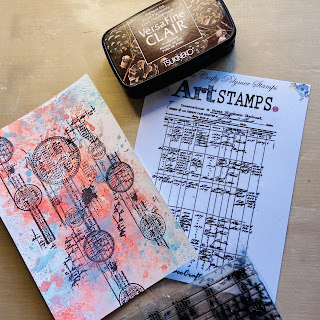
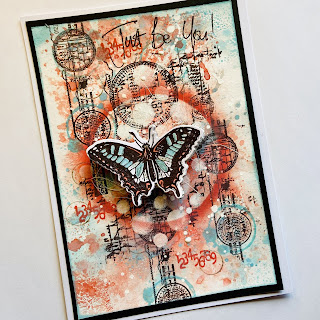
5) I stamped out the largest star again onto black card with the same ink and embossing powder to use alongside the ATC for the card toppers...


6) Finally I put the card together, using some black thread under the stars for extra texture and dimension...


Here are links to the products used:


Thank you for looking and happy crafting!
Jane xx


Wednesday, October 27, 2021

Ledger Butterfly by DT Ann


Ledger Butterfly
 

By DT Ann


Hi everyone hope you enjoyed the one day event over on Facebook last week. I was having a little break but caught bits throughout the day… 

This week I was inspired by a lovely lady to use these colours & use one of my go-tooos, a butterfly… enjoy x


Stamps: Birds & Butterflies reg. , Coffee Stains, Ledger Measure, Ledger Inkwell & Nibs, Handwritten Words1

Dies: Birds & Butterflies reg.

Inkables: 6x6 Alternate Circles 

Easy Frames 4” Circle 

Distress Oxide Inks: Barn Door & Salvaged Patina 

Versafine Clair .. Pinecone ( Brown) 

Non Stick Craft Sheet 

White gesso

Dina Wakley Gloss Spray White

Book pages & sisal


https://www.beecrafty.net/


Cut a piece of paper 6 1/2” x 4 1/2”

Use paper that will take water so watercolour card or mixed media card. 


Put a little Barn Door onto a craft mat spritz with water & smoosh your paper through it..dry then  do the same with Salvaged Patina, repeat with each colour, drying in between each layer… 


Using Versafine Clair Pinecone, ink up the slim stamp from the Ledger Measure set & stamp onto your background, 3 times… 


Then add, freehand ( without a block) a few small sections of the Ledger stamp, again in Pinecone… 

On a separate piece of paper stamp a butterfly in Pinecone, make sure it’s dry, then die cut. Using some old book pages, die cut several butterflies out. I did about 7 in one pass through my machine ( pages were very thin). Glue them together down the centre.. 


The background needed a focus so using the inner circle from the Template Frames (4”) & swept Barn Door ink outwards from the centre , creating a ‘halo’… 


Add some Coffee Stains in Salvaged Patina onto the background & some of the numbers from the same set in Barn Door… 


To break up the background a bit add some white gesso through the Alternate Circle Inkable, concentrating on the centre of the circle…  Add some white splatters with Glossy Spray or a Posca Pen… 


Stamp your sentiment onto the background… 

Colour the butterfly, I used the two Distress Oxides & a small paintbrush to do this. Add a foam pad to the back of the butterfly then a few bits if sisal ( or cotton) & another foam pad on top, glue in the centre of your circle.. 


Matt & layer on to a 5” x7” card… 


Thank you for stopping by… Ann xxx


Monday, October 25, 2021

Sally DT - Samples for Dream Facebook Launch

  Last Tuesday was such a fabulous day! Bee Crafty launched 3 new sets of gorgeous stamps and there were all sorts of giveaways, lives, videos and crafting fun on Facebook. If you didn't manage to join in, but want to see some awesome crafting in action, pop over to the Bee Crafty Facebook page to see the videos. You will also be able to see them all on Bee Crafty's YouTube channel very soon.

Here is a closer look at the samples I made.

This first one was stamped over a smooshed distress oxide background with stencilling and stamping with distress oxides too. The face and sentiment were stamped in Versafine Clair Fantasia
Next is a simply stamped single layer card coloured with distress oxides in Twisted Citron, Peacock Feathers and Salvaged Patina. Dream was stamped in black versafine .
This was a very quick card stamped in distress oxides with the Sentiment  in versafine.
For this one I stamped slightly more than half the Dream face at each side of the card and watercoloured them. I added a few stencilled circles and coffee rings in between them.
I used Dylusions shimmer paints for this one, adding a patch of gesso in the middle for her face. I added some stamping with versafine clair and used inkables to apply more paint and Texture paste.
My mdf tag was gessoed, then I painted a little Dina Wakely heavy body acrylic paint at the top before spraying with water and allowing it to dribble down. when it was dry I stamped and embossed the face and sentiment, adding the hearts in Kitsch Flamingo Distress oxide. The lips and eyes were coloured with ecoline pens.
These stamps are so good for art journaling with! For my first page I used them in combination with the previous release of face stamps and journal art elements. 

I then used my Dina Wakely Kraft journal, Scribble sticks and Pencil crayons, along with Dina Wakely collage papers. I so enjoyed doing this one I had to give her a friend! 

The hair on this one was painted with dylusions shimmer paints...
And here they are together. The white stamping was done with the Hero Hues unicorn white ink pad. 
This was the double page spread in my Dylusions mini journal that I completed in my facebook live. 

And finally, here is another in my craft journal using the same paints and ink colours as I used in my live.

The new stamps and bundle offers are all here until the end of the month.
You can find the products I used here:
Gold Embossing powder

Thanks for looking and happy crafting!

Saturday, October 23, 2021

Jane DT - 'Hello Dream Girl'

 Hello!

This week on the Bee Crafty Facebook page there was a brand new stamp launch!!!  The bundle prices will stay in place until the end of the month and can be found on the website in the October Launch section.

If you didn't see it, all the live demos will remain on the page and our lovely Ann also made a fab video which is on the Bee Crafty YouTube channel!

So this week for my blog post I have created a card using 2 of the new sets but added a different sentiment...


I didn't take step by step photos as it was a fairly straight forward card to make but this is what I did..


1) On a piece of watercolour cardstock I stamped the Dream image using black archival ink.

2) Then I coloured the image using Ecoline brush pens and matted onto black cardstock.

3) On a bigger piece of cardstock I stamped some of the Journal Elements #2 mostly in two of the corners and mounted the image on top with foam tape.

4) Finally I stamped one of the Everyday Sentiments onto black card with clear embossing ink and heat embossed with white embossing powder.


Here are links to the products used:

* Art Stamps - Art Journal Elements 2

* Wordage - Everyday Sentiments 1

* Ecoline Brush Pens

* Ranger Superfine Embossing Powder - White

Thank you for looking and happy crafting!

Jane xx


Monday, October 18, 2021

Sally DT - Autumn leaves and a sneaky peek!

Hi there! I am here with a step by step for a simple Autumnal card for Bee Crafty. 

Here is how I made it:

I began by making a border on an ivory card using masking/ stencil tape. 

I then blended distress oxide inks in autumnal colours into the centre and left to dry completely.
After a dust with an anti-static bag I stamped the leaves from the Doodle Art dragonfly set at each corner in versamark and sprinkled over gold embossing powder. The leaves in this set were originally joined together but I have cut them apart carefully with scissors. Next I removed the masking tape carefully.
I heated the embossing powder then stamped the smaller leaf 4 times in the centre and added  embossing powder before heating again.
Using the border stamp from the same stamp set I stamped it centrally on each side of the square in tea dye distress ink
I used a gold gellyroll pen to add a doodled border to each corner and also sprinkled a few drops of water onto the distress oxide ink panel. 
here is the finished card...

...and a closer look at that gold embossing. Don't forget to enter your Autumn colour creations in the October challenge album over on the Bee Crafty Facebook group

Here is a list of what I used:
6x6 ivory card
Masking/stencil tape
versamark ink
Anti static bag
gold gelly roll pen

Before I go, here is a sneaky peak of one of the new stamp sets that Bee Crafty are launching on Facebook tomorrow. There will be facebook lives, videos, giveaways and bargains from 10am throughout the day. Visit the Bee Crafty Facebook page for details! 


I hope you can join in the fun! 
Thanks for looking and Happy Crafting! 

Saturday, October 16, 2021

Jane DT - Funky Card!

 Hello!

I have created a funky card for the blog this week that could be used for a number of occasions...


1) I started by layering up some distress inks one at a time and drying between each layer.  The colours were Carved Pumpkin, Wilted Violet and Twisted Citron, once the colours were smooshed on I also added a few orange splatters...

2) Using the same colours I then added some stamping with the Arrows set...


3) Next I stamped one of the borders from the Borders #1 set and added the smallest circle from the Journal Blocks with black archival ink...


5) Then the circles were coloured in with the distress inks and once dry white pen was added...


6) Finally a sentiment from Everyday Sentiments 1 was stamped out and mounted onto black card...


Here are links to the products used:


Thank you for looking and happy crafting!
Jane xx


Related Posts Plugin for WordPress, Blogger...