Friday, May 30, 2014

Dots, Circles &.....

Dylusions....

Morning gang how are you all?

I can't quite believe another week has flown by and here I am blogging again!!!

So Art Journalling...who's into it?  I love it and the thing I love most is that no-one can tell you its wrong because as long as you have captured what you wanted to then it's 100% right!!!

This has been a page that has taken me a long time, not because I was stuck but because I wanted it to be absolutely right!  I got lots of colour down using the Dylusions Sprays, with really contrasting colours across the page. 

Then my favourite part .... the water reaction!  So using my Bee Crafty Inkables Templates I set about changing the background from the solid panels of colour. So using the Circles from the inkables range I popped it onto the opposite corners and misted through blotting afterwards to lift the colour away.  In the bottom right and opposite corner I sprayed the water onto the template rather than the page and this is how the effect looks entirely different from the same template.

Using the dots I have done the same very lightly in the centre of the page and then inked through with some Black Soot at various places over the double page.  You'll also notice I have done the same with a white pen.  The Border is freehand using the Black from the Wink of Stella pens.

Lastly a white pen.....and my thoughts about what I had done and away I went!!!  In my eyes everything in there is true and reflects exactly how I felt at the time.

Hope you like it

Sam xxx


Wednesday, May 28, 2014

Marleen DT - Wizard of Oz - Tinman

Morning ya all..

Wednesday again.. phew the weeks are flying by I tell ya lol.. wont be too long till christmas now ;-)
Anyway wednesday = inspiration post from me for 

This week I have used and absolutly adorable stamp..
Most people will know him as soon as they see him and I hvae to be honest.. It was love at first sight for me. 

The stamp I used iiiissss.... The Tinman.. Yep think Wizard of Oz..
Bee Crafty has an intire series just with Wizard of Oz. Do check it out HERE ..
Here is what I have made with him for this week:

 I stamped Mr Tinman, coloured him with Promarkers and cut him out.
This card I decided to make a more funky card. One for the boys.
Its simply a matting and layering and a bit of washi tape added to the wee dotted panel.
Finished with a button and the wee badge.

Next week, I will share a couple of Vintage card using Mr Tinman but do hope you like this one.
 Thank you for stopping by and for any comments left behind.


Tuesday, May 27, 2014

FASHIONettes

Good morning to you all 
Sue here with the  
Tuesday fix of BeeCrafty Stamps 
What I have used today
is one of the new stamps
that was released on Friday
FASHIONettes


6x6 card
I made the background by spritzing with inks
then added  music stamp at random
then used the Harlequin inkable  template 
and used Distress ink
went round the edges of the card  then matted onto green card and mounted onto main card
I then stamped Judith onto white card  and colored her with pro-makers 
went round the edges with memento inks and matted her on to green card 
then added her to main card 
then added die cut flowers and swirl and candy dots 
hope you like it will be back next week 
Marleen  will be here tomorrow 
Happy Crafting 
xxx


Monday, May 26, 2014

Meet Shirley

Good Morning Guys, 

Have you heard the news?

Bee Crafty have just launched a new range!


How great are these? I am sure you will be just as excited about them, as all of us at Bee Crafty are!

Clare introduced you to Vera yesterday, so today I am going to introduce you to Shirley. 


The card blank is an 8X8 Card matted with cream, yellow and pink card, finished with a flowery backing paper.  The swirls are made with funky foam, wrapped around a pencil and I used my heat gun to heat it up, once it had a good few seconds all around, I removed it and tripped it down to fit the card.


Shirley was coloured in with Promarker Pens and Graph It Marker Pens, I added glossy accents to her glasses to give it a bit of texture.

 The sentiment is from the wordage and I think this goes really well with it.


 The items I used:
 Card Stock
Foam Swirls 
Alcohol Marker Pens


 So what do you think? 

They are so sweet and I can not wait to see what you create with them.

See you in a week

Crafty Hugs 
Kelly
xxx

Sunday, May 25, 2014

Meet our Vera!


Well it's that time of the week again, and it's my weekly blog for Bee Crafty.  They have just launched their fantastic new range of Fashionettes and I would like to introduce you to Vera.

For this tag I have used:

Vera 
Davinchi script
Inkables wire fence
Sentiment
Dylusion postbox red and white spray
Distress inks


I sprayed my tag with dylusions post box red then I laid the wire fence Inkables mask over the top, spritzed with water and blotted.  Then I laid the mask over at a different angle and sprayed with the white ink and left to dry.  On a separate piece of card I stamped Vera and coloured in with my promarkers. I cut her out and then went over her hair with a Sakura glaze pen.  I went back to my tag and added the script stamp at different angles and went around the edges with distress inks.  I put vera on the tag using pva glue and then gave an extra outline to create a shadow.  


I stamped the sentiment stamp and then snipped it down so that I had 'perfect 10'.  Finally I decorated with a flower, liquid pearls and ribbon.


Don't forget to pop over to Bee Crafty to check out the full range.

Have a happy crafty bank holiday weekend.

Crafty hugs,

Clare x x x x


Wednesday, May 21, 2014

Marleen DT - WORDage + Maidenhair

Morning my dear blogger friends.
 
Its once again wednesday and my turn to share some inspiration here on the blog.

This week I have used 2 stamps. The "Maidenhair" from the BEAUtanical series and the "Wishes/special" from the WORDage minies series.

I had loads of fun making these 2 cards. I really just sat down and played.

On both cards I have used Distress inks and masks
And as well as that I used glitter glue on the "sun" one and white embossing powder on the one with the big bow.

They are both really easy cards to make and dont take too much effort to make, but i really love them both.


And that is it from me for this week. I hope you like what I have made.
Thank you for popping by and for any comments left behind.

Tuesday, May 20, 2014

JOY

Well here we are again 
so glad these Tuesday's come round quickly 
another one very different for me
I used for this card
First I made my background with the Dylusion ink sprays 
I then lay the template over the background and used the distress inks over that
I then stamped the fern round the edge of the background
I then added the ribbon
I stamped the sentiment onto white card and used a die cut to cut it out
I added this to the background 
as well as the flower which is also a die cut
I then mounted it all onto a green card then mounted onto 
  6x6 main card
I would watch this space because I think this would be great as in
Christmas colors 
so pop along to 
and have a look
see you next week 

Monday, May 19, 2014

We are off to see the Wizard !

Good Morning Everyone, 

Kelly here again today, these Mondays do come around so quick. 

Today's card is a little different for me, I don't normally like steam punk or anything to do with it, and this card some probably wouldn't class it as steampunk, but for me it is as close as it is going to get. 

Firstly I used Wizard of Oz Tinman, I stamped him in a well used black momento ink pad, so that it wasn't grey but wasn't tuxedo black either. I think he come out pretty well. Originally I was going to colour him in using greys and shading, but when he stamped out, the detail that was on him, I decided to show it all off and leave him "plain" I stamped him on 300gsm stamping card, matted it to silver mirror card and then to a thin layer of black card. I added faux stitching with a 0.1 fine liner black pen.

 To create my card I used a black A4 card stock folded in half, and added a backing paper of grey cogs. I used my Cameo machine to cut the cogs out, and then coloured them in using Warm Greys from my promarker collection. I then ran it through my embossing folder.  I certainly think you could get the same result with any cog die, or stamp.


I finished it with adding a sentiment from the Wordage collection, and matted this onto black card and again faux stitched around the edge.


Thank you for taking the time to have a read, I hope you have enjoyed. Don't forget to pop back each day to see more creations from each member of the design team. Up tomorrow is Sue. 


See you next Monday
Crafty Hugs
Kelly
xxx

Items I used

Friday, May 16, 2014

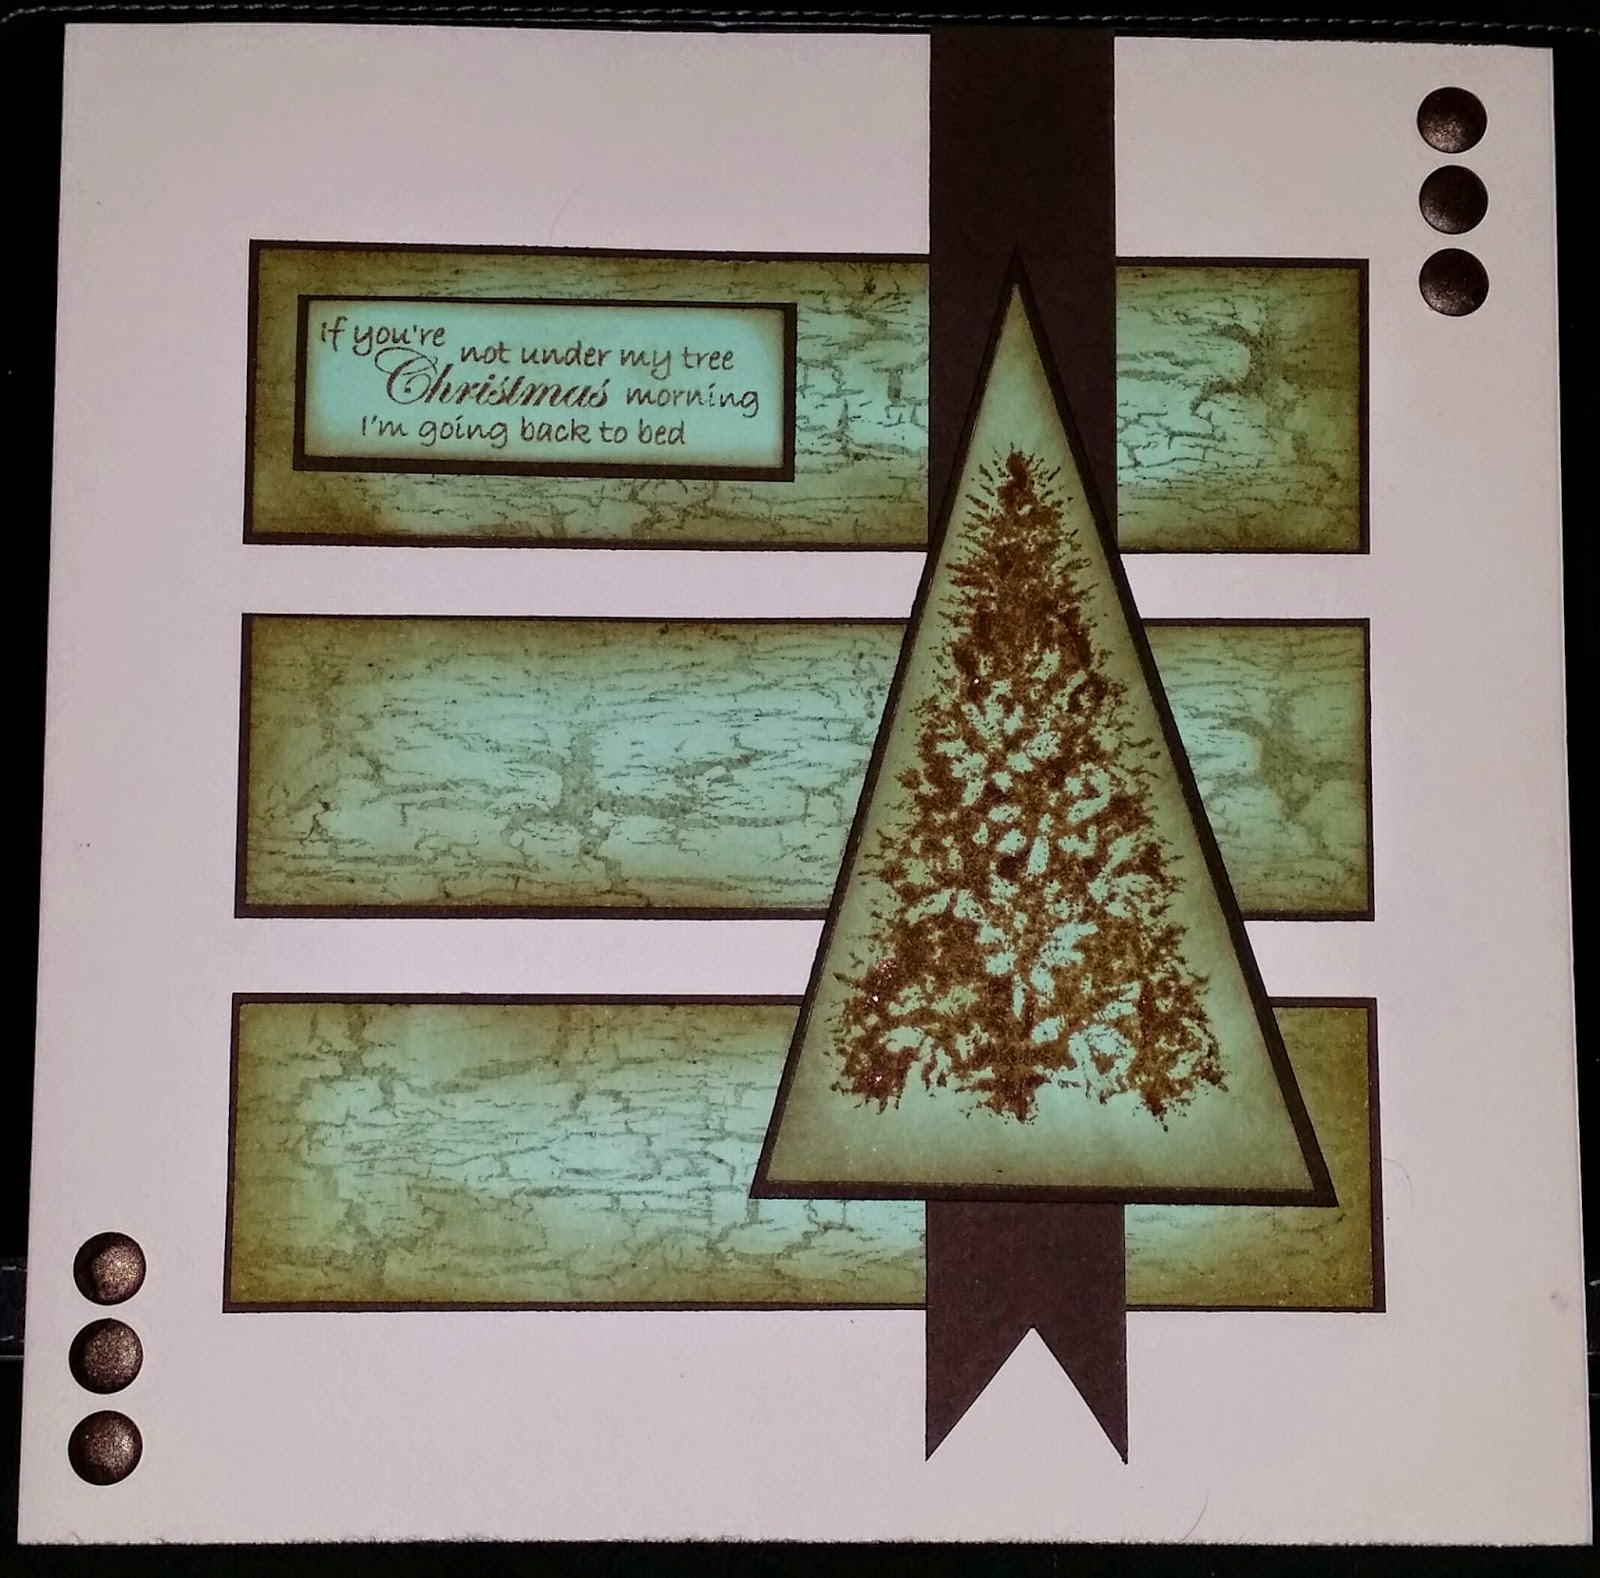
If you're not under my tree...

...on Christmas Morning I'm going back to bed!!!

Hi Everyone

Hope you've all had a good week.

Who has started their Christmas cards yet?  Someone told me the other day they have finished theirs!!! Madness but perhaps I am just jealous not to be so organised?

So for this weeks blog post I have used two stamps from the Yuletide range and another from the Backdrops.

I took some Mint and Chocolate coloured cardstock adn stampeed the Bark Positive Backdrops on there in Walnute Stain Distress Ink.  Then inked the edges with the same using my Blending Foam.  I chopped this up into 3 pieces and layered it up onto the dark chocolate coloured card with just a small enough edge for it to make a lovely contrast. 

Doing the same with the  Fir Tree made a lovely way to top the card I stamped this in a slightly darker shade - Vintage Photo.

I had some spare cardstock so made the long Rosette Tail finish to place under the layered up Fir Tree.  Stamped out the Under My Tree (small) in the same colour and layered it too - and put it all together.  

I really like the simple effect of this one hope you do too.

Take Care

Sam xxx


Wednesday, May 14, 2014

Marleen DT - Glad Lg

Morning everyone.. 

Its once again wednesday and my turn to share a bit of inspiration here on the blog.

This week, like last week, I have used the stamp called "Glad Lg". You can fin it in the STORE..
Last week I made a a srappage using the stamp so this week I thought I share a little card I made.

I dont own many big sentiment stamps, most of the ones I have are the little greeting ones so it was really nice to be able to make my sentiment the center point. 

Here is what I have made:
 For this card I took a card blank and covered with pink glitter card, leaving a little border of the card blank showing. I then cut a second piece of white card, to fit inside the pink layer. Before attaching that piece I ran it through my big shot in an embossing folder.

I stamped my sentiment stamp and cut it out using the die. The die is a Marianne die and cuts the middle circle out (with my stamp on it) and leaves you with the flower circle. Before I took the cut pieces out of the die, I gently added a bit of distress ink through the die to add to the flowers as well as the edges of the circle sentimen.

I layered them both on my card, the sentiment flat on the card, and the flower circle added on foam pads.

 My little flower in the corrner is really 2 pink flowers I just added together. They really are pink, as are the distress ink, but for some reason the pictures shows up more of a peacy colour.

I finished the card with a few diecut leaves and beads.

And that is is from me for today. I hope you like what I have made.
Thank you for stopping by and for any comments left behind


Tuesday, May 13, 2014

fables and fantasy

Hi ladies
Its Tuesday again 
so so that means its my day
and I'm here with 

fables and fantasy 

Something very different from me this week 
I hope you like it as much as I did 
making it
First of all I die cut a circle in the corner 
of a spare piece of card
I placed the circle on a piece of card with low tack tape 
I used blues and greens 
Distress Inks
to get  the effect I wanted 
I removed the circle 
then added the spare card on top matching up the circle
and went over the circle area with red ,orange and yellow 
Distress Inks
then removed spare card
I then stamped the castle ,moon and bats and leaves
 straight onto my card
colored the castle with promarkers
I then mounted to card onto orange card then black
 before adding it to main card
I then stamped the sentiment onto white card 
I used the Inks again to dull the white down 
mounted that onto
Orange and black card 
and added to main card
I hope you like it 
What I used to make my card


all these can be found at 

Monday, May 12, 2014

Rose Garden Abi

Good Morning Everyone, 

Kelly again today. 

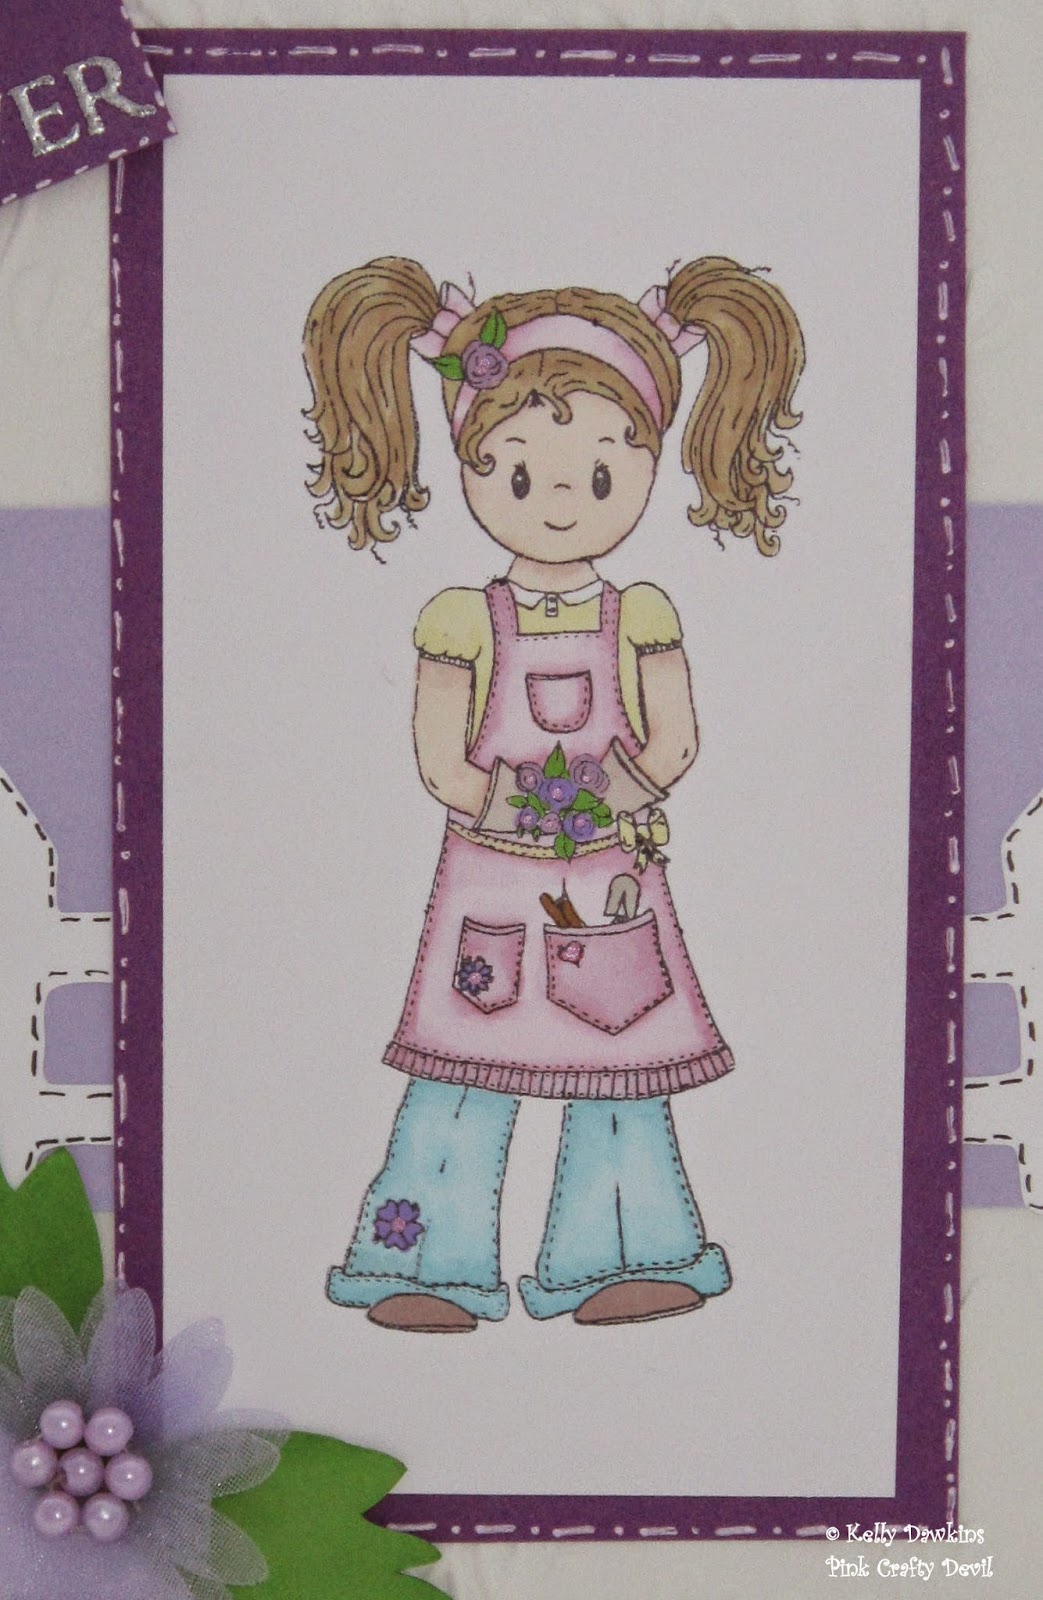
Today's card is a card I have made using the "Rose Garden Abi" stamp. 


 I stamped her in memento ink and coloured her with Promarkers.

 I matted an layered her on to dark purple card, which I used a white gel pen on and used fake stitching around the image.


The completed card is a 6x6 card blank, matted with a light purple layer, and matted again with a dark purple layer, I embossed the top layer and added a light purple strip. I used a die cut of a garden fence and put this behind the image. 

I added a little flower to the corner, three pieces of card candi. 

The sentiment "Flower Power" is also included with the stamp, this has been stamped and embossed using a silver embossing powder. 

The items I used are:-


I hope you like it, and Sue will be back tomorrow with another lovely creation for you.

Crafty Hugs 
xxx

Thursday, May 08, 2014

Maidenhair ...

...fern of course!

Morning you beautiful lot how are you???

Its been a funny old week since I saw you last, lots going on....lots of rain too - bleugh!!!

Anyway more importantly how about this for something different - Altered Dictionary. Are you a liker on our Facebook page? If so you will have already seen this but if not have a look as we are doing some open sessions on this topic starting in June.


So this is it before I did anything..


So this is the Maidenhair Fern stamp from the BEAUtanicals range.  I realised afterwards that I used this particular range last week but it is totally fabulous so why not!

I used blues and greens in distress ink to lay a background and used a £2 coin as my Moon as I couldn't quite lay my hands on my circle punch.

I sporadically placed the stamp all around the page in no particular order but enough for it to make sense to me.  The word in the dictionary is highlighted with the Wink of Stella pens


, the Green and Black over each other to get the colour I wanted and I am pleased with it.  For no particular reason at all I used the black to give some of the ferns what can only be described as eyelashes but I am really pleased with how this looks.  

Hope you like it too

Sam xxx

Wednesday, May 07, 2014

Marleen DT - "Glad Lg"

Hi guys..

Once again wednesday and its my turn to share a bit of inspiration..

For this week I have chosen to play with the "Glad Lg" stamp.
I have made a 12x12 scrappage this week as scrapbooking is a real passion of mine.
I dont scrap half as often as I would like too, but its something that, when I do, I really enjoy. I find it the most relaxing of all my crafting.

The papers Ive used are some I had in my stash.
My stamp is the "Glad Lg" and can be found in the STORE

Here is what I have made


With this, apart from loving scrapbooking, I wanted to show, that a sentiment stamp can be used for more then just a card. The words on this stamp just fitted perfect for this picture of me and my oldest daughter Emma. 

And that is it from me for today. Ill be back next week with a card also using the "Glad Lg" stamp.
Thank you for stopping by and for any comments left behind.

Tuesday, May 06, 2014

Heartfelt Abi

Hi well these Tuesdays come round very quickly 
I hope you all had a good Bank Holiday

Well this week I went a bit different for me 
I used

Wordage Stamp - Special Thoughts
6x6 White card
First I made the background I used white card lay the 
Chain link fencingon it and used different distress inks 
over the mask .
I then stamped the script  on half the page and added the poppy heads stamp at 
the bottom of the page
on the other half I stamped the Ferns
I add the ribbon down the center Then matted onto light brown card then 
added to main card I then stamped the 
Maple leaf onto green card and embossed it 
I stamped Heartfelt Abi once onto white card
I used pro-markers to color her in
I then stamped her top in spotted card and trousers in brown
I cut them out and added to main Abi then added to the  card.
I hope you like it
Sue 
xx
all the stamps can be found at 

Monday, May 05, 2014

Fern Today

Good Morning Everyone, 

Kelly again today. 

Today I have a card I have made for you, using one of the Beautanicals stamps called Fern. 

This stamp you get two lovely ferns. 

I decided to create my own background using two different coloured inks and using both the ferns to make it. 


This was a simple white piece of card that I stamped randomly over with the different ferns and the different colours.


I took the larger fern stamp and stamped it with a clear ink pad, and embossed it using green embossing powder.

I did this three times, matted and layered each square with green and white card, then mounted the three on to a larger section of green card. I placed this across the middle of the card.


To finish the card I used one of the sentiments from the Sentiment and Phrases set from the Wordage collection. I used a die cut to create the frame, and finished with card candi.

The items I used are:-
Card Candi


Thanks for looking Sue will be back tomorrow with another lovely creations.

Hugs 
xxx

Saturday, May 03, 2014

Blooming Beautiful!

This will be a short and sweet blog today as I am feeling a little under the weather.  I have got laryngitus (hurrah says my hubby) lol I have lost my voice and no,before anyone asks it has not been put away in one of my craft draws :-) My fingers have been well and truly inked up after this week which is just as well with Bee Crafty their distress inks at £3.99 bargain!


For this card I have used:


I made the background for this card using my gelli plate and adirondack inks, unfortunately I can't remember the colours as this week has been a bit of a blur.  I stamped a mask of flower girl Abi, cut out and put her on the gelli plate, i then inked up the plate with my inks.  I stamped the cow parsley and branches stamp directly onto the gelli plate and then lifted of the print.  To add a bit more depth I stamped on some more cow parsley.  I also used the cow parsley stamp to make a background for  the topper to sit on. Finally I stamped Abi and coloured her with my promarkers.


The flower is made from a Tim Holtz flower die and I added some leaves as a finishing touch.

Well I hope you have enjoyed looking at my blog entry don't forget to follow if you have enjoyed.  Have a happy crafting bank holiday.

Crafty hugs,

Clare x x x x x

Related Posts Plugin for WordPress, Blogger...