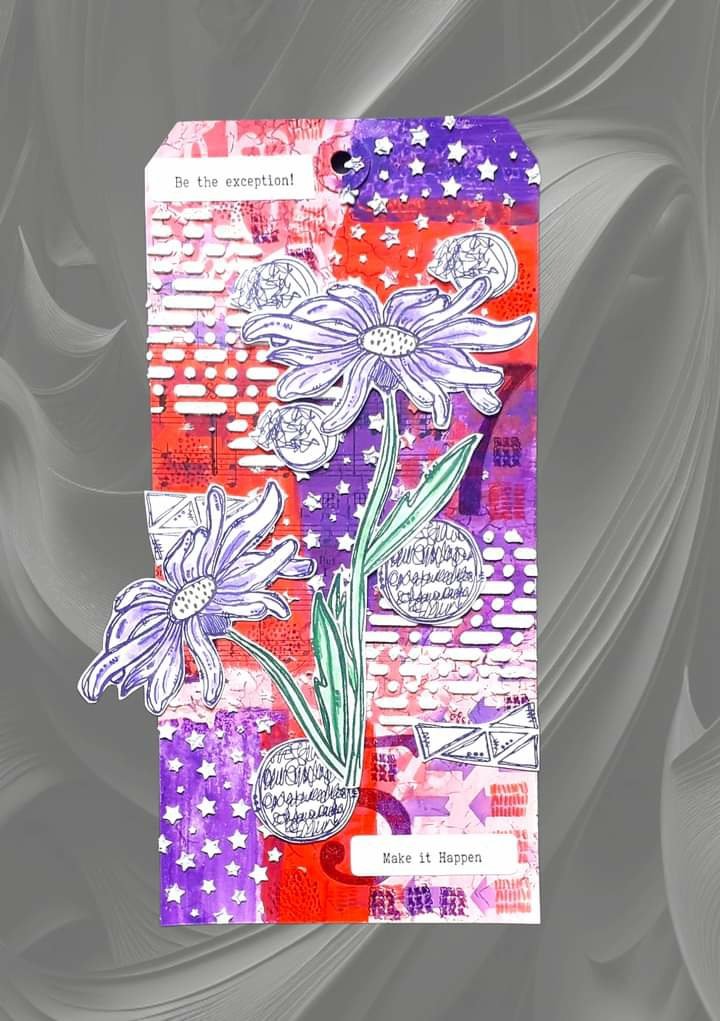
Three Daises in a Journal
By CT Ann

•••
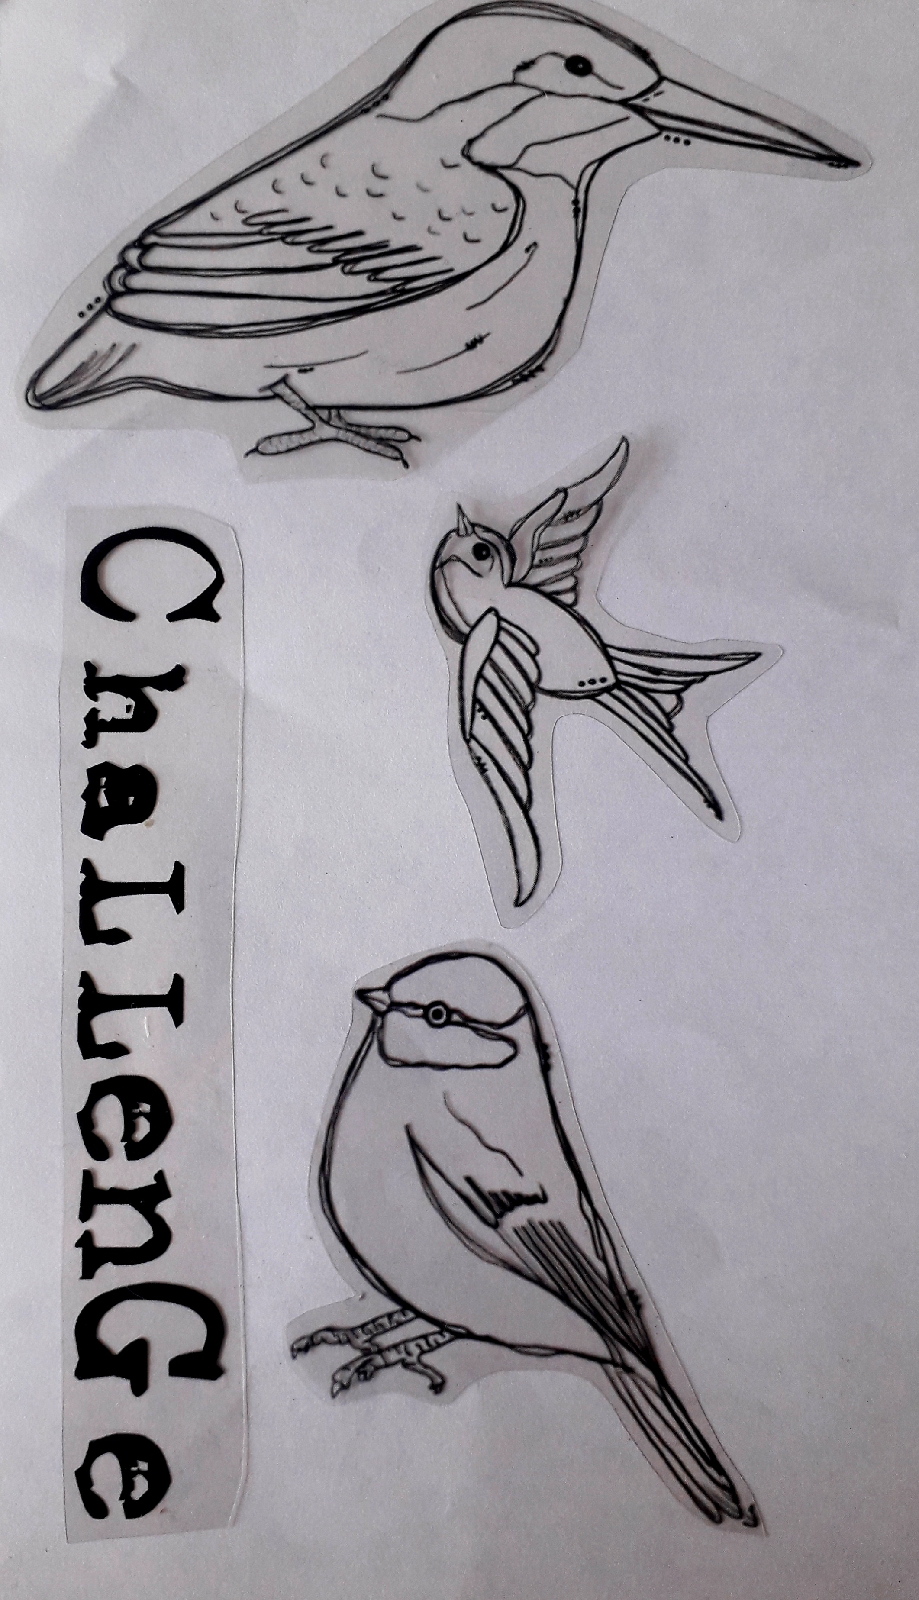
Stamps : Doodle Art Dancing Daisy
Inkabkes: Texture Discs-set 4
6x6 Regular Dots or use dotty one from D’Inkables set 2
Distress Oxide Sprays: Salty Ocean/ Scattered Straw/Kitsch Flamingo
Distress Oxide Inks: Salty Ocean/Scattered Straw/Kitsch Flamingo
To start I spritzed each of the Distress Oxide inks onto my journal page & let them dry (or use a heat tool)…

Then using the Circle for Circles Inkable & I spritzed some Salty Ocean & Scattered Straw through & a on to the page…
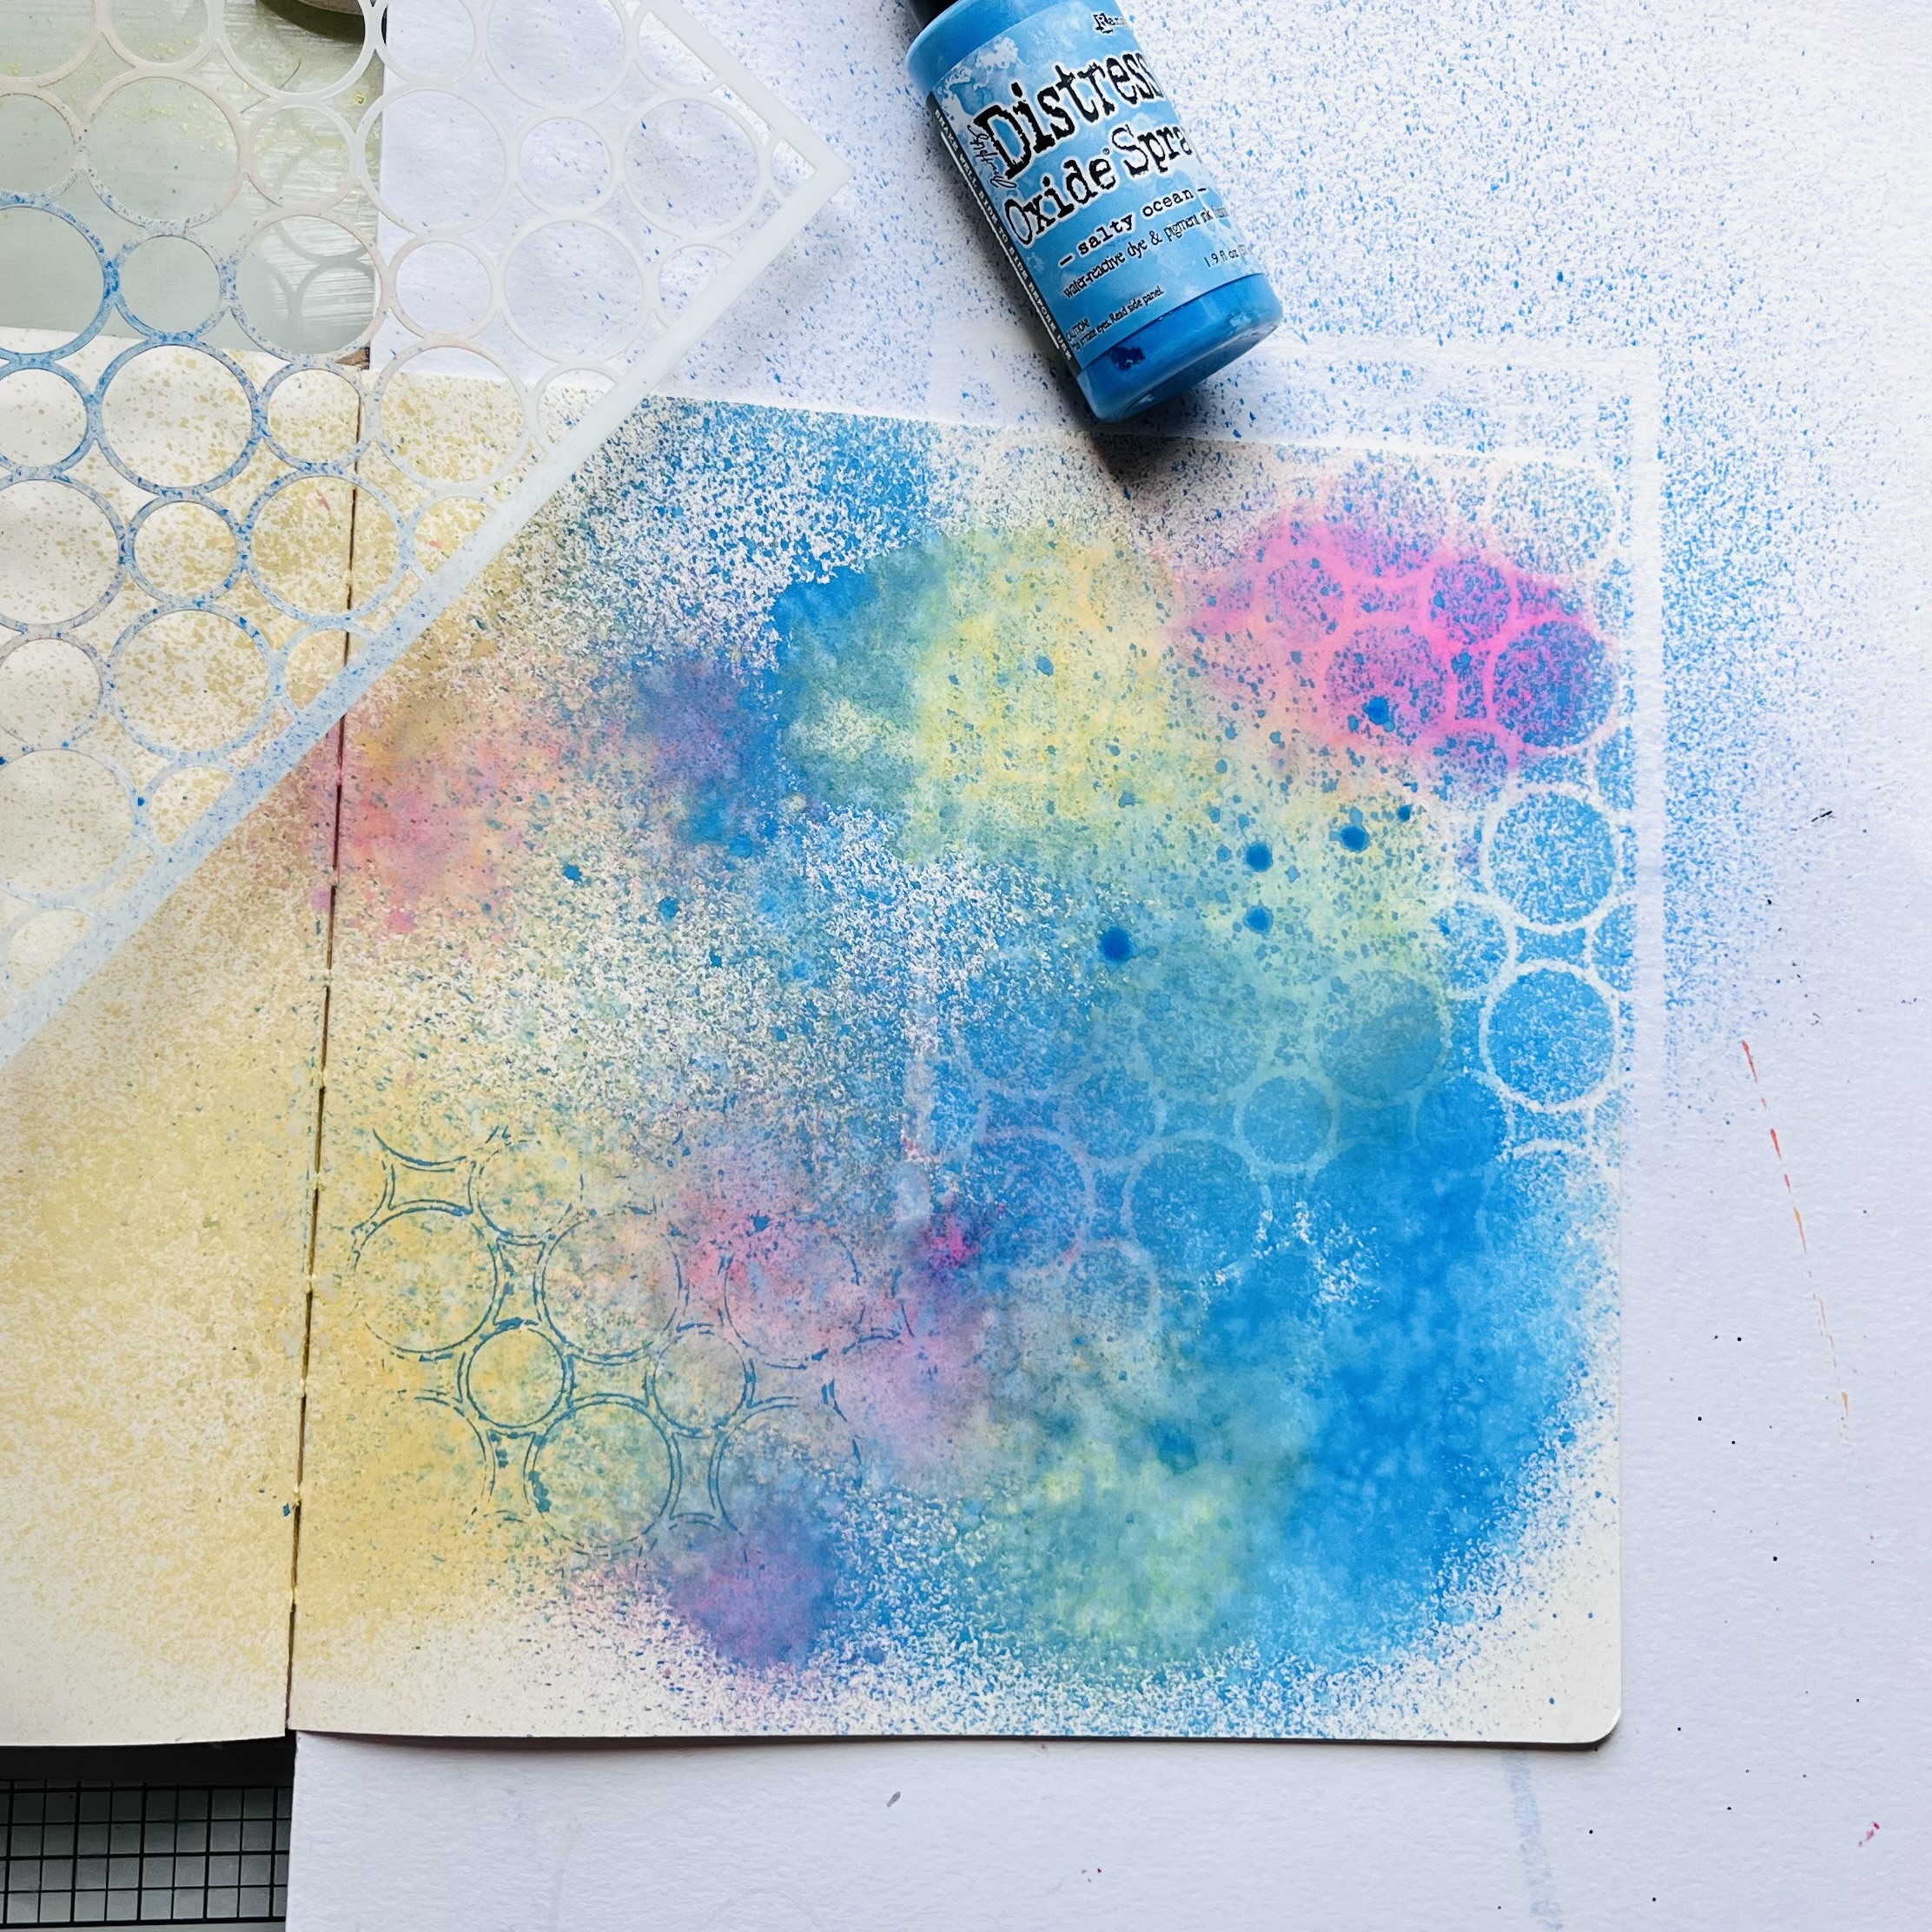

When the spray inks were dry I used Distress Oxide Salty Ocean through the Texture Disc…


Using a sponge & some white Gesso I added more stencilling, through a different Inkable tag, to break up the busy background…

I felt it needed more pink in the background & used the dotty Inkable with Kitsch Flamingo…

To break up the background a little more I added some of my homemade washi tape & used stamps from the Journal Art Elements 3 stamp set 3 (using Hero Arts Ink)

Whilst my page was drying I stamped (in Versafine Clair Nocturne) & cut out the Dancing Daisy 3 times…

When my background was dry I added lots of doodles using the Moonlight Fluorescent Gel pens…

I glued the Daisies in place & added a sentiment from the Incredible Words stamp set (on offer this week) …

Looking at the page I felt it needed a few more numbers from the Art Journal Elements 3 set adding to the background…


Thanks for stopping by… Ann xxx