Sunday, December 25, 2022

Alison CT - Tags

Good morning and Merry Christmas everyone. Today I thought I would share all my Christmas tags from the 24 days of Christmas tags.
For this tag I have used:
Selection of snowflakes from the Winter Journaling Girls 

On this one I've used:
Snowflakes XL and regular (discontinued)
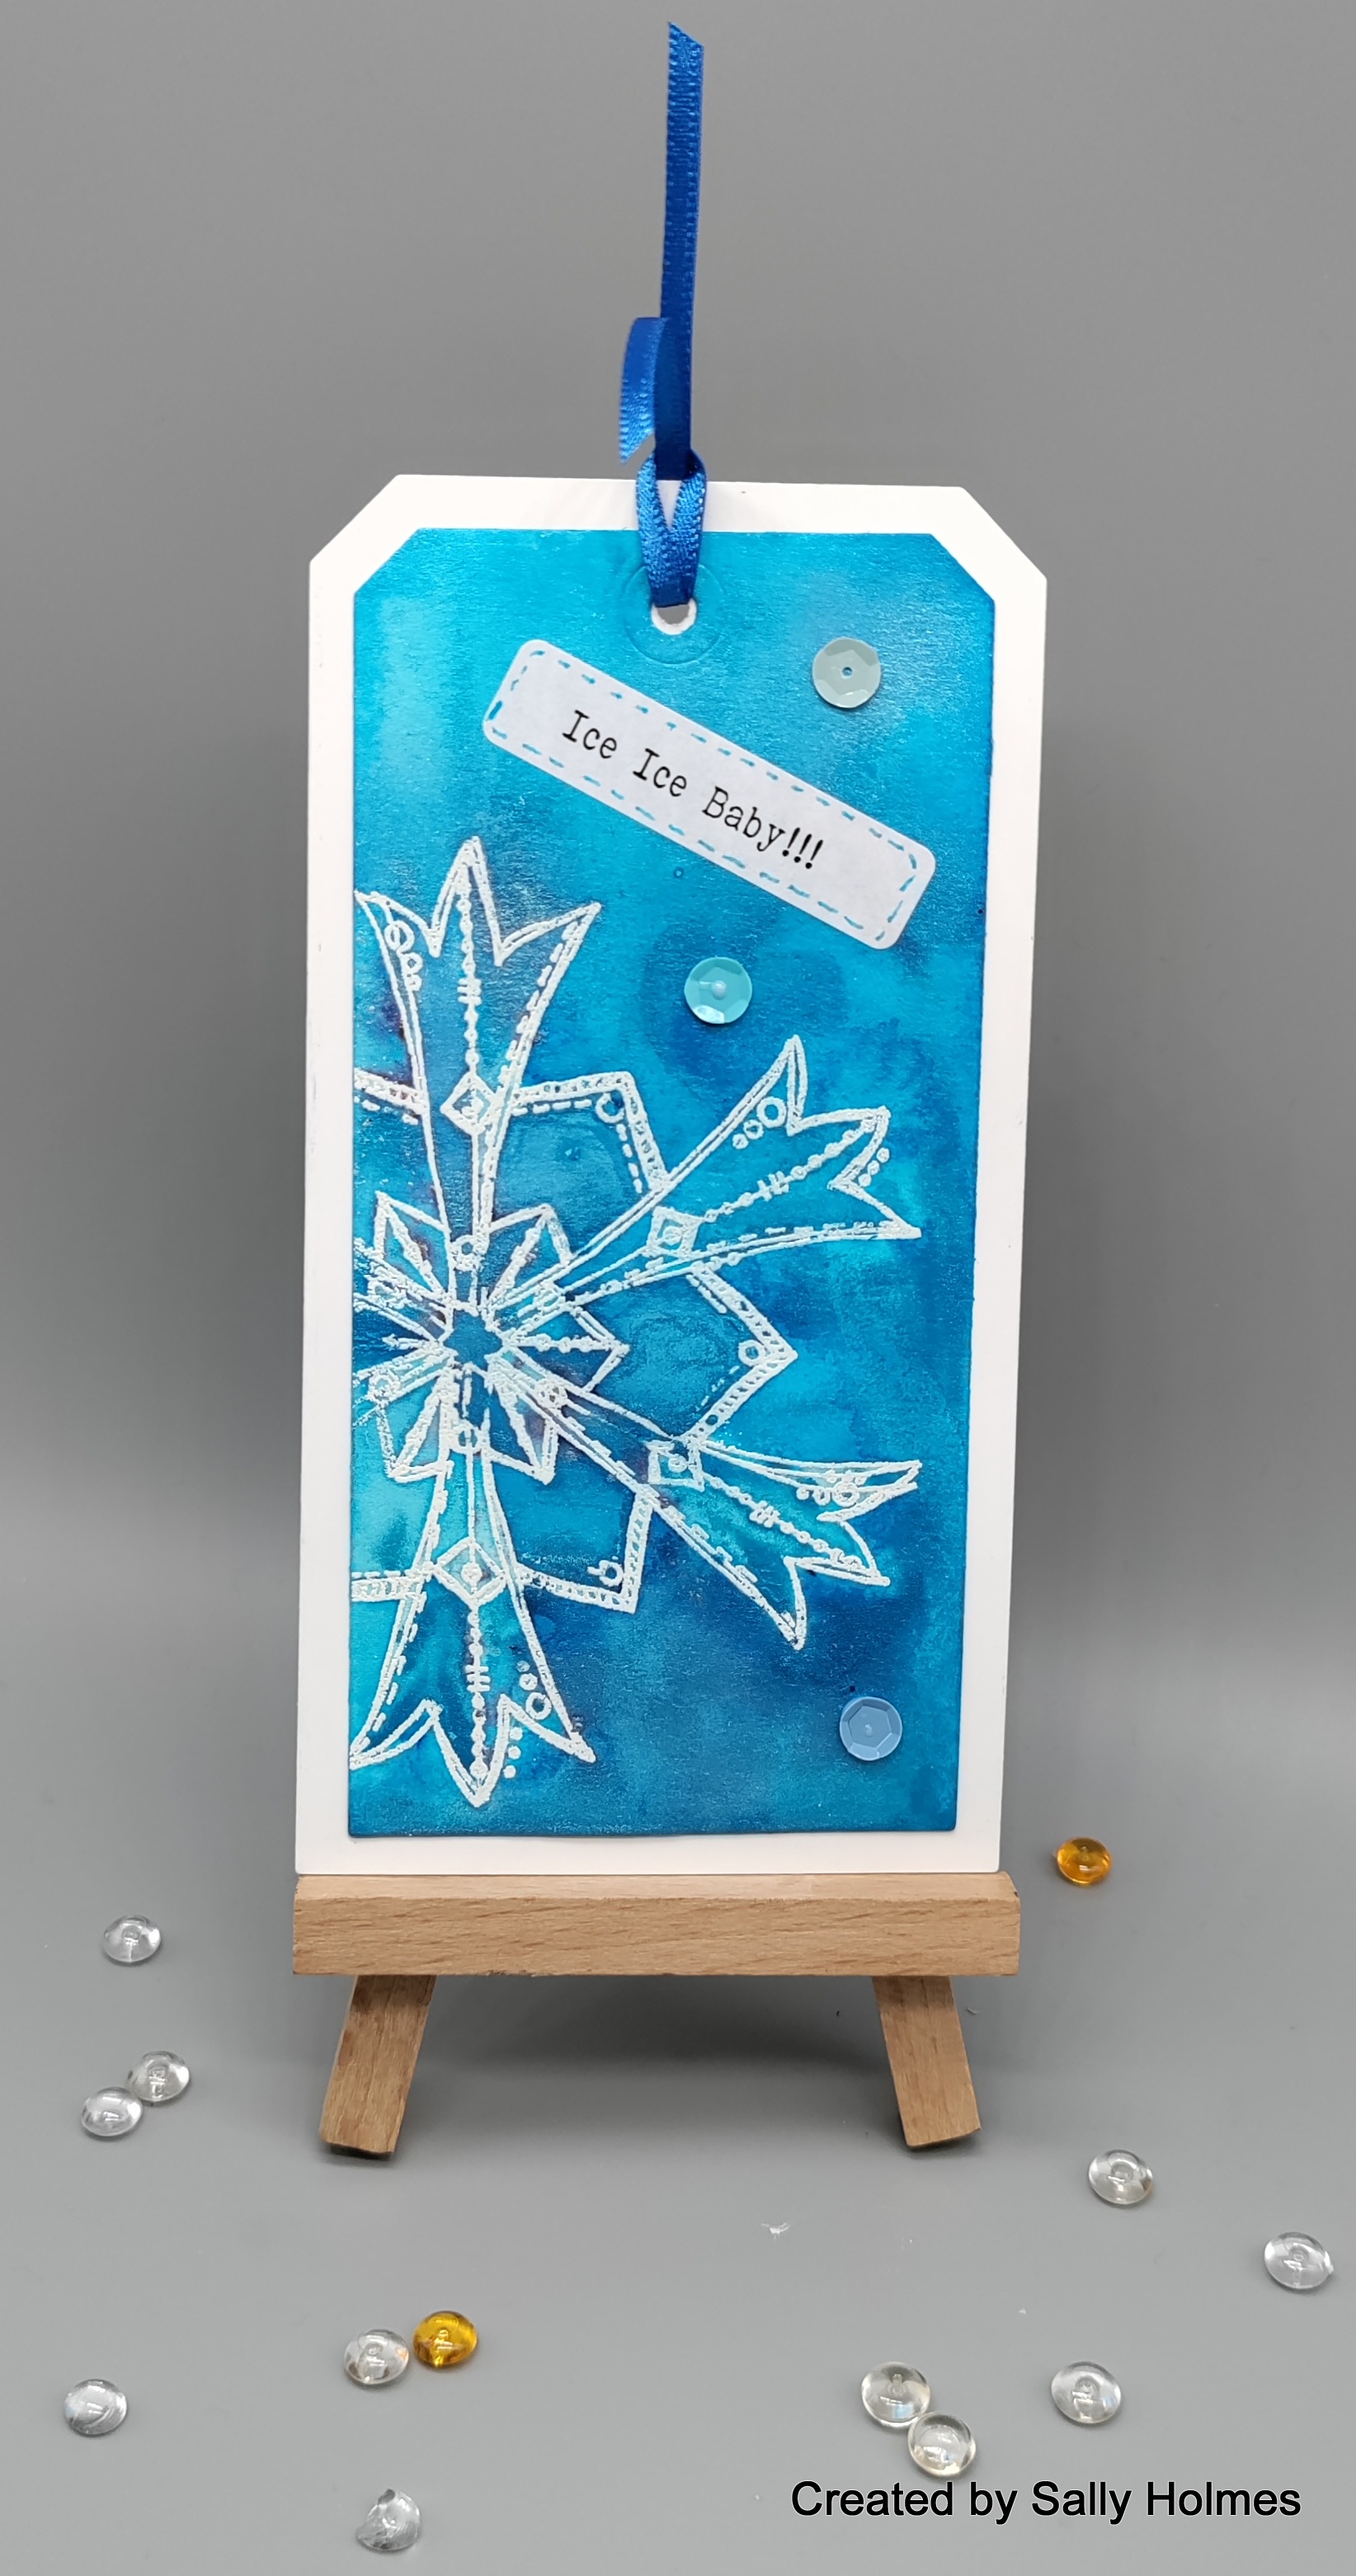
Uncharted Mariner and Savaged Patina Distress Oxides
Versafine Clair - Midnight

For this one I used:
Poinsettia XL and regular (discontinued)
Music manuscript
Gathered Twigs and Mowed Lawn distress oxide

On this one I used:
Art Stamps - Robin and Wreath
Lumberjack Plaid distress oxide and ink

For this one I used:
Texture, film strip and circles (discontinued)
Uncharted mariner and salvaged patina distress oxides

On this one I have used:
Picked raspberry, kitsch flamingo and warm lipstick distress oxide
Silver sharpie

Thank you for taking a look. Sorry that some sets have now been discontinued, but if you have a lokk at the website there are others that could be used instead. My makes are just for inspiration and can be easily adapted to other stamps.

Alison

Saturday, December 24, 2022

Sally CT - A Vintage journal page

Hi there! I am here with a vintage journal page step by step for you today.

I began by arranging some torn scraps of book page, music and patterned paper on a journal page and stuck it down with matte medium. 
next I stencilled some walnut stain distress ink around the edges where the papers hadn't quite met.
I found a torn piece of corrugated kraft card and sponged walnut stain ink around that too


I added some stamping using the doodle art mandala stamps again in walnut stain. 
next I attached the panel to the background, adding some braid too, with gel medium. 
with the tag inkables I added a bit of texture paste...
then used distress crayons in hickory smoke and salty ocean to add a few lines around the page. I also added a little gilding wax on the corrugated card and the texture paste, 
finishing off with a splatter of white gloss spray (not a spray - just unscrew the top, hold the pipe over the project and tap).
I stamped the three butterflies in versafine clair ink and coloured with ecolines before die cutting.
Finally I used gel medium to add these to the corrugated panel. 
Here is the finished page, although I might add some words to it...

I used:
A selection of papers to collage

Thank you so much for looking! Wishing everyone a happy and healthy Christmas and New Year! 
Sally xxx

Wednesday, December 21, 2022

Countdown to Christmas by CT Ann

 Countdown to Christmas 

By CT Ann 


I’ve gone all out with a sparkly tag today & want to wish you all a very Merry Christmas 

🎄🥂💖 


I used: 

Distress Oxide Inks: Tumbled Glass/ Spun Sugar/ Speckled Egg/ Kitsch Flamingo / Salvaged Patina 

Brilliance Moonlight White Ink

Inkable: Alternate Circles

D’Inkable: Regular Dots 

Stickles Glitter Gel: Moon Dust

Stamp: Wreath

Embossing Ink 

Gold Embossing Powder 

Dina Wakley Tag 

Ribbon


https://www.beecrafty.net/


Start with the palest Distress Oxide Inks & the Alternate Circles Inkable building up a bokeh style background on to your tag. I used Tumbled Glass to start, going very lightly at first… 

Next was Spun Sugar… keep rotating / moving the Inkable each time you change inks… 

Then Speckled Egg …


Kitsch Flamingo & Salvaged Patina to give a little more depth..

Then using the Regular Dots D’Inkable add Tumbled Glass & Kitsch Flamingo with a little more pressure.. 


Finally I used Brilliance Moonlight White over the top this gave the whole tag a softness / blurred look as in bokeh effects… 

Next spread some Stickles Glitter Gel through the Alternate Circles Inkable & leave to dry…

On a separate piece of paper stamp the Merry Christmas sentiment in embossing ink, sprinkle with gold powder, shake excess off & heat until molten. Cut out the sentiment..


When the gel is dry glue the sentiment onto it using foam pads & add a few sequins & a ribbon… 


Thank you for stopping by…

 Merry Christmas 

Ann xxx


Sunday, December 18, 2022

Alison CT - Transparency ATCs

Hi everyone, today I'm sharing a simple ATC project.

To begin I cut a piece of card into 3 ATC blanks (2.5" x 3.5"). I then used an off cut from one of the Catalyst papers from pack 2 to create backgrounds. I used Distress Collage Medium to glue them.

Next I blended picked raspberry distress oxide ink over the edges to blendany white edges into the papers.
Then I chose three of the faces transparencies and stapled them to the backgrounds. I used staples to add a further texture to the ATCs.

Finally, on a seperate piece of card, I stamped my chosen sentiment using versafine clair nocturne ink. I then cut it into three seperate pieces and glued them to my ATCs.
Products used:
White card
Bee Crafty Media Papers - Catalyst papers 2
Wordage - Ticker tape 3
Distress oxide - Picked raspberry 
Stapler and staples

Thank you for taking a look.
Alison

Saturday, December 17, 2022

Sally CT - icy tag

Hi There

Thought I would show you how I made this shimmery icy tag. 


I began by cutting the largest tag from mixed media paper and the larger mount from white card.
 
On the tag, I stamped the largest snowflake stamp in versamark ink and embossed in fine detail white embossing powder
I sprayed water onto the tag and sprinkled with explosion powder and left to dry
once it was dry I stuck it onto the white mount and added a winter wordy sticker, some sequins and a ribbon. 
Here is the finished tag once more.

I used :

Thanks for looking! 

Sunday, December 11, 2022

Alison CT - Noel

Hi everyone, today I'm sharing a clean and simple Christmas card made using a stencil and one stamp.

To begin I taped the 6x6 Noel inkable to a 6x6 square of super smooth white card. I then blended lumberjack plaid distress ink through it, making sure I got ink into all the corners.

Once the ink was dry, I used a gold sharpie to outline the letters. I did this through the stencil.
On some white super smooth card I stamped the holly branch, from the Art Stamps Robin stamp set, four times using versafine clair morning mist ink.  I then coloured them with distress watercolour pencils, but this can be done with any media of your choice. I then cut them out leaving a small white border.
I then mounted the noel piece onto a piece of red card that was a quarter of an inch bigger. Next I glued this to a 7 inch square card blank. I glued one piece of the holly to each letter.
To finish the card I glued small red gems around the letters.
Products used:
Red and white card
Distress Ink - Lumberjack plaid 
Art stamps - Robin
Versafine clair - Morning mist 
Distress Watercolour Pencils set 3 - rustic wilderness, candied apple
Small red gems

Thank you very much for taking a look at my project today.

Alison 

Saturday, December 10, 2022

Sally CT - Snowy Robin card

Hi There! Here is a step by step card as I rattle off as many Christmas cards as I can, lol. 


I began by stamping the robin and colouring him in using markers

Next I stencilled the snowflakes in broken China around the robin using the snowflake dinkable
On the base card I used the splatter dinkable to add some stickles gel through
next I stamped, coloured and cut out three lots of the foliage and added them to the robin's branch.
I used one of the Winter stickers , layered on a scrap of card....
and here is the finished card once more.
I used 
Black ink (I used memento)
Markers (I used alcohol markers)

I will be live on the Bee Crafty Facebook page on Wednesday evening if you fancy joining me with a Mince pie and a glass of something warming x

Thanks for looking!  

Related Posts Plugin for WordPress, Blogger...