Showing posts with label Wizard of Oz. Show all posts

Thursday, November 16, 2017

Marleen DT - Hochanda Wizard of OZ samples

Hey Bloggers..

I appologise, I totally forgot about my post for BeeCrafty yesterday. Life is a bit hectic around here at the moment.. No excuse though so I decided to post my samples today.

Bev was on Hochanda this past Tuesday with the amazing stamp collection called "Inspired by the Wizard of OZ". Its a beautifull collection based on the original book.

This 
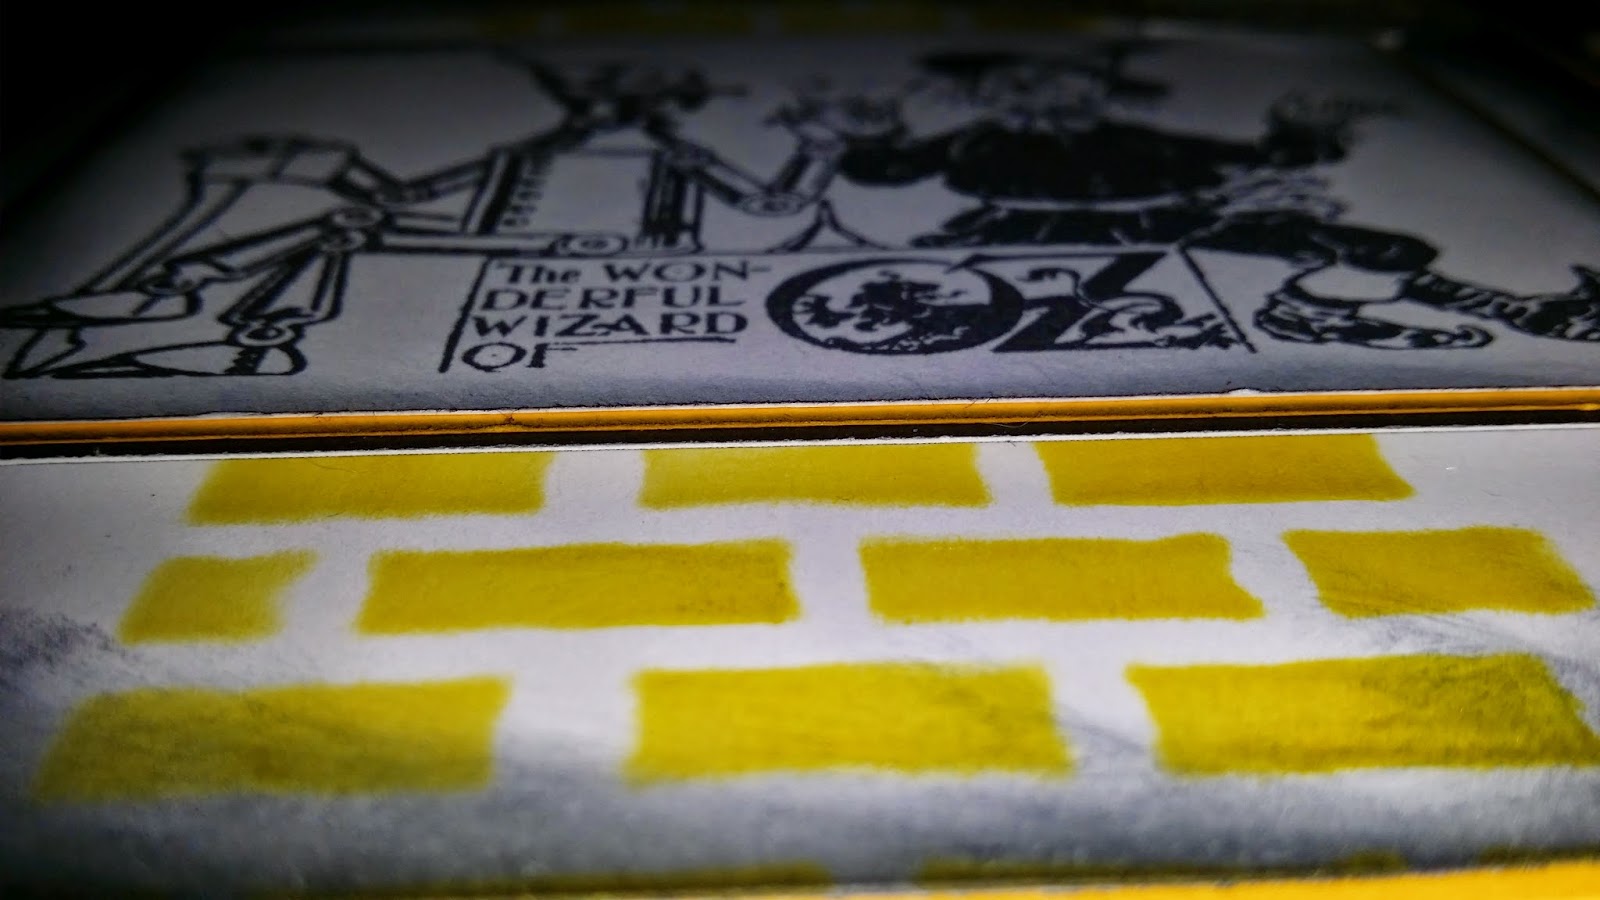
one is made with distress ink. I made a water colour wash for the back ground and then the same colour through the brick stencil.
Mr Tinman is coloured and covered with glossy accent.

This background took quite some time to make to be honest, but it was worth it I think. I started by repeatedly stamping OZ greeting with red, orange and yellow distress ink. I then misted it with water and left to air dry. Once dry, I took the brick stencil and used a clear paste through it. Once again, left to dry. Once totally dry again, I misted the background with plenty of water so the ink between the bricks started to run. Once again left to dry.

While doing all this waiting, I stamped the same greting on to vellum and I stamped and water coloured my Lion. I fuzzy cut him and added him to my background with my greeting.

 Once again my brick stencil, this time with white paste. Once oaste was dry I added brusho on top.
Dorothy is water coloured and fuzzy cut as is my greeting.

 This one was a play on one of my favorite card designs. Its no secret that I love making backgrounds and this design is such an easy way to show off a background. 

And then my favorite.. These stamps has a vintage feel to them. And after making the other samples I still hadnt come up with that "wow" card that I always aim for when getting a new collection landing on my table. And then it hit me.. I had made my samples as usual BeeCrafty cards.. My usual style.. But these stamps are so different and needed a different approach.. And thats when this vintage card came together..

I used the BeeCrafty Steampunk papers, lots of layers and distressing, water colouring and fuzzy cutting, twinw and whatever that mesh stuff is called  lol..

I love this creation and think it truly sets of these beautiful stamps.

And that is it for today. Thank you for popping by and for any comments left behind.
Dont forget to come visit me on FaceBook, Twitter, Instagram, Pinterest, Youtube or my FB page.
 Happy Crafting


Friday, April 17, 2015

Kerrie DT - Tin Man - Tag

Hiya and welcome to my Friday post for Bee Crafty 

This week I have made a Tag using a few of my fave stamps 

Bee Crafty stamps I have used are..

They are all available from the Bee Crafty STORE along with lots of other yummy products


First I stamped the Tin Man using grey ink into the centre of the tag, I then stamped again onto a piece of wide tape from my masking roll, which I cut around the Tin Man shape to make a mask. I was the Tin Man un-coloured for later.

Next I stamped the Backdrops Border - Clover using clear embossing ink accross the bottom of the tag just touching the Tin Man's feet. I used silver embossing powder tipped over the front, tapped of excess powder and heated with a heat gun

Then I stamped the 'Da Vinci - Script' stamp over the whole tag using clear embossing ink and then used 'clear' embossing powder and heat embossed - the tag is very textured now with raised areas. I inked over using 'Weathered Wood' and 'Pumice Stone' Distress Inks over the tag.

I used the leaf stamps from the 'BEAUtanicals - Maple Solid' to randomly stamp in the corners and down the sides of the tag

I added some random stamping of the 'BEAUtanicals - Cow Parsley' stamp in between the leaves. I took the masking tape off the tag to reveal the un-coloured Tin Man

I stamped the 'WORDage - Being Happy' off the edge of the tag so only the 'look beyond the Imperfections' line was on the tag. I heat embossed using silver embossing powder.

I ran the clear ink pad over the tag edges and dipped into black embossing powder and heated with an embossing gun

I coloured the Tin Man using Alcohol Markers 

Thank you for visiting today and I hope you come back soon to see more gorgeous makes by the Design Team xx

Hugs Kerrie x x

Friday, April 03, 2015

Kerrie DT - I'm Glad I Did It - TinMan

Hiya and welcome to my Friday DT post for Bee Crafty

I have made a TinMan from the Wizard of Oz Collection card using Distress Inks and a mask


To create the background I tapped some ink from Stormy Sky distress inkpad onto a craft sheet then using water and a paint brush I used the ink as a watercolour across a piece of watercolour card.

Using an inking tool and Weathered Wood distress inkpad Ive inked the edges and in from the corners, more on the top left. Using a mask I sprayed water through it, this dilutes the ink just where the water hits through the mask. I added some salt which then moves the watery ink and creates a bit more texture look. I heated the card using a heat tool and then brushed the salt away. I cleaned the mask and then inked through it randomly using Weathered wood.


I stamped the TinMan using a grey inkpad, then coloured him using Weathered Wood distress ink and a waterbrush. Once dry I went over the shaded areas again with Weathered Wood to darken the colour.


Ive added embossed details in the Corners using clear embossing ink with white embossing ink and some more lush Bee Crafty stamps.... Yuletide - Holly Swirl, Beautanicals - Branches and Cow Parsley


I stamped WORDage - Glad I Did It using a grey inkpad in the area that the TinMan is looking so it looks like he is thinking the phrase

I hope you like my project today and that you will visit again soon to see some more gorgeous makes by the Bee Crafty Design Team

Krafty Hugs xx

Tuesday, February 17, 2015

Kerrie DT - Dorothy

Hiya its Tuesday so I'm here to share with you today a card I made for Bee Crafty Stamps

Its half term this week so im enjoying a nice break from school runs - my kiddies are enjoying their free time too and we are planning a few crafting activities this week and I'm hoping to get a few more makes finished to show over on the Bee Crafty Facebook Group have you joined yet? 

Have you been watching our Beverley on the 'British Craft Network' an online craft TV channel where you can see lovely shows with gorgeous products

Ive been working with 'Dorothy' from Wizard of Oz collection you can find her and all her friends in the SHOP along with lots of yummy stamps and craft goodies

I stamped Dorothy using Memento ink onto smooth cardstock and coloured her with my Alcohol Markers


I chose a paper to colour match her dress and the layered up with mirror board and embossed pearlescent cardstock which I wrapped a ribbon around and added a small bow

I wanted to show off Dorothy so I framed her using some circular die's, I cut her from a plain circle and a decorative circular die i used for the frame

I chose a simple flourish die cut twice and some pale blue and white paper flowers which I have fixed onto the cardfront using a hot glue gun

The sentiment is from the WORDage collection 'Happy Birthday/With Love' set

Thank you for visiting today come back soon to see more makes by the Amazing Design Team 

Krafty Hugs xx


Monday, July 07, 2014

Yellow, Grey and A Tin Man

Hi Guys, 

Thanks for stopping back in today. 

Today I have a card that is great for a male. 


To create the card I folded and created an A5 Card base, matted with a grey layer. I added fake stitching to this layer to give the eye somewhere to stop. Next I cut down some stamping card to fit within the grey. I used a yellow ink pad and stamped the "Bark Positive" background stamp. I repeated this to create three sections. On the bottom layer I added twine and finished it with a knot. I matted this on 2 layers of foam tape and placed it at the bottom, the middle section is on one layer of foam tape and the top section I glued down flat.  I then used a yellow piece of card blank cut it down using a circle die, and used my grand calibre to run it through with my Inkables "Honeycomb" mask to give the embossing to it. Finally I stamped my "Tinman" stamp added stitching around him and matted him onto the grey card stock, I cut a shape out for the sentiment and used the Wordage "Thank You" Stamp, and added three pieces of card candi. 


That is all for me for today, don't forget to pop back tomorrow for more creations from Sue.

Crafty Hugs
Kelly
xxx

Friday, June 13, 2014

Follow Follow Follow....

...Follow Follow the Yellow Brick Road

Hi Everyone

Had a good week?

I have and this week I have created a little card that could be adapted for a variance of occasions for use.


So I took my white cardstock and used the Brick Wall Template from the Inkables range and went straight on with some Mustard Seed Distress Ink.


I had left and equal border on each side and then used the Black soot around the edge (thank heaven for my new Black soot following the 'loss' of my previous one) 


I used the Courage from the Wizard of Oz Range and a Yellow Wink of Stella pen to colour the selected parts as per the picture.


The Centre piece is the Scarecrow and Tinman which is a stamp I actually love!!!

Layered it up and I love the simplicity of it.

Hope you like it.

Sam xxx 

Wednesday, June 04, 2014

Marleen DT - Wizard of Oz - Tinman 2

Morning ya all..

Wednesday again..You know what that means :-)
Wednesday = inspiration post from me for 

This week I have once again used The Tinman.. Yep think Wizard of Oz..
Bee Crafty has an intire series just with Wizard of Oz. Do check it out HERE ..
Here is what I have made with him for this week:

 On both cards I have stamped Mr Tinman with StazOn onto water colour paper and coloured with Distress markers. Both cards are also just a bit of matting and layering.
 Once matted and layered, on this card I then smothered it in distress ink.
After that, I started to turn up the corners to reveal the white card underneath.
On this card also, I smothered it with distress ink. Only I put a mask over the whole card to make the outline of the cogs.

And that is all from me for today,
 Thank you for stopping by and for any comments left behind.


Monday, May 19, 2014

We are off to see the Wizard !

Good Morning Everyone, 

Kelly here again today, these Mondays do come around so quick. 

Today's card is a little different for me, I don't normally like steam punk or anything to do with it, and this card some probably wouldn't class it as steampunk, but for me it is as close as it is going to get. 

Firstly I used Wizard of Oz Tinman, I stamped him in a well used black momento ink pad, so that it wasn't grey but wasn't tuxedo black either. I think he come out pretty well. Originally I was going to colour him in using greys and shading, but when he stamped out, the detail that was on him, I decided to show it all off and leave him "plain" I stamped him on 300gsm stamping card, matted it to silver mirror card and then to a thin layer of black card. I added faux stitching with a 0.1 fine liner black pen.

 To create my card I used a black A4 card stock folded in half, and added a backing paper of grey cogs. I used my Cameo machine to cut the cogs out, and then coloured them in using Warm Greys from my promarker collection. I then ran it through my embossing folder.  I certainly think you could get the same result with any cog die, or stamp.


I finished it with adding a sentiment from the Wordage collection, and matted this onto black card and again faux stitched around the edge.


Thank you for taking the time to have a read, I hope you have enjoyed. Don't forget to pop back each day to see more creations from each member of the design team. Up tomorrow is Sue. 


See you next Monday
Crafty Hugs
Kelly
xxx

Items I used

Thursday, May 09, 2013

We're off to see the...

... Wizard!

Well what else could these guys be going to see???


I have been having lots of fun with the Wizard of Oz Stamps available from Bee Crafty

I took part of an old book (approx 100 pages) and went straight for the centre folding and tucking to create these cute little loops.  You can also see here that I have made some of my favourite paper roses from another sheet of the book.


Side view...


I stamped all of my images onto cream cardstock - not all the same as I didn't want it to all just blend in but wanted to keep the natural tones that the old book already had.  Carefully cut them out and inked the edges with a Distress inkpad.  All of the images are mounted onto sticks so that they easily slotted into the spaces between the curves.


All finished off with a lovely big Satin Ribbon bow, I love how this tones in with the rest of the book

Many thanks for reading hope you enjoyed as much as I did making it.  This is also available as a workshop please get in touch with us at Bee Crafty for details.

Thanks

Sam xxx


Tuesday, April 09, 2013

So I was looking around ...

...and look what I found

Pretty Pretty things

This is made by Jason Wilkes and I found it on the Crafters Refuge Page on Facebook  I like the Distressed effect, I would use Tim Holtz Distress Ink Pads here, nothing quite like them for this!


Now I can't remember if this has been on the blog already ( I know I didn't blog it so as far as I am concerned it's fair game.  The lovely Pauline made this for us and you can view it here on facebook - look at the perfect blend in the colours and naturally the Tinman is awesome from our Wizard of Oz Range.


So anyhoo just a little short one tonight as I am off to play with my Sugapop Paper from the Kaisercraft Ranges. So here I go - I shall report back sometime soon, I wonder how messy this will get....

Have fun guys

Sam xxx

Sam xxx

Wednesday, February 27, 2013

DT Project: Pauline ~ Vintage Oz

Hi Everyone, 

Today I have got a fab project for you made by Pauline Butcher in our DT she has used some gorgeous Vintage Tones of Tim Holtz Distress Ink to make a wonderful

Vintage Wizard of Oz Card
Pauline has used a few of the Wizard of Oz Collection here

With using so many stamps Pauline has used a lovely simple polka dot packing paper in coordinating brown tones (if you enjoy making your own backing paper this could be done with the NEW Offset Dots Inkables template).
The card style stamps have been stamped in Tim Holtz Distress Ink  cut out with a border left and then mounted on dark card. These have then been layer onto the card using 3D Foam.
The Knowledge sentiment has been cut out using spellbinders and then layered onto a larger scalloped spellbinder circle.
The Tinman has been stamped in the same Distress Ink and then gorgeously layers.

This is a beautiful card and could be sent to anyone for any occasion and I love that, it's so versatile and could so easily be recreated in bright tines of you want to which is fab.

Speaking of Bright Tones did you know that all 12 Seasonal Distress Inks are now available at Bee Crafty, and not only that we have lowered the price of all of our Distress Inks to ONLY £3.99 so now there is no excuse not to get with Distress.

Colour Charts and Hints & Techniques sheets are also available so if you are popping in grab one off the counter, if you order online just ask for one in the comments box at checkout :)

Bev x

Sunday, February 24, 2013

DT Project: Tinman Suze Jo

Hey Crafters, 
 
I hope you are all having a great weekend

Have a look at this gorgeous creation by Suze Jo.

 If Only I had a Heart by Suze Jo

 
This is made using the fab resist technique, this is done by stamping with clear ink and embossing powder and then inked over in this case with Black Soot & Blue Distress Inks.
 
 The background was then mat & layered onto silver mirri board  to co-ordinate not only with the theme of the tinman but what she had in store for him, then again layered onto black card.
 
The love of Suze's life Monsieur Tinman (this is what she calls him) is stamped onto a sheet of thin metal (Suze bled for this boy cutting him out, os if you try it be VERY careful) ... added him onto black card for an outline.
 
Suze completed it with the heart from the Unbreakable Heart Sentiment, cut out stars and then sprayed it all with Shimmer Glitter .
 
I think you'll agree the overall effect is stunning and although she ended up a little injured it is beautiful x
 
I hope you're having a lovely relaxing Sunday and keep your eyes peeled for more of the show goss coming tomorrow, and make sure you take a look at the other recent posts to see more Oz samples


Friday, February 22, 2013

DT Project: Tinman by Sue Hickey

Hi Crafters, 

Today I have gorgeous card made by Sue Hickey.

This is one of those beautifully simple cards that can be given to anyone for nearly any occasion

The Tinman


 This is an A5 white card that has been layered up to stunning effect.
Sue has embossed a piece of white card using the Brick Wall with Hole Inkables template,
  layered up on black and added to the card.

She has stamped her Tinman using Black Soot Distress Ink and using a selection of Ice & Cool Grey Promarkers to give him a gorgeous 3D effect 

then cut him out and rounded the corners, this has also been layered up on black with double sided tape and that layer has been stick down using 3D foam to create dimension.

The Courage sentiment was also stamped in Black Soot Tim Holtz Distress Ink and cut out using a circle spellbinder die.

Sue added die cut black swirls from her Memory Box Dies.

Bev x


Friday, February 15, 2013

The Wonderful Wizard of OZ. Tinman ATC by Pauline

Good Afternoon Everyone, 

If you haven't seen them yet be sure to check out the gorgeous NEW  
range of self cling polymer stamps from Bee Crafty.

This great range of stamps has ink drawing style images based on the original illustrations from the very first publication of the book.

There are framed card style images as well as individual characters and accompanying circle messages with quotes from the book.

Our DT have been hard at work and I would like to show you this gorgeous ATC made by Pauline

 This is a standard size ATC featuring the Tinman one of the Wizard of Oz story's most beloved character's, the background was created using Tim Holtz Distress Inks and the ground he is standing on is the Bark Positive Backdrop stamp, the gorgeous glittered arrows have been made using the Arrows Inkables template exclusive to Bee Crafty and the heart is from the Unbreakable Heart sentiment. As you can see Pauline has expertly coloured him in and cut and layered him up to give this ATC lots of texture and dimension,

What I love about this ATC is the same techniques could easily be applied to a card or Art Journaling Page.

Keep your eye on the blog for lots more samples coming from the DT and us.

Bev :) x
Related Posts Plugin for WordPress, Blogger...