Monday, February 26, 2018

Lorre-Anne DT - Egyptian Hochanda samples

Hi everyone, for my blog post this week for Bee Crafty I want to share the rest of the samples I made for Bev's recent shows on Hochanda... these samples were all made using the fabulous new Egyptian collection of stamps and stencils.  I had so much fun working with these, I've been interested in everything Egyptian since I was a little girl, so this was right up my street.


6" x 6" card made using Faded Jeans Distress Oxide, Onyx Black Versafine ink and Kuretake Zig pens.  


6" x 6" card made using Faded Jeans Distress Oxide.


6" x 6" card made using Fossilized Amber Distress Oxide straight on to black card, Golden Gate Lustre Luxe, and Glossy Accents.


Twisted Easel card made using Fossilized Amber and Wild Honey Distress Oxide, Onyx Black Versafine ink, Kuretake Zig pens.  


6" x 6" card made using Onyx Black Versafine ink, and Kuretake pens.


7" x 7" card made using Brushos (Lemon, Orange and Burnt Sienna) and Black Soot Distress Ink.

That's it for this week, and I'll be back next Monday to share another one of my DT makes with you all.

Hugs, Lorre-Anne x

Saturday, February 24, 2018

Jane DT - Circle Crazy Journal Page

Hello!

On the Buzzy Goings on at Bee Crafty blog today I thought I would share another couple of art journal pages with you...


As I do more pages I have realised that I really like circles so decided to raid my Bee Crafty stash for as many circles as possible!

I started these pages by using a palette knife with white gesso and crackle paste, then once this had dried used Dylusions ink sprays (lemon, bubble gum pink and funky fuchsia) plus spritzes of water to help them flow and blend...


Next I used the circle lattice d'inkable with white gesso and then the circle d'inkable with the matching dylusions paints.  For added texture and layers I used a couple of the texture border stamps with archival inks that matched the tones of the pages.  I wanted to add some black as a contrast to all the bright colours so used black gesso through the chevrons d'inkable...


More circles were added using one of the texture circle stamps and black archival ink.  To help them stand out I used some white gesso to colour the centres then added some more black stamping with the retro dash and dots stamp...


The large creativity words were stamped onto card coloured with the dylusions paint and then once added to the pages some pen added around the edges to help them stand out.  At this point I decided that there were areas of the pages that needed something extra, so using the paint again I coloured some more card and stamped the medium style wire circle onto them...


More of the circle lattice stencil was added to these two before being adhered to the pages.

These are the products that I used:

* Style Wire Circles
* Retro Dash and Dots
* Texture Borders
* Texture Circles
* Large Creativity Words
* Circle Lattice D'inkable
* Circles D'inkable
* Chevrons D'inkable
* Dylusions Ink Sprays
* Dylusions Paints
* Archival Inkpads

Hopefully those colours have helped to brighten up your day!

Happy crafting,

Jane xx

Thursday, February 22, 2018

Karen DT- LOVE

Hello crafters

Hope you're all well. As it's Thursday I'm back with another make to showcase the beautiful products available from Bee Crafty 

Today I'm using the beautiful Dragonfly stamp with the versatile LOVE Inkable

Also used:
Dinkable : Splatter,  Distressed Harlequin,
Feather 2
DO: Worn Lipstick, Iced Spruce
Versafine : Smokey Grey
Rainbow mirri


  • Blend Worn Lipstick through the LOVE Inkable and then through the Distressed Harlequin Dinkable
  • Ink through the Feather 2 Dinkable in the bottom left and top right of the card, with Iced Spruce DO 
  • Use the Iced Spruce DO through the Splatter Dinkable, to add effect around the feathers
  • Stamp the Dragonfly twice in Smokey Grey versafine 
  • Mat on rainbow mirri and then onto the card blank 

Well that's another Bee Crafty make for you..hope you enjoyed reading through today' posteo
I'll see you next Thursday with another Bee Crafty make 

Crafty hugs xx 

Wednesday, February 21, 2018

Marleen DT - More Egyptian cards

Hello again Bloggers..

For todays post for BeeCrafty, I want to share a few more cards Ive made using the amazing Egyptian stamps. I just love love love this series of stamps.


This one.. well I cant take all the credit for it.. This card is made using ideas form 2 of my teamies samples.. Lorre-Ann made a card with the background, only hers was black on white, but I loved it so I decided to try it out.. Paula however, made a card with gold embossing on black card stock and I loved that too. So I combined their ideas and came up with this. Do pop over on the DT blog to see all the girls amazing samples.

Anyway, this one is made with lots of stamping with versa mark and heat setting it with gold embossing powder. I did the same with the sentiment. The Life symbol I stamped in versamark, heatset also with gold and then fuzzy cut. Once cut I added another 2 layers of embossing powder to give it real dimention.
This one isnt much different really. Just stamping with versamark, heat setting with gold embossing powder and then smothering the whole thing with distress ink.
And once again the same.. More embossing powder and distress ink..
I made my mats the same way too. Just cut the mat to the right size and then added gold embossing powder around the egdes..

And that is it for today. Thank you for popping by and for any comments left behind.
Dont forget to come visit me on FaceBook, Twitter, Instagram, Pinterest, Youtube or my FB page.
 Happy Crafting


Tuesday, February 20, 2018

Charlee DT - Simple oxide background

Morning crafters. My turn for the blog this week. Today I'm doing this quick and easy card, perfect for them last minute cards you've forgotten to do.


What you'll need:


Step 1:

Cut your card down to size. Staring with broken china blend in random places on the card trying not to get harsh lines. Repeat with Cracked Pistachio and then Faded Jeans until you're happy with the finished look. Sprinkle some water droplets over the top and then blot.

Step 2:

Once dry take the splatter dinkable and blend through some black soot using different pressure to get different shades. I went over a couple of the dots with a black pen to bring them out even more.

Step 3:

Use and antistatic bag and then stamp the peony with versamark. Pour on the white embossing powder then heat set. Then ink up your sentiment with black ink and stamp in the position you want. Then just matt with with blue glitter card and adhere to your card blank.

Quick and easy. Hope this gives you plenty of inspiration.

Until next week
Crafty hugs
Charlee
x

Monday, February 19, 2018

Lorre-Anne DT - Twist & Pop card instructions

Hi everyone, for my blog post this week I'm going to share the instructions for the Twist & Pop style of card.  


I made one of these cards for Bevs Hochanda shows last Tuesday using the gorgeous new Egyptian collection of stamps and stencils, and it was very well received, and a lot of people were asking how it was done.  I first seen this card made by the very talented Collette Mitrega, and thought I wanted to give it a go.  I have done this post as a tutorial with lots of photos which will hopefully help show what you need to do.


You need 3 piece of card measuring 4" x 12", 3.5 "x 10" and 3.5" x 8"


Score the 4" x 12" piece at 6" (this is your base card), score the 3.5" x 10" piece at 2.5", 5" and 7.5" (this is where your images will go) and score the 3.5" x 8" piece along the short side at 1 3/4" (this will create your pop mechanism)


Place the 3.5" x 8" piece of card landscape and measure and make a pencil mark at 2 1/4" at each edge then score along these to create an x as shown above.


This is what your mechanism should look like.


Fold along the scorelines to get the shape above.


This is the trickiest bit of the card in my opinion, you want to pinch the sides in to make the shape above.  Burnish your folds really well with a bone folder.


Place some red liner tape to the area shown above, on both sides.


Open up the base card portrait and stick the mechanism just under the crease, in the centre.  Peel off the red liner tape on the top side and fold the card closed.


Your card base should now look the picture above.


This is a side view of the card base with the mechanism in place.


You now want to take the final piece of card (with it having a Valley, Mountain, Valley fold facing up) and line up the centre mountain fold with the centre of the mechanism.  Holding this in place carefully, fold back one of the outer panels back and draw a pencil line from the top right hand side to the scored line, and from the bottom left hand side to the scored line.  Mark a cross in these boxes.


In the areas I have marked with a cross above is where you will add your red liner tape.


Red liner tape in place.


Peel off the red liner tape and stick one side in place, then repeat with the other side.


This is how your finished card should look.


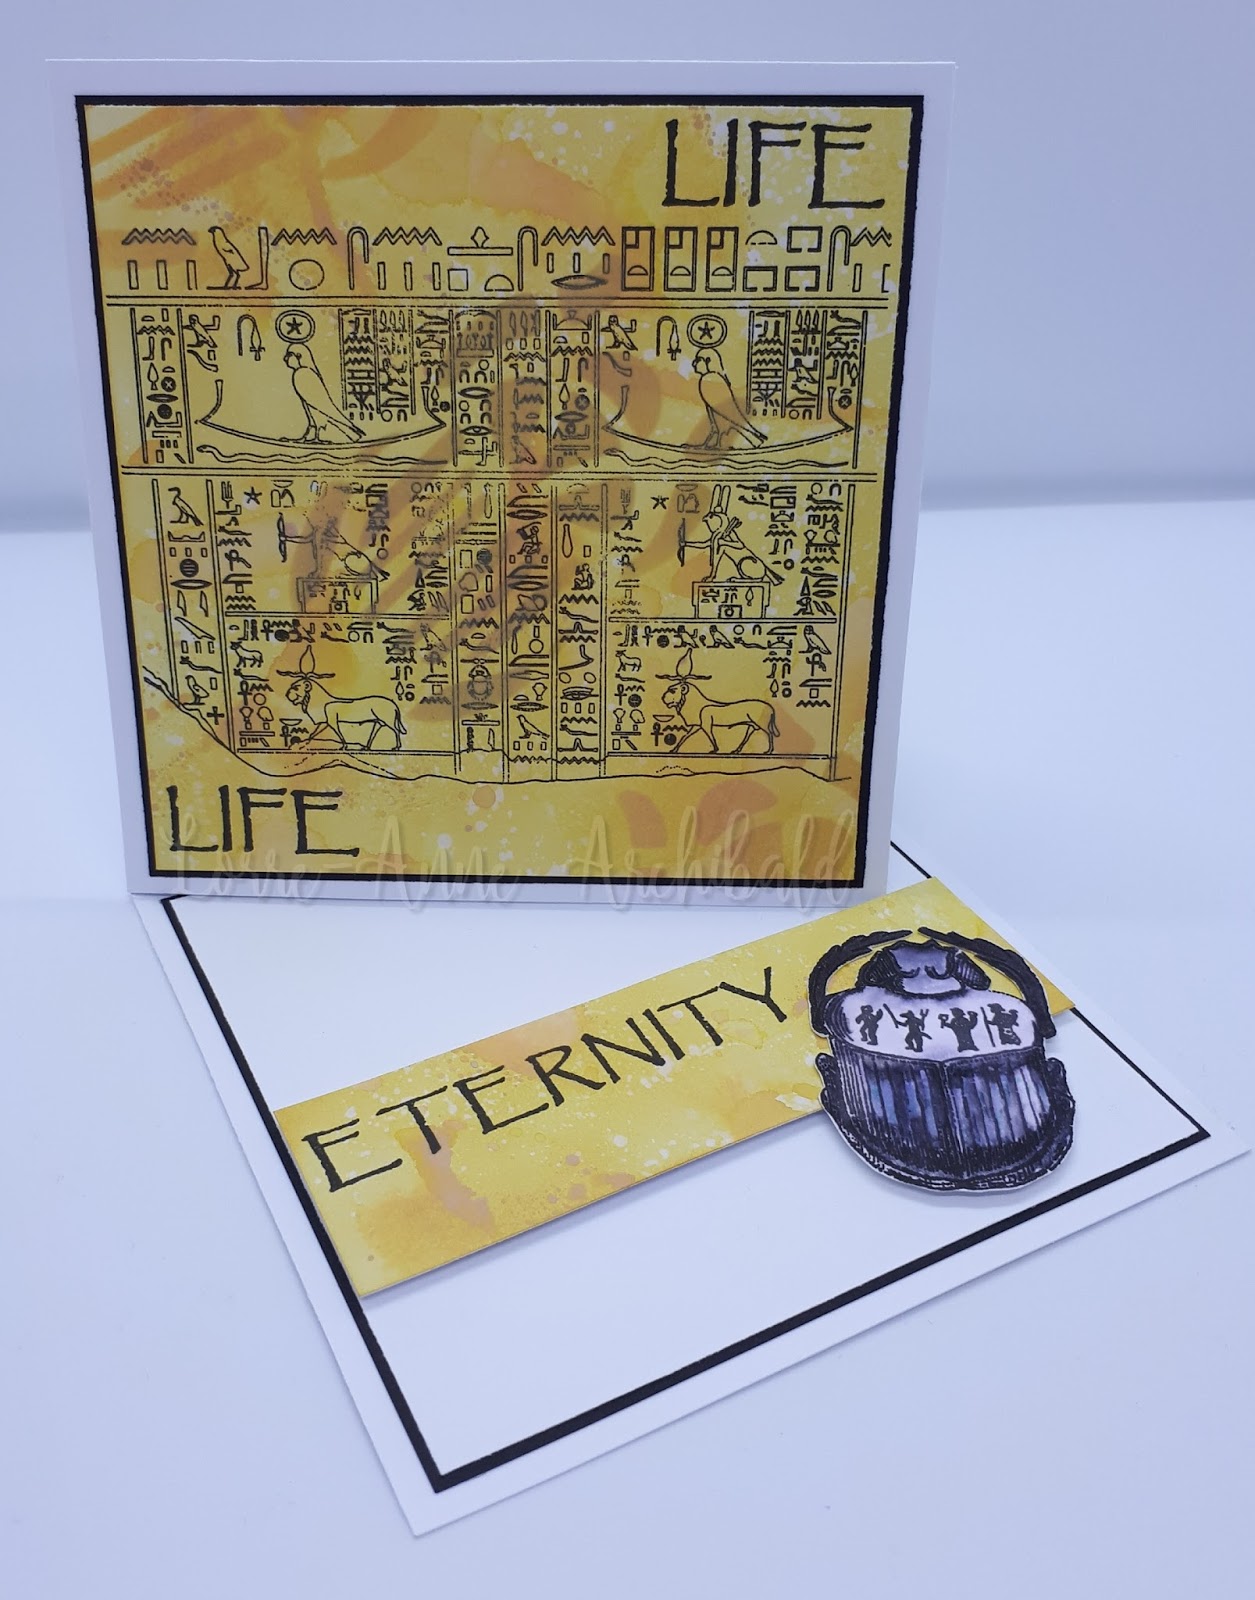
This is the front of my finished decorated card.  I simply cut mat and layers from black and white card stock to fit the front and back panels.  The above background was made using Blue Brushos, Distress Oxides (Mustard Seed & Faded Jeans), Black Soot Distress Ink, Onyx Black Versafine ink, and Gold gilding wax.  I made a band to keep the card closed by simply taking a 2" by 12" strip of card and wrapping it around the card, cutting off the excess and simply gluing it closed.  Again I cut mats and layers, and created the background using Lemon Brushos, and stamped using Versafine ink.  Just ensure you don't make the band too tight as you want to be able to put it on and take it off easily.


This is the inside of my finished card, and like the front all I did was cut mats and layers to fit the various panels.  I used the same colours as I did for the outside, and blended a good bit of Black Soot Distress Ink around the edges.

I hope the instructions are o.k, but if you have any questions please do get in touch via the blog or the Bee Crafty Stamps page and I will do my very best to help.

I'll be back next week to share the rest of my Hochanda samples, have a great week everyone.

Hugs, Lorre-Anne x

Sunday, February 18, 2018

Paula DT - The Bird is the Word


Shopping List

Distress Ink: Faded Jeans & Mermaid Lagoon
Inkable: Egyptian Gods
Dinkables: Egyptology
WORDage Sets: Life Words 1

CARD 1

* Take a card blank and place the large bird Inkable down off the edge of the card, as shown.
* I used DI Mermaid Lagoon across the whole of the Inkable.
* Took DI Faded Jeans and just highlighted parts of the bird like the edge of feathers. Repeat the process using the small D'inkable bird.
* I stamped the wording twice using a stamp press; stamped once in the DI Mermaid Lagoon then I inked the bottom half of the word only using the DI Faded Jeans.


CARD 2


* I used some masking tape to make 2 stripes across the card front.
* Take Mermaid Lagoon and Faded Jeans and ink around the masking tape and all the card edges.
* I used the large bird Inkable wings to make a pattern in the middle of the card. Then I used the small bird Dinkable on the outside edges of the tape.
* Use the small bird Dinkable within the centre of the card; use the top half of the same stencil along the top and bottom edges of the card.
* To finish, use a fine liner to define the masked off area. Stamp the quote in Faded Jeans DI.


Saturday, February 17, 2018

Jane DT - Papyrus Plaque

Hello!

Today on the Buzzy Goings on at Bee Crafty blog I am sharing one of my Egyptian samples with you.  The new stamps and stencils were fab to work with and I really wanted to use the large background to create my own papyrus to use on one of the art boards.

To make the papyrus I started with some cheap tracing paper that I coloured with watered down acrylic paint.  Once this was dry I stamped the background using archival ink then added some splashes of paint...


I then tore pieces from the sheet and used a dark brown ink around the edges...


To create the main plaque I used one of the MDF art boards, first coating it with gesso then adding crackle paste to areas...


Once this had dried washes of acrylic paint were added in various shades of brown, some was also dripped from the top to add even more of an aged look and some burnt umber antiquing cream was added to the crackled areas...


Stencilling was added to the background using one of the d'inkables and gold paint...


Next the sphinx was stamped onto the board using Versafine and then clear embossed...


I used permanent pens to add a bit of extra colour to the sphinx then stuck the papyrus onto the plaque using gel medium.  Finally one of the words was stamped onto card, distress ink added around the edges and then layered onto the art board on another piece of papyrus...


Here are the links to the products I used...

* MDF - Art Boards Landscape
* Art Stamps - Sphinx
* Backdrops XL - Egyptian
* Wordage - Life Words 1
* D'inkables - Egyptian Set

Thank you for taking a look, happy crafting!

Jane xx

Friday, February 16, 2018

Emily DT - Egyptian Samples


Hi everyone,

I'm back again with my samples for the recent Hochanda show. This time it was the fabulous new Egyptology stamps and inkables. They are so unique and fun to play with.

Here are my samples I made...


I hope you like them, see you next week.

Emily x
Related Posts Plugin for WordPress, Blogger...