Friday, April 09, 2021

Imagine Something... Circular! by DT Ann


Imagine Something... Circular!  


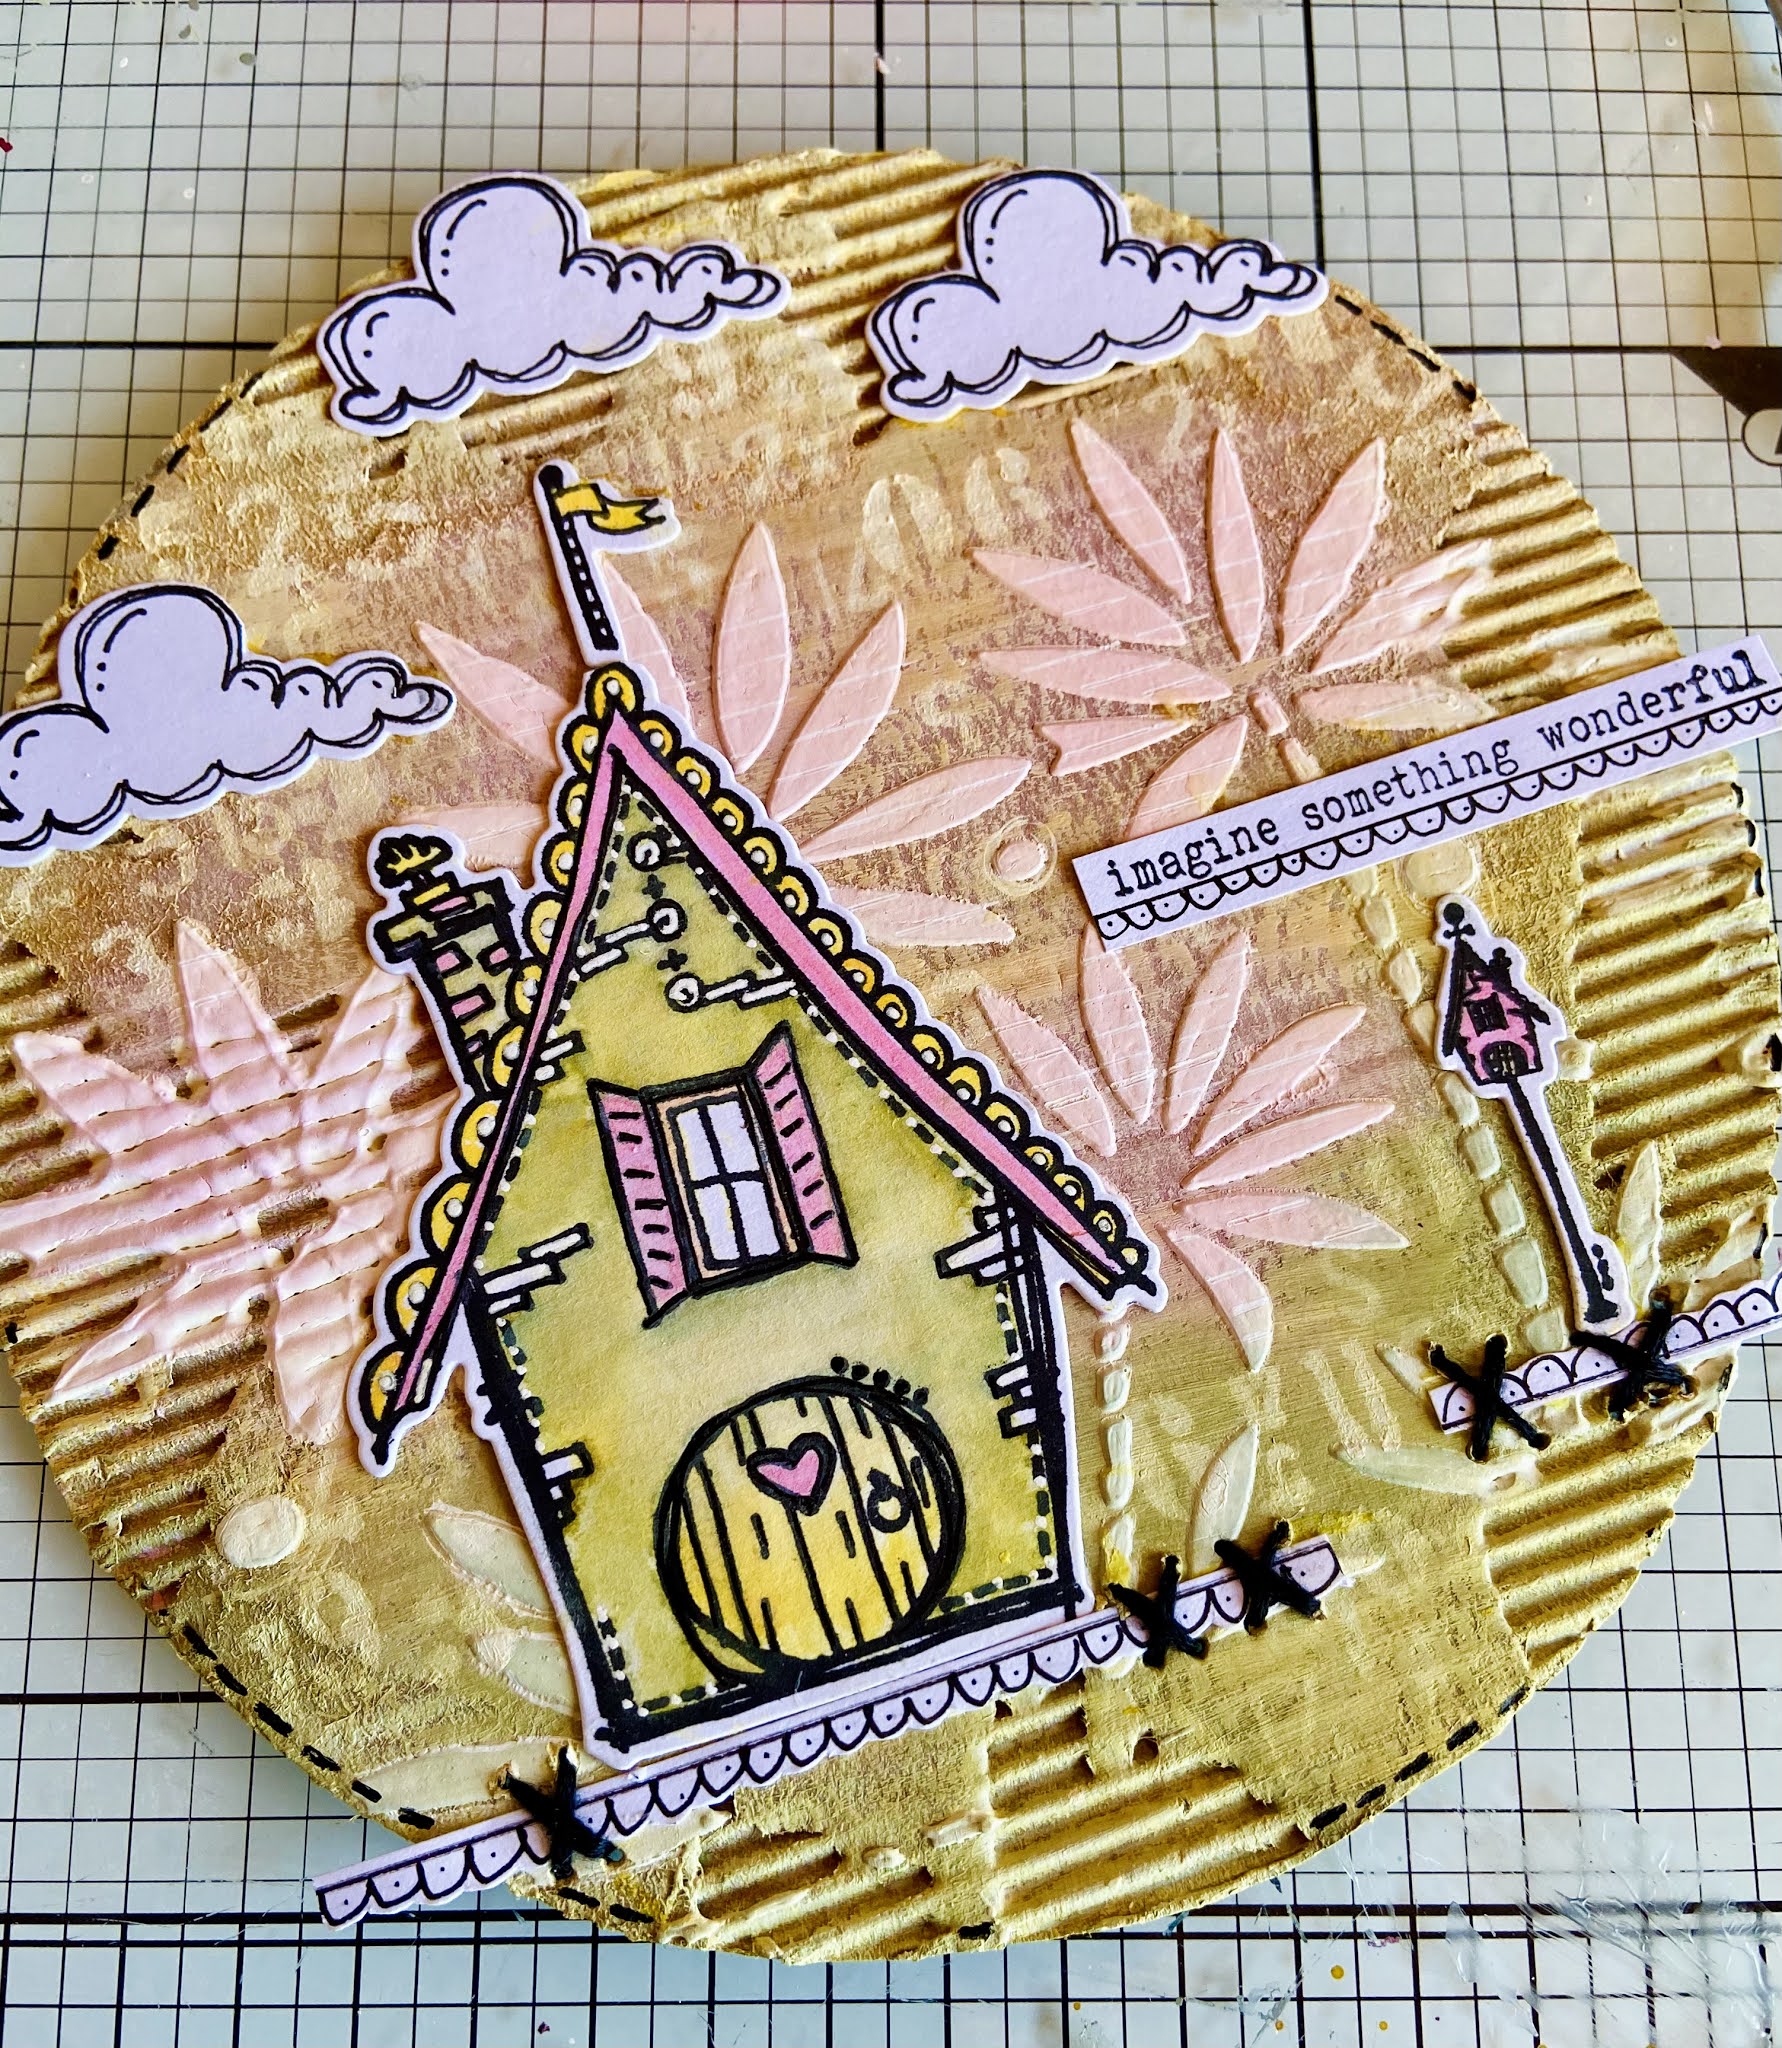
Are you entering April’s challenge set by my teamie Sally? Here’s some inspiration using a shoe box & some buttons from my mums old sewing box... 

Stamps: Doodle Houses, The Bird House
XL Lighthouse
Small Words
Inkables: Flower Palm (Big Ones)
D’Inkables: Metal Alpha
Distress Oxides: Kitsch Flamingo, Wild Honey, Peeled Paint
Black & white Gelly Roll Pen 


Draw a circle around a plate or other round object approximately 17cm diameter (61/2”)  & cut out. Tear some of the top layer of paper off to reveal the ridges..


Use a clear gesso over the middle area, dry, then spread texture paste through the Flower Palm Inkable, leave to dry... 


Meanwhile stamp, colour (I used the Distress Oxides) & die cut the regular Bird House & the little bird house. Stamp & die cut the large cloud 3times, from the XL Lighthouse set...


When the texture paste is dry blend the Oxides over the whole thing, Start with Peeled Paint at the bottom, then Kitsch Flamingo in the middle & Wild Honey at the top.. 
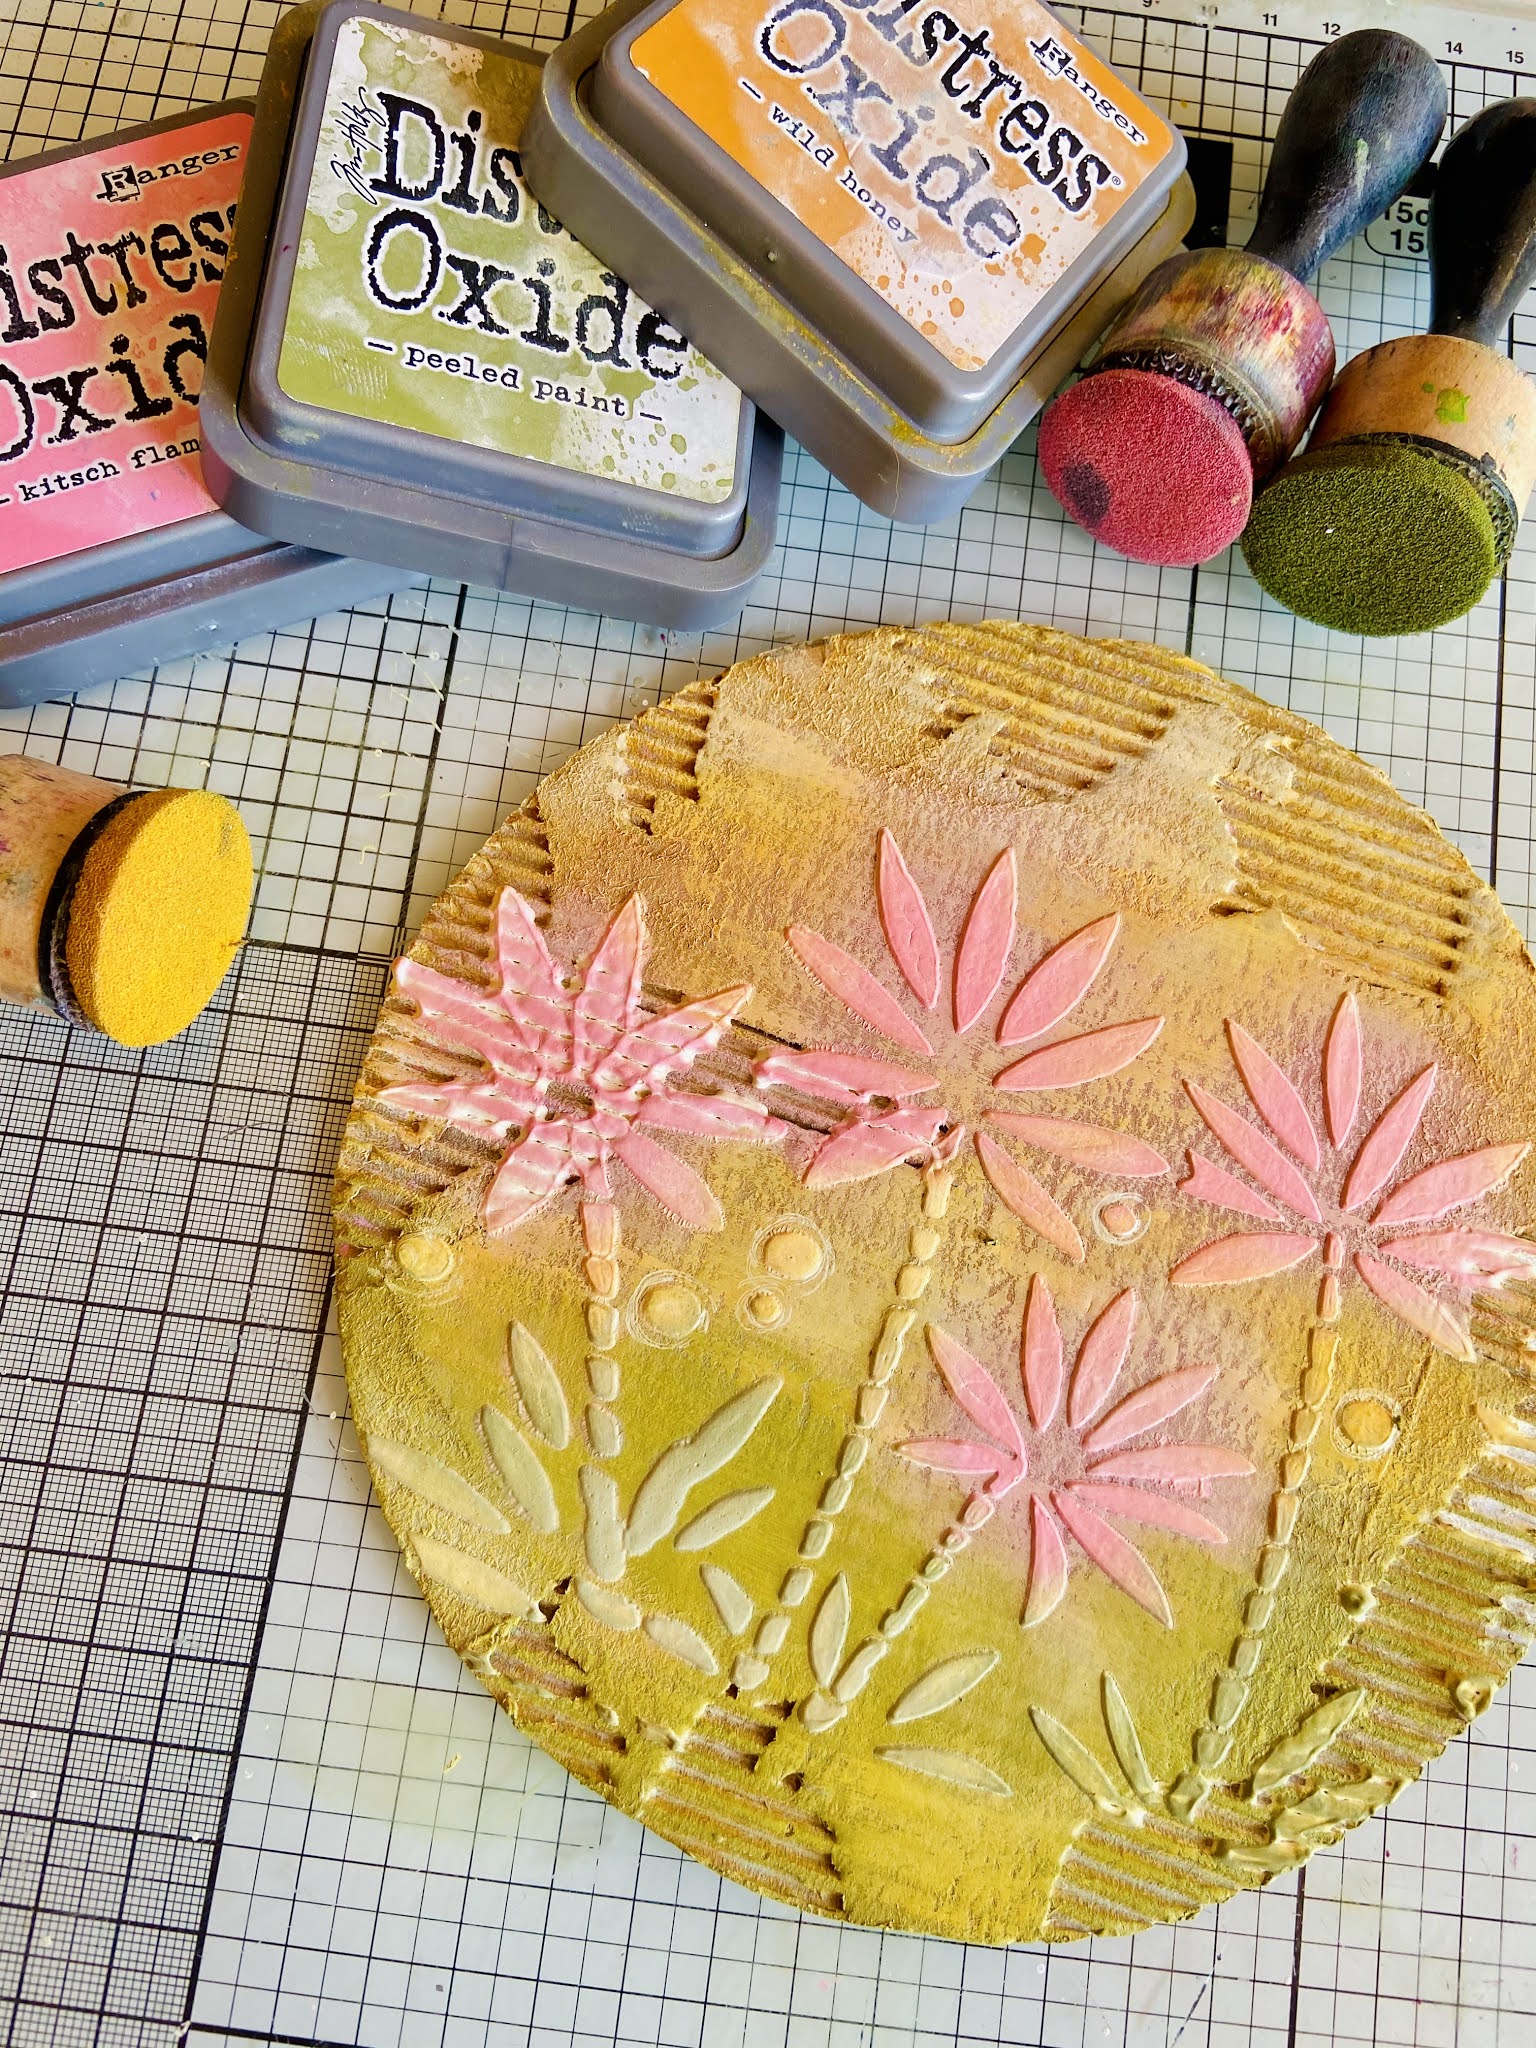

Add some white gesso (or acrylic paint) through the Metal Alpha D’Inkable to create interest in the background... 


Stamp your sentiment onto white card, add some doodles in a black pen, I took inspiration from the roof of the Bird House... 
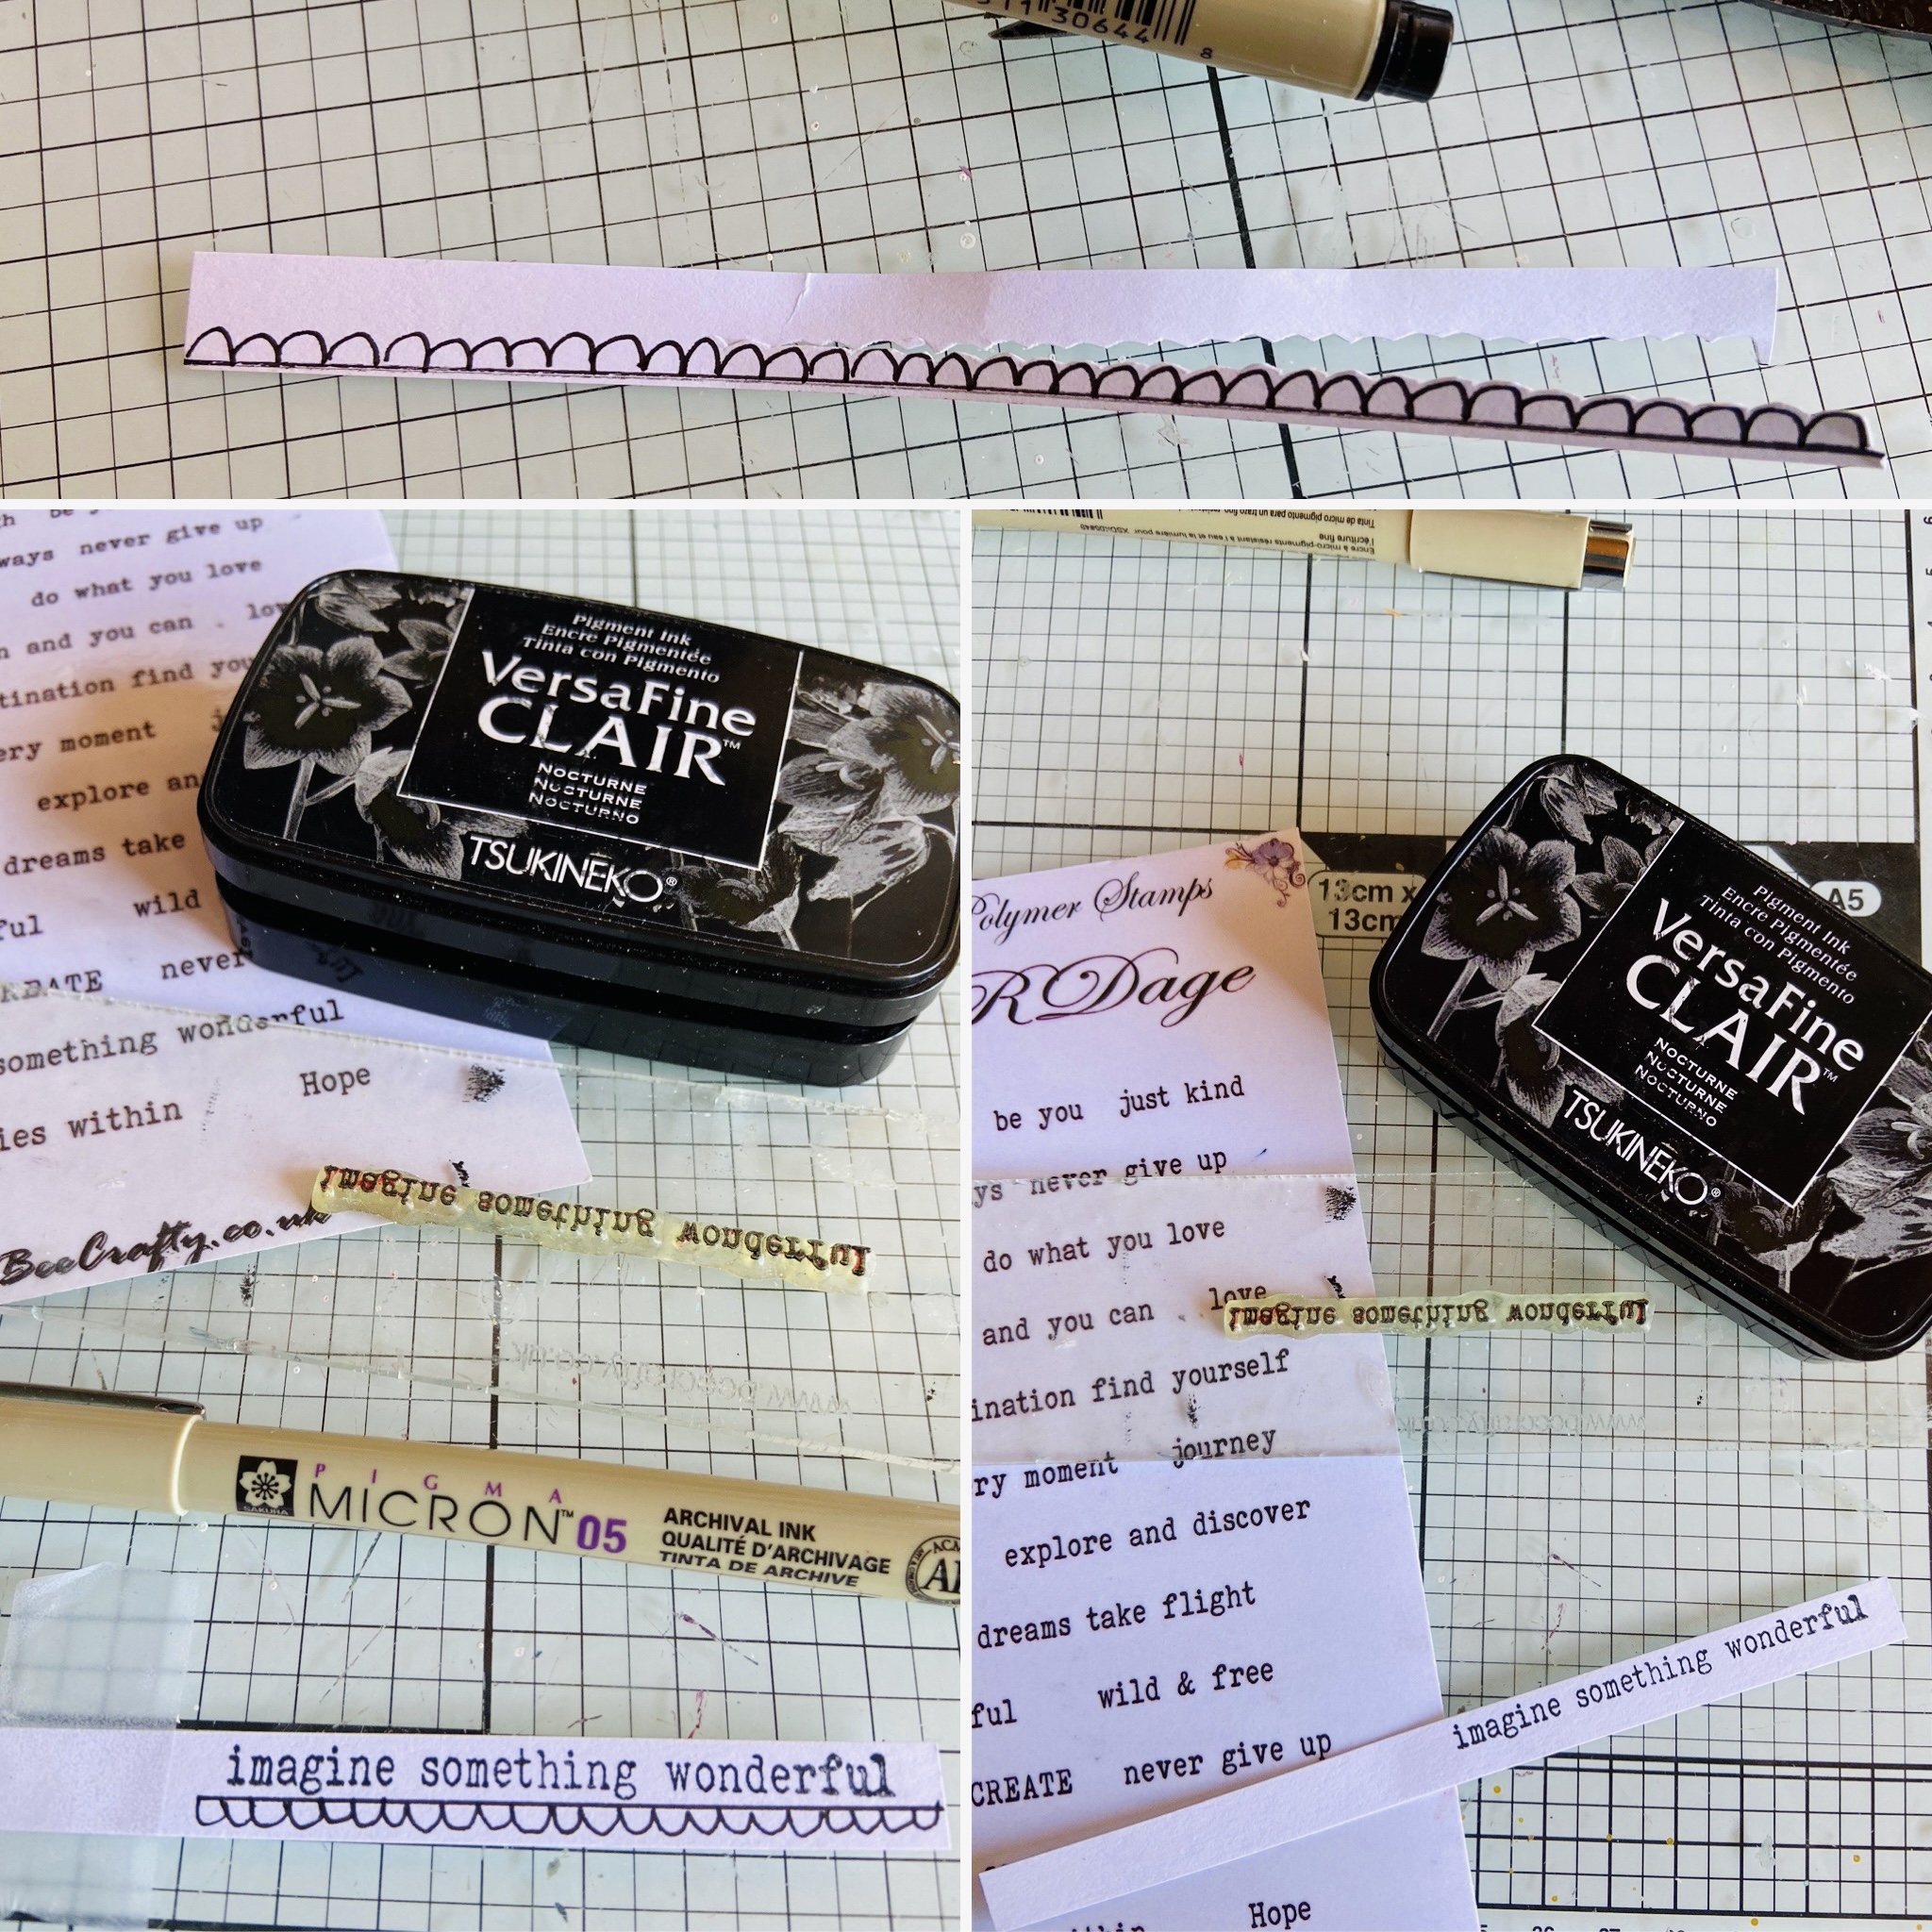

Glue all your pieces to the background.. 


I felt it still needed something else, I rummaged in my mums old sewing box & decided to use some embroidery thread & some buttons...
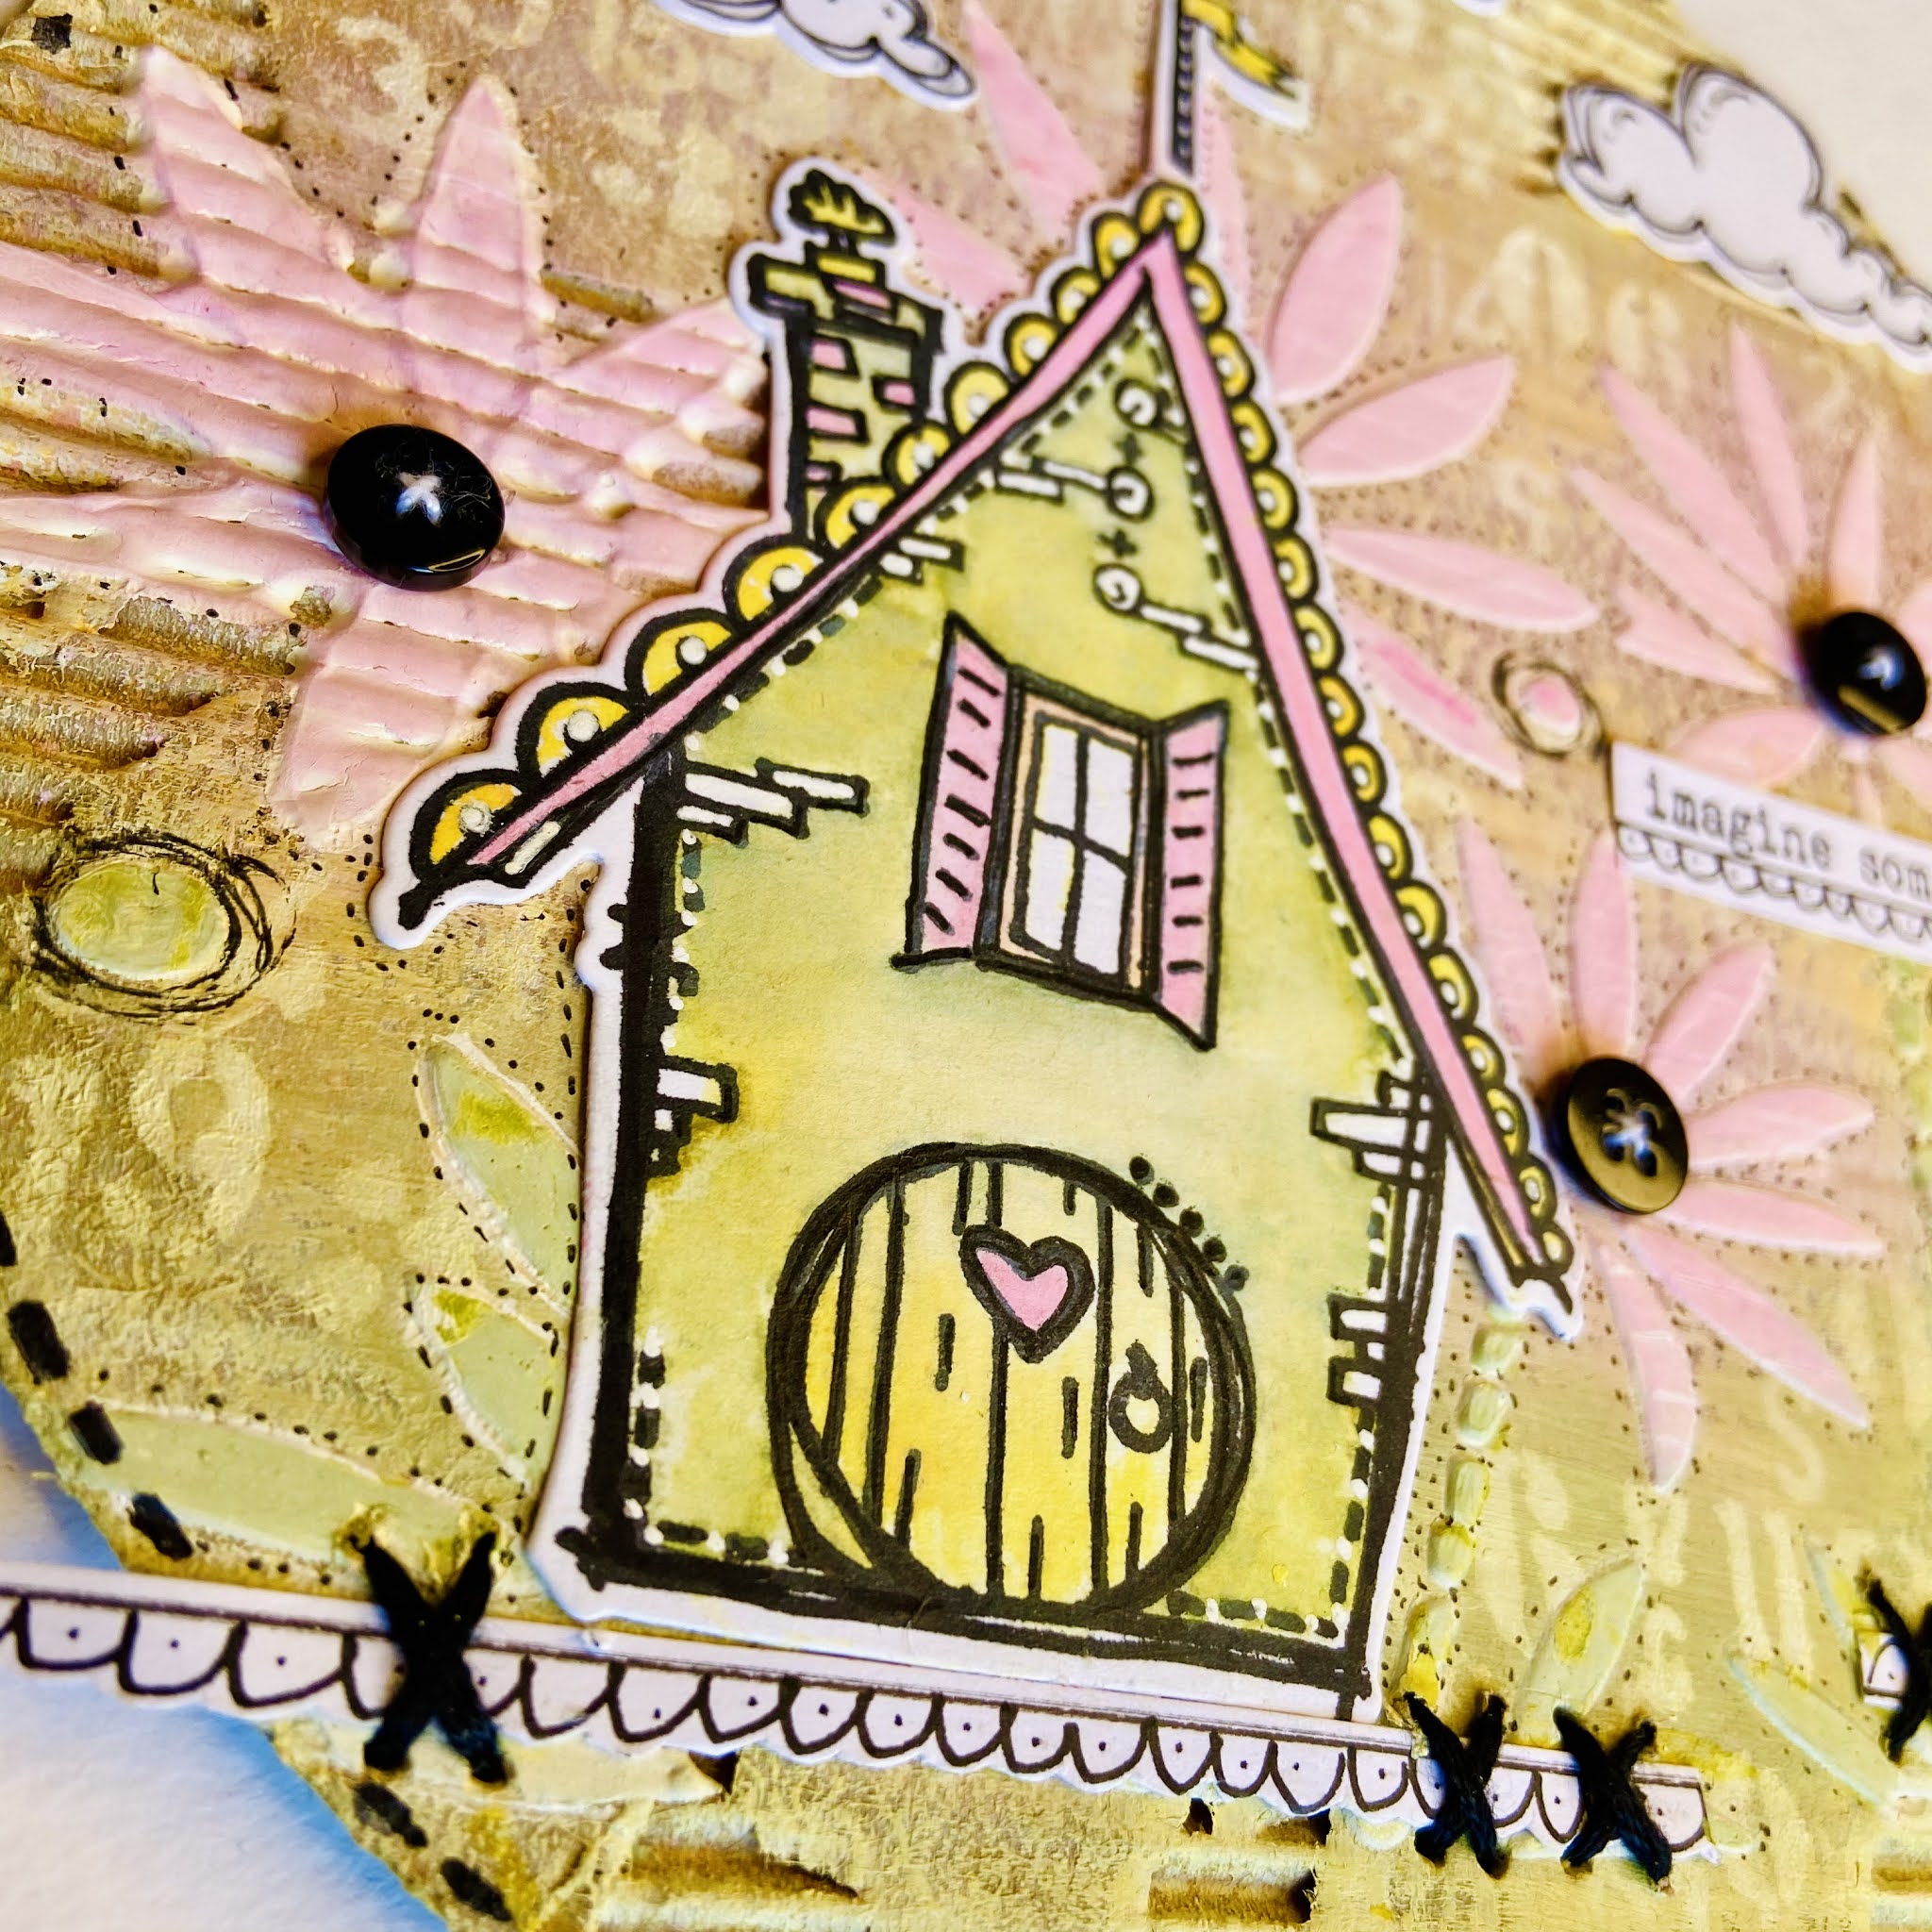


Finally I added some doodles with both a black & white fine pen. 


Thank you for stopping by...  Ann xxx


Wednesday, April 07, 2021

Caz DT - Doodle house shaped card


PRODUCTS USED:

Versafine onyx black ink
300GSM Card stock

HOW TO MAKE:

Stamp and die cut 3 houses, I chose villa rose and sky terrace...


Then die cut the same 3 but blank - this will form the back of your card...


Colour with ecolines (or any medium you like to use) I think watercolor is forgiving and suits the style of these stamps...


Add in details using the sakura gel pens, bricks, highlights etc Just gives them more character...


Glue them together in a row and then cut two small squares of card (I did not measure, I eyeballed this) score them down the middle to make hinges - glue to the top of both ends...


Now glue your blank houses in the same way and attach them to the hinge part with glue - your card is formed...


Stamp and die cut a couple of trees & add them to the card front for more interest...


Add a sentiment and you're done! 

HOOE YOU LIKE
❤️
THANKS FOR LOOKING


Monday, April 05, 2021

Sally DT - A shrink plastic key ring


 Hi there!

I thought I would share a bit of shrink plastic with you today. It is something that has been around for a long time, but it seems to be one of those things that you don't see much of it unless you seek it out. I thought I would show you how to make a simple key ring, and let you know a bit more about it. 

Shrink plastic comes in several different sorts. You can get clear, frosted, black and white. If you wish to colour on it you can sand it with some fine sandpaper, although some comes ready sanded (which feels slightly rough to the touch). You will need to use a permanent ink  - one that dries on any surface - I use Archival or Brilliance. The ink will need to air dry for a good amount of time  (at least half an hour for Archival and overnight for brilliance)  The easiest way to colour your stamped images once dry is with coloured pencils. A sanded surface will help with this. Be aware that as the item shrinks the colour will intensify, so light shading with coloured pencils will give a better result.

I used: 

shrink plastic

XL Doodle Art dragonfly

archival ink

coloured pencils

corner rounder

hole punch 

heat gun

Key ring findings

First I sanded the surface of my shrink plastic

Then I stamped the dragonfly onto the sanded surface with black archival ink and left it to dry.

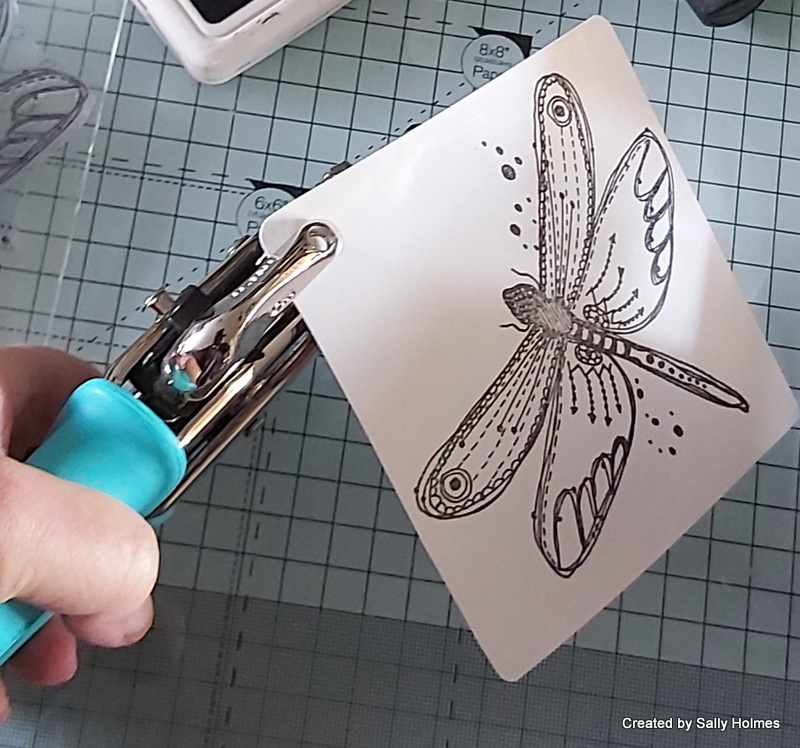
I rounded the corners with a punch....

and punched a hole in the corner (a regular hole punch could be used for this too)

Next I coloured the image with pencil crayons - remember paler and lighter is better as it intensifies when shrunk.
On a heatproof surface use your heat gun to start heating. It will curl and squirm, so keep some tweezers close by in case you wish to turn it over or reposition it. Occasionally it can stick to itself. Try and seperate it as quickly as possible if it does, but mind your fingers as it will be hot! 
Once it has finished shrinking, place an acrylic block (not a skinny one, but one with some weight) on top to make sure it is flat. 
Thread a jump ring through the hole and add the keyring. 
As you can see the colours are much deeper than before it was shrunk. I think I should probably have gone even paler! It really is huge fun to play with and a great hit with kids. there is something so magical about the shrink process. 
Thanks for looking! 

Saturday, April 03, 2021

Jane DT - 'Make A Difference' Journal Spread

 Hello!

This week for my project I decided to set myself a challenge, I had to use a page from my journal that already had mop up on it and I could not use any black!!!  

Here is the spread I made...

1) I started by looking through my small flip journal by Dylusions and selected a page where I had mopped up distress oxide spray from my d'inkables...

2) I wanted to add some more colour to the pages so used the Speckled Egg distress oxide ink pad with a blending tool...

3) Next I added some patches of white gesso to create a misty look and then used the gesso through the Bakewell inkable...

4) After that I used the Wildflower 2 and 3 stamps with Speckled Egg distress oxide ink and Wild Honey distress ink to add some images into the background.  These ended up being quite light but helped add to the misty look, to create some darker images I used Wildflower 2 with Faded Jeans archival ink...

5) To bring out the flowers more I used a white gelly roll pen for highlights and dabbed on some of the Moon Dust glitter gel.  I wanted to add some extra darker points to the spread so I used the Distress Diamonds with the same archival ink and also edged the pages...


6) Finally I stamped out one of the Ticker Tape 3 sentiments in the same colour...


To create this spread I used the following products which you can go to by clicking on the product links:

* Wildflower 2 Stamp Half Price in End of Line
* Wildflower 3 Stamp Half Price in End of Line
* Distress Diamonds Stamp Half Price in End of Line

Thank you for looking and happy crafting!

Jane xx


Friday, April 02, 2021

Time Matters Page By DT Ann

Time Matters


This week I found the TIME stamp in my stash & thought how apt it was in current times. I’m hoping to leave many a coffee cup stain wherever I’ve met my much missed friends... 


Gesso:White & Black

 Inkables 6x6: Coffee Stain Script/ Text

Stamps: Time (Wordage)/ La Luna/ Texture Stars/Typewriter Alpha

Ranger Crackle Paste & Collage Medium 

Sakura GellyRoll Pens/ Posca Pens 

Inks: Black Archival or Versafine Clair Nocturne/Memento Bahama Blue

Paint: Light blue/mid blue /mid yellowtail green


https://www.beecrafty.net/


Paint white gesso onto your page, don’t worry if it’s patchy it adds texture. 

When dry add some paint with a dry brush. I used a Sky Blue, Royal Blue & Leaf Green (bit deeper than lime). Using a dry brush gives a sketchy effect, doesn’t saturate your paper & less likely to create mud. 


Again don’t worry about covering the edges.. 

Stencil some White gesso through the Text Inkable, I find it easiest with a stencil brush... Janes Tip! 

Add some black gesso to the edges with a dry brush, the paint ‘feathers’ into your page better, keep turning your page as you go ... note: a wet brush may give you a solid edge.


Spread the Crackle Paste through the coffee stains Inkable ... leave to dry , it doesn’t take long. 


Meanwhile stamp the Time sentiment onto tissue paper, wet around the words & tear gently. Use collage medium to glue under & over the tissue, onto your page.


Add some marks with a small paintbrush & paint


Use Archival ink & the mini stars stamp around the edges of your page...


Add some La Luna circles & numbers from the Typewriter Alpha ... 


To finish doodle & journal away with Posca Pens or Gelly Roll Moonlight  Pens, add some extra splatters with a white pen. The photos below show you some different marks & doodles.. 


Happy Journaling  & thanks for stopping by... Ann xxx


Related Posts Plugin for WordPress, Blogger...