Saturday, December 24, 2022

Sally CT - A Vintage journal page

Hi there! I am here with a vintage journal page step by step for you today.

I began by arranging some torn scraps of book page, music and patterned paper on a journal page and stuck it down with matte medium. 
next I stencilled some walnut stain distress ink around the edges where the papers hadn't quite met.
I found a torn piece of corrugated kraft card and sponged walnut stain ink around that too


I added some stamping using the doodle art mandala stamps again in walnut stain. 
next I attached the panel to the background, adding some braid too, with gel medium. 
with the tag inkables I added a bit of texture paste...
then used distress crayons in hickory smoke and salty ocean to add a few lines around the page. I also added a little gilding wax on the corrugated card and the texture paste, 
finishing off with a splatter of white gloss spray (not a spray - just unscrew the top, hold the pipe over the project and tap).
I stamped the three butterflies in versafine clair ink and coloured with ecolines before die cutting.
Finally I used gel medium to add these to the corrugated panel. 
Here is the finished page, although I might add some words to it...

I used:
A selection of papers to collage

Thank you so much for looking! Wishing everyone a happy and healthy Christmas and New Year! 
Sally xxx

Wednesday, December 21, 2022

Countdown to Christmas by CT Ann

 Countdown to Christmas 

By CT Ann 


I’ve gone all out with a sparkly tag today & want to wish you all a very Merry Christmas 

🎄🥂💖 


I used: 

Distress Oxide Inks: Tumbled Glass/ Spun Sugar/ Speckled Egg/ Kitsch Flamingo / Salvaged Patina 

Brilliance Moonlight White Ink

Inkable: Alternate Circles

D’Inkable: Regular Dots 

Stickles Glitter Gel: Moon Dust

Stamp: Wreath

Embossing Ink 

Gold Embossing Powder 

Dina Wakley Tag 

Ribbon


https://www.beecrafty.net/


Start with the palest Distress Oxide Inks & the Alternate Circles Inkable building up a bokeh style background on to your tag. I used Tumbled Glass to start, going very lightly at first… 

Next was Spun Sugar… keep rotating / moving the Inkable each time you change inks… 

Then Speckled Egg …


Kitsch Flamingo & Salvaged Patina to give a little more depth..

Then using the Regular Dots D’Inkable add Tumbled Glass & Kitsch Flamingo with a little more pressure.. 


Finally I used Brilliance Moonlight White over the top this gave the whole tag a softness / blurred look as in bokeh effects… 

Next spread some Stickles Glitter Gel through the Alternate Circles Inkable & leave to dry…

On a separate piece of paper stamp the Merry Christmas sentiment in embossing ink, sprinkle with gold powder, shake excess off & heat until molten. Cut out the sentiment..


When the gel is dry glue the sentiment onto it using foam pads & add a few sequins & a ribbon… 


Thank you for stopping by…

 Merry Christmas 

Ann xxx


Sunday, December 18, 2022

Alison CT - Transparency ATCs

Hi everyone, today I'm sharing a simple ATC project.

To begin I cut a piece of card into 3 ATC blanks (2.5" x 3.5"). I then used an off cut from one of the Catalyst papers from pack 2 to create backgrounds. I used Distress Collage Medium to glue them.

Next I blended picked raspberry distress oxide ink over the edges to blendany white edges into the papers.
Then I chose three of the faces transparencies and stapled them to the backgrounds. I used staples to add a further texture to the ATCs.

Finally, on a seperate piece of card, I stamped my chosen sentiment using versafine clair nocturne ink. I then cut it into three seperate pieces and glued them to my ATCs.
Products used:
White card
Bee Crafty Media Papers - Catalyst papers 2
Wordage - Ticker tape 3
Distress oxide - Picked raspberry 
Stapler and staples

Thank you for taking a look.
Alison

Saturday, December 17, 2022

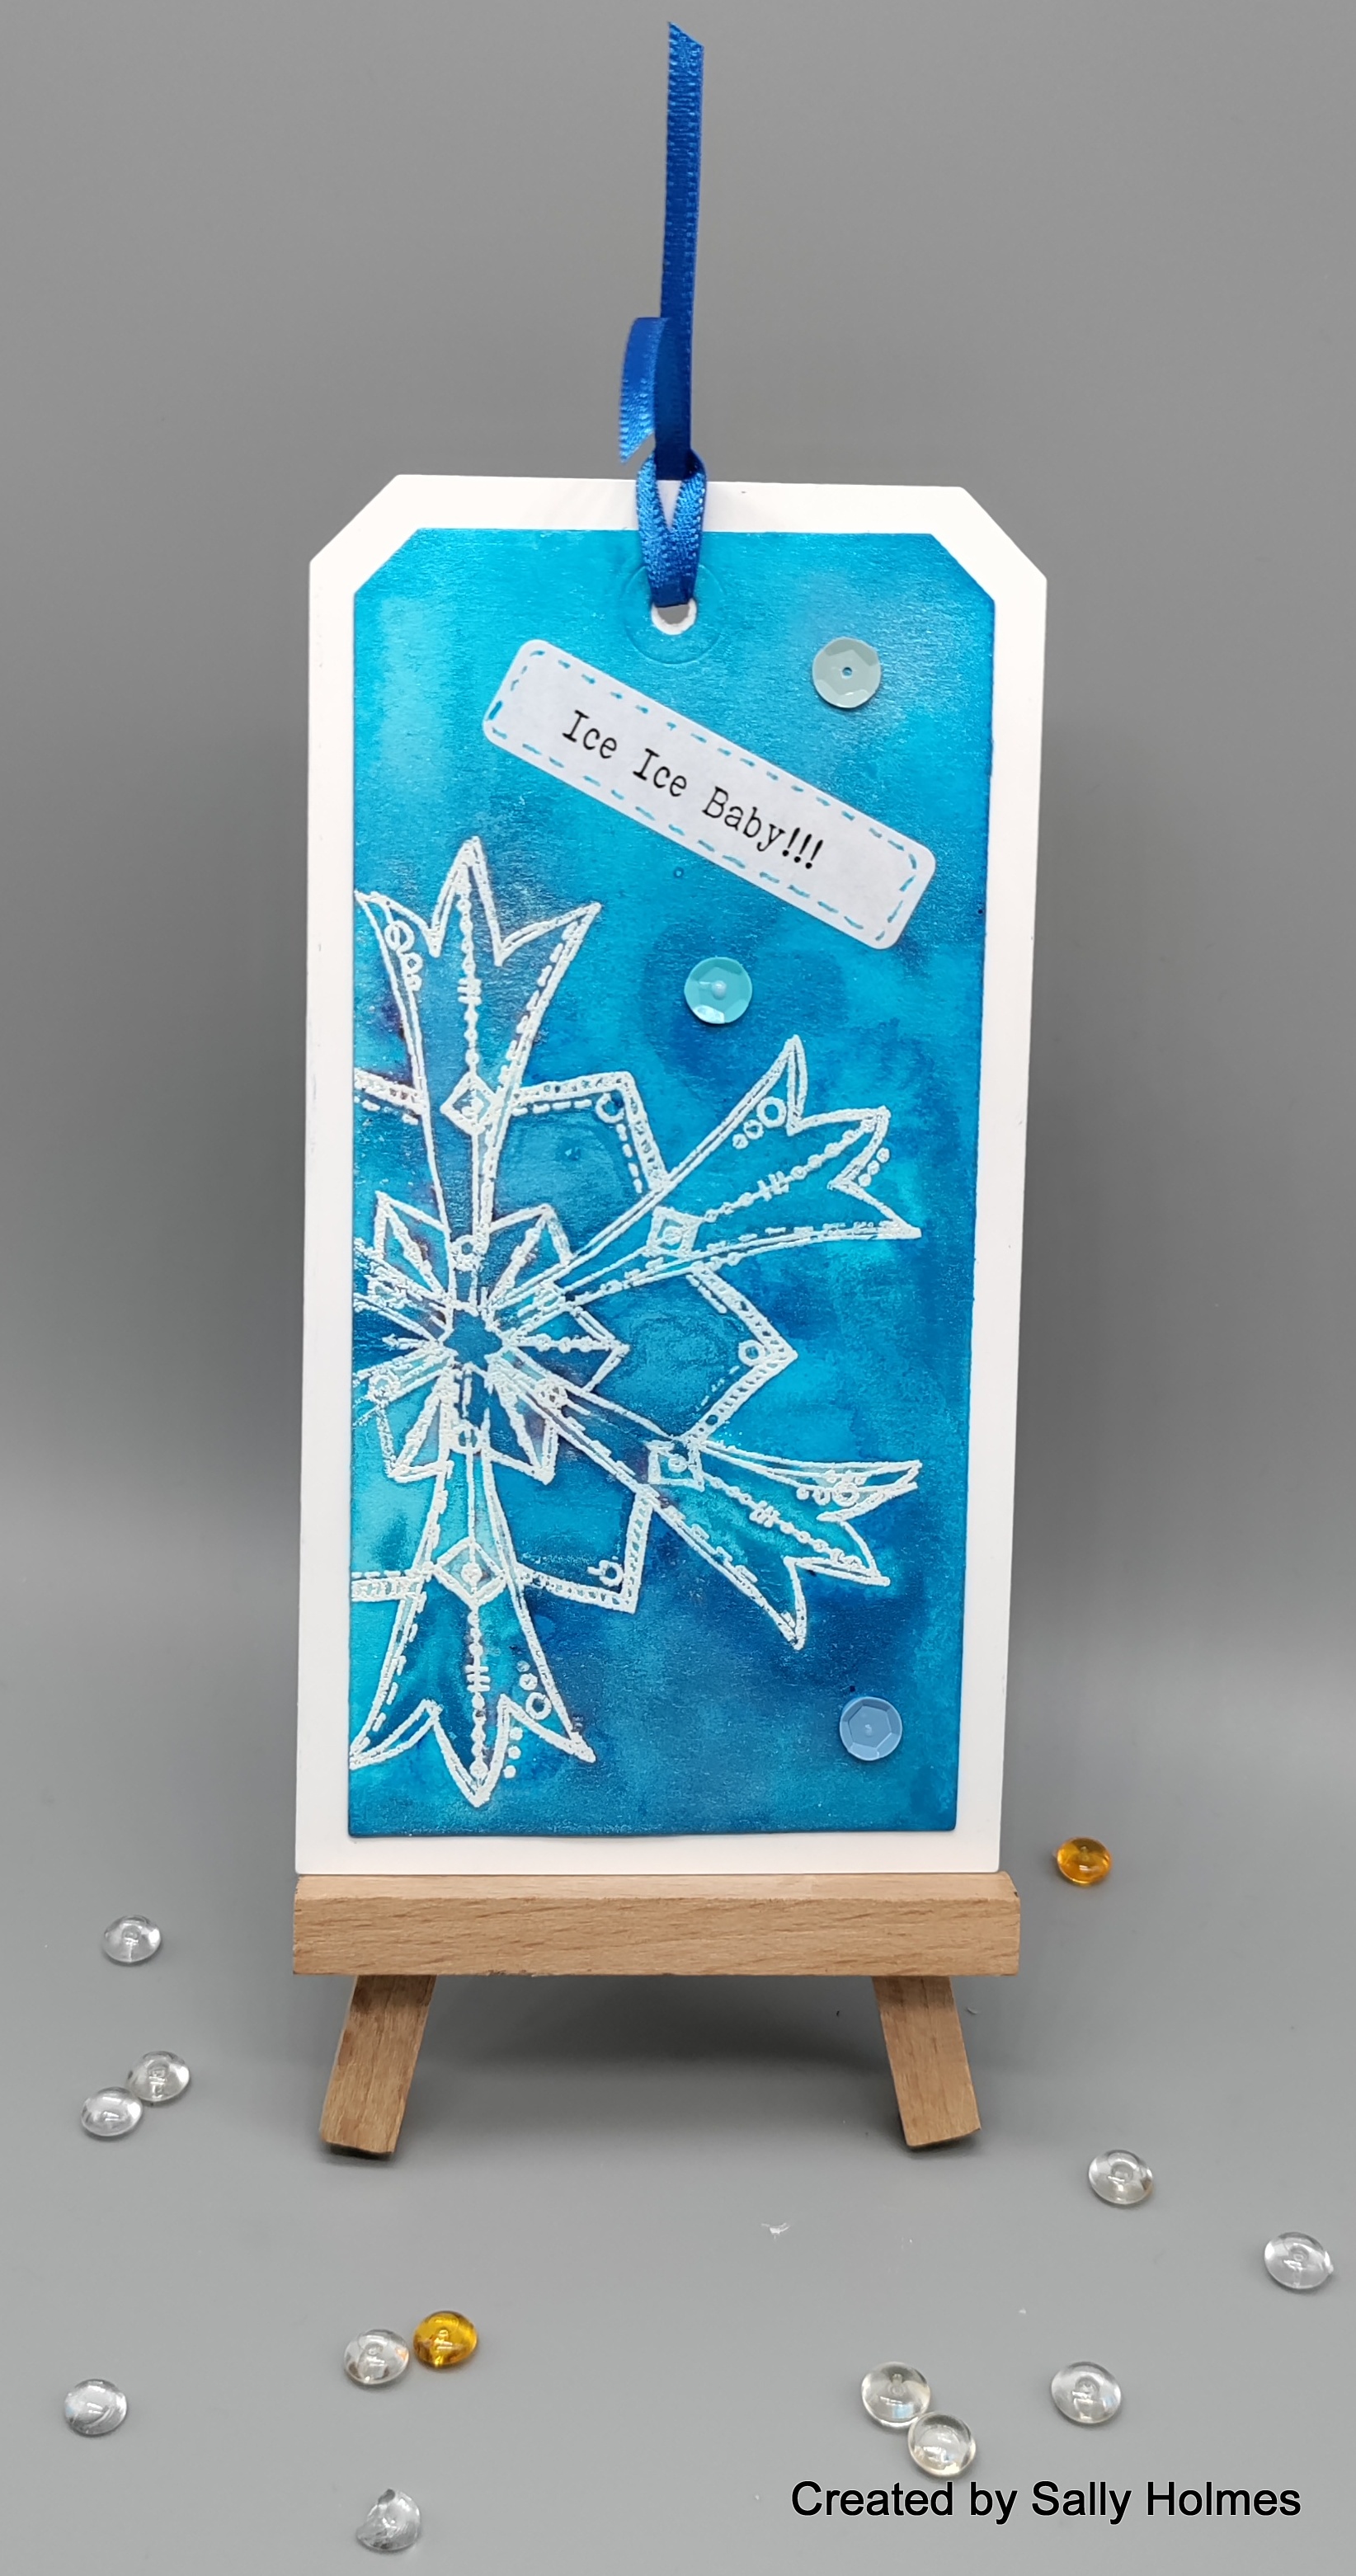
Sally CT - icy tag

Hi There

Thought I would show you how I made this shimmery icy tag. 


I began by cutting the largest tag from mixed media paper and the larger mount from white card.
 
On the tag, I stamped the largest snowflake stamp in versamark ink and embossed in fine detail white embossing powder
I sprayed water onto the tag and sprinkled with explosion powder and left to dry
once it was dry I stuck it onto the white mount and added a winter wordy sticker, some sequins and a ribbon. 
Here is the finished tag once more.

I used :

Thanks for looking! 

Sunday, December 11, 2022

Alison CT - Noel

Hi everyone, today I'm sharing a clean and simple Christmas card made using a stencil and one stamp.

To begin I taped the 6x6 Noel inkable to a 6x6 square of super smooth white card. I then blended lumberjack plaid distress ink through it, making sure I got ink into all the corners.

Once the ink was dry, I used a gold sharpie to outline the letters. I did this through the stencil.
On some white super smooth card I stamped the holly branch, from the Art Stamps Robin stamp set, four times using versafine clair morning mist ink.  I then coloured them with distress watercolour pencils, but this can be done with any media of your choice. I then cut them out leaving a small white border.
I then mounted the noel piece onto a piece of red card that was a quarter of an inch bigger. Next I glued this to a 7 inch square card blank. I glued one piece of the holly to each letter.
To finish the card I glued small red gems around the letters.
Products used:
Red and white card
Distress Ink - Lumberjack plaid 
Art stamps - Robin
Versafine clair - Morning mist 
Distress Watercolour Pencils set 3 - rustic wilderness, candied apple
Small red gems

Thank you very much for taking a look at my project today.

Alison 

Saturday, December 10, 2022

Sally CT - Snowy Robin card

Hi There! Here is a step by step card as I rattle off as many Christmas cards as I can, lol. 


I began by stamping the robin and colouring him in using markers

Next I stencilled the snowflakes in broken China around the robin using the snowflake dinkable
On the base card I used the splatter dinkable to add some stickles gel through
next I stamped, coloured and cut out three lots of the foliage and added them to the robin's branch.
I used one of the Winter stickers , layered on a scrap of card....
and here is the finished card once more.
I used 
Black ink (I used memento)
Markers (I used alcohol markers)

I will be live on the Bee Crafty Facebook page on Wednesday evening if you fancy joining me with a Mince pie and a glass of something warming x

Thanks for looking!  

Related Posts Plugin for WordPress, Blogger...